Protocols
Earlier in this school year, we learned how to author structures that describe things like 2D and 3D figures, people, book listings, and hockey cards.
There is a feature of the Swift programming language that allows us to require that structures follow certain rules.
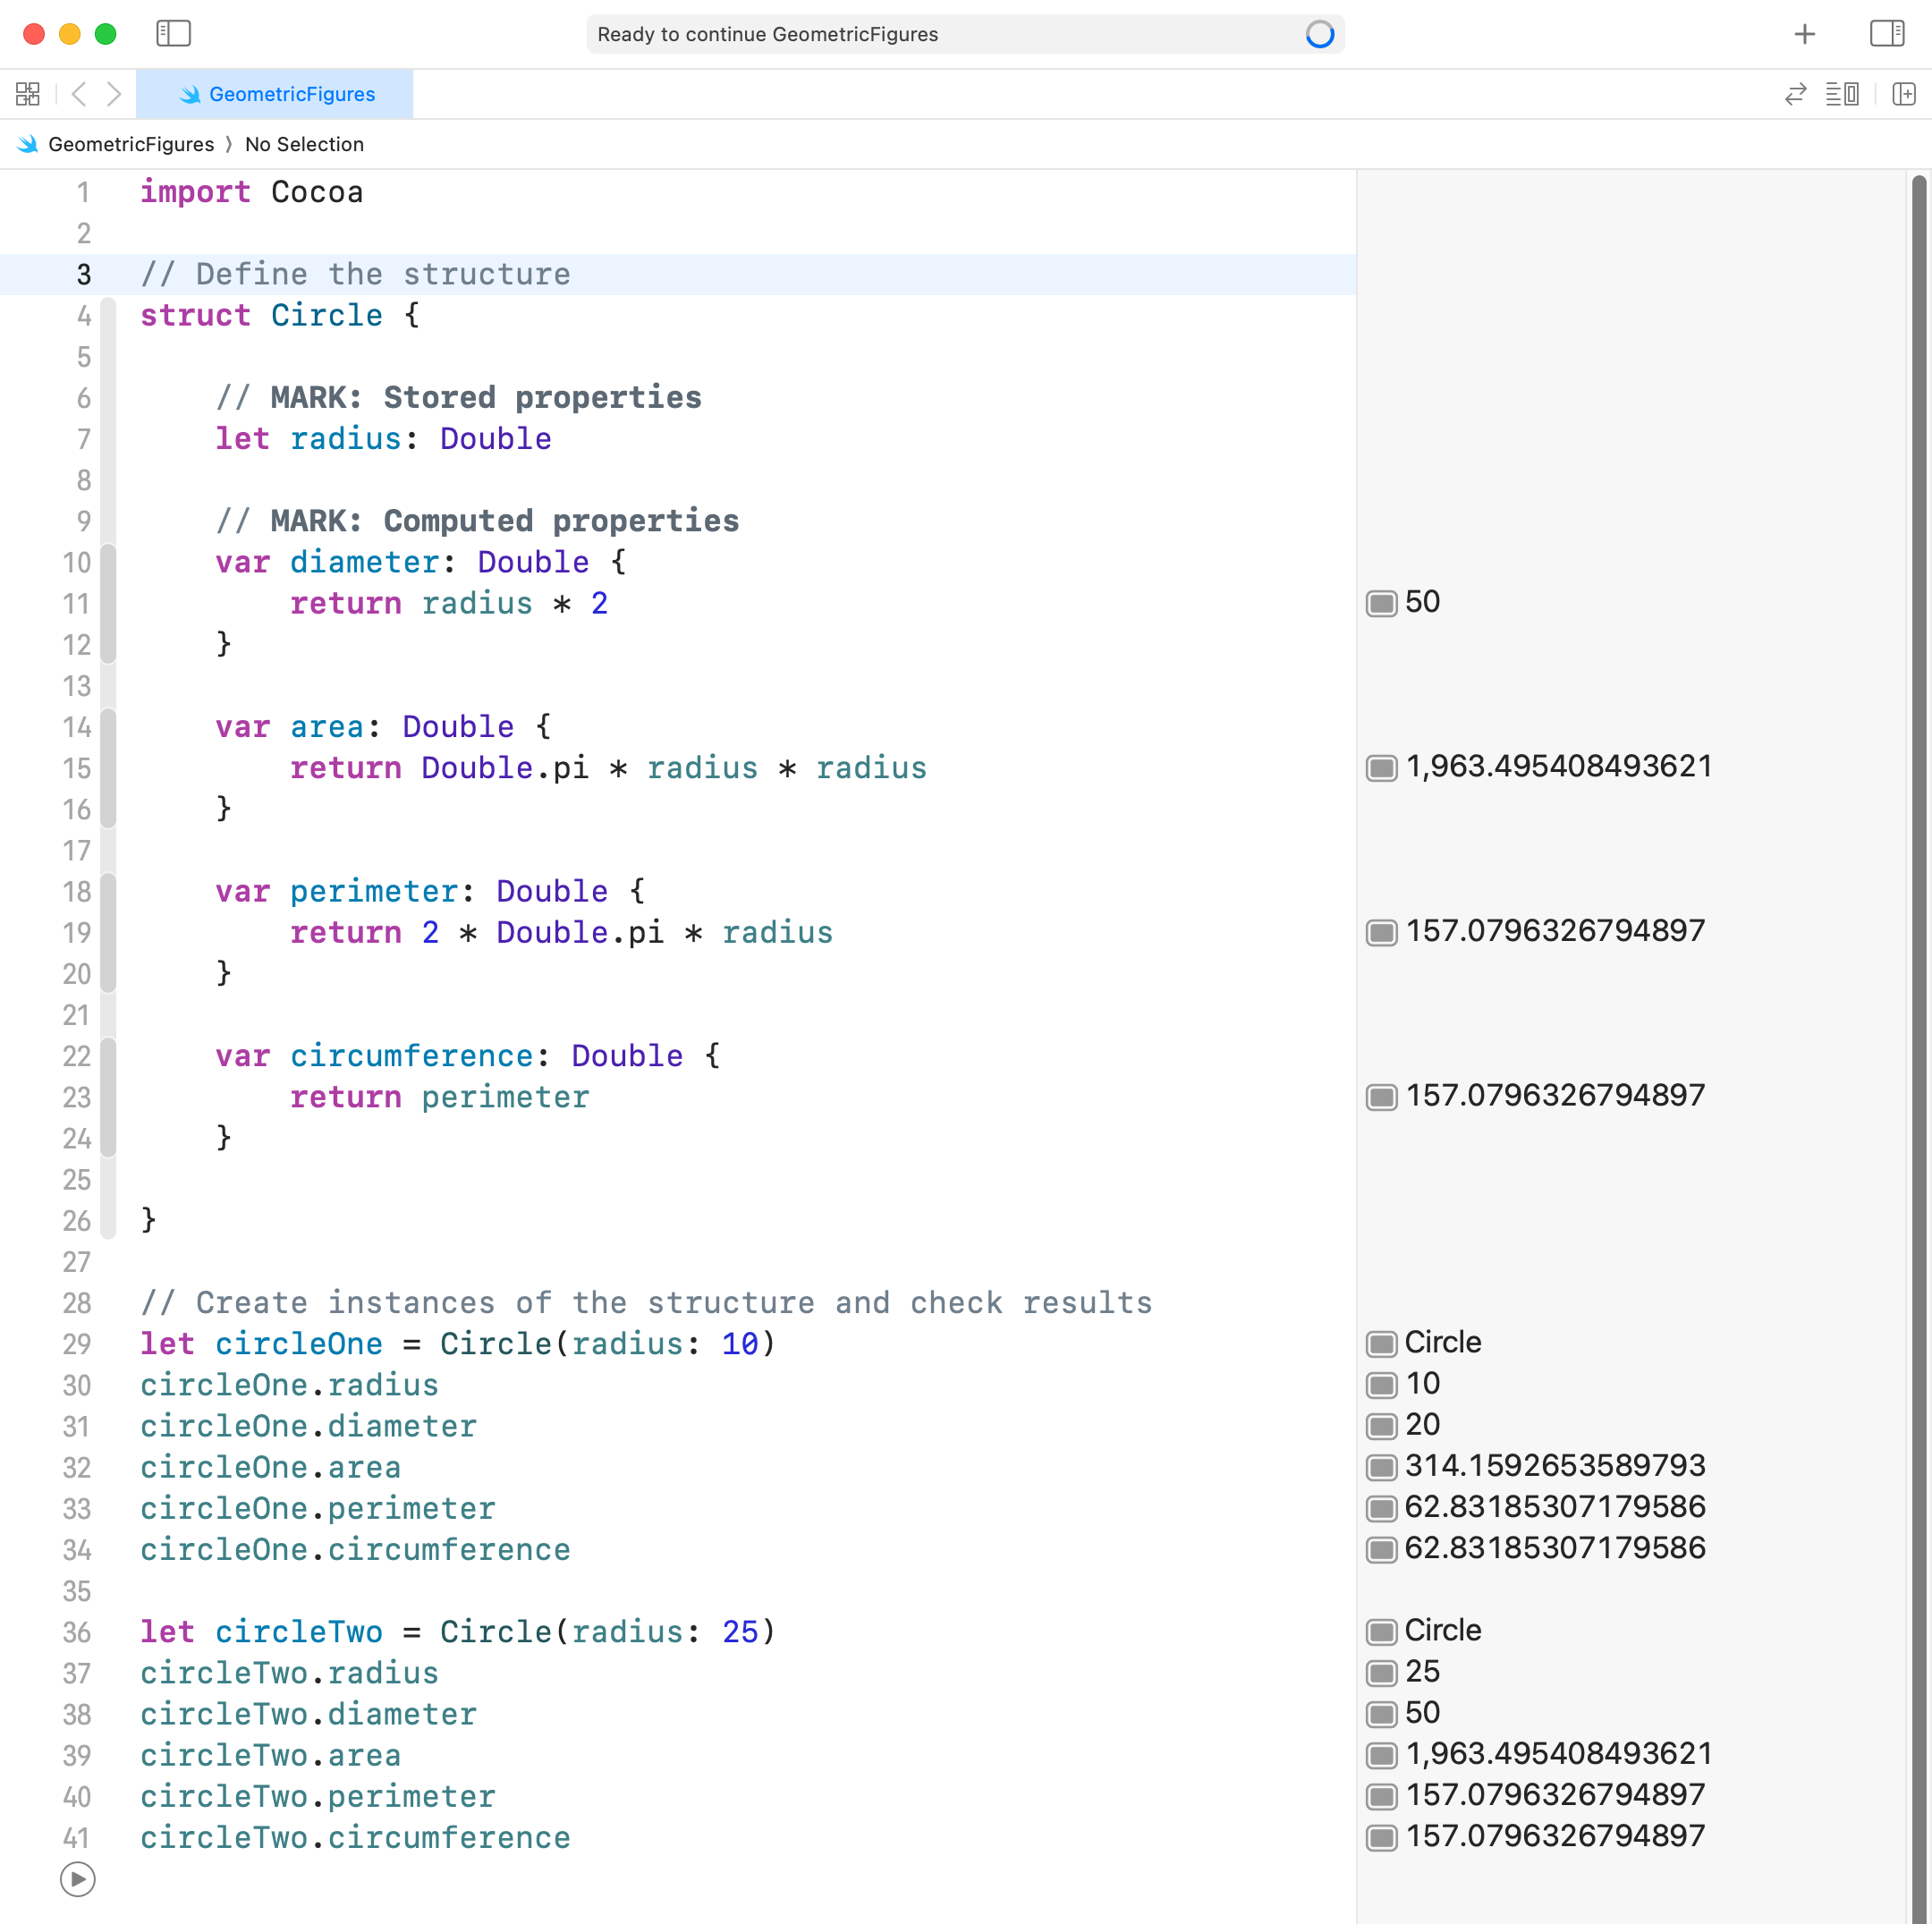
For example, consider Mr. Gordon’s Circle structure:
Let’s say we wanted to make a rule that all structures that are geometric figures should follow – and that the rule was “be able to describe yourself”.
We can do that by defining a protocol, like this:
protocol Describable {
	var description: String { get }
}
In this case, we are saying that any structure that follows the protocol, or rule, named Describable must have a property named description that we can “get” as a String.
This is what happens if Mr. Gordon defines the new protocol (lines 4 through 6) and then makes the Circle protocol promise to follow the rules of the Describable protocol (see the addition of : Describable on line 9):
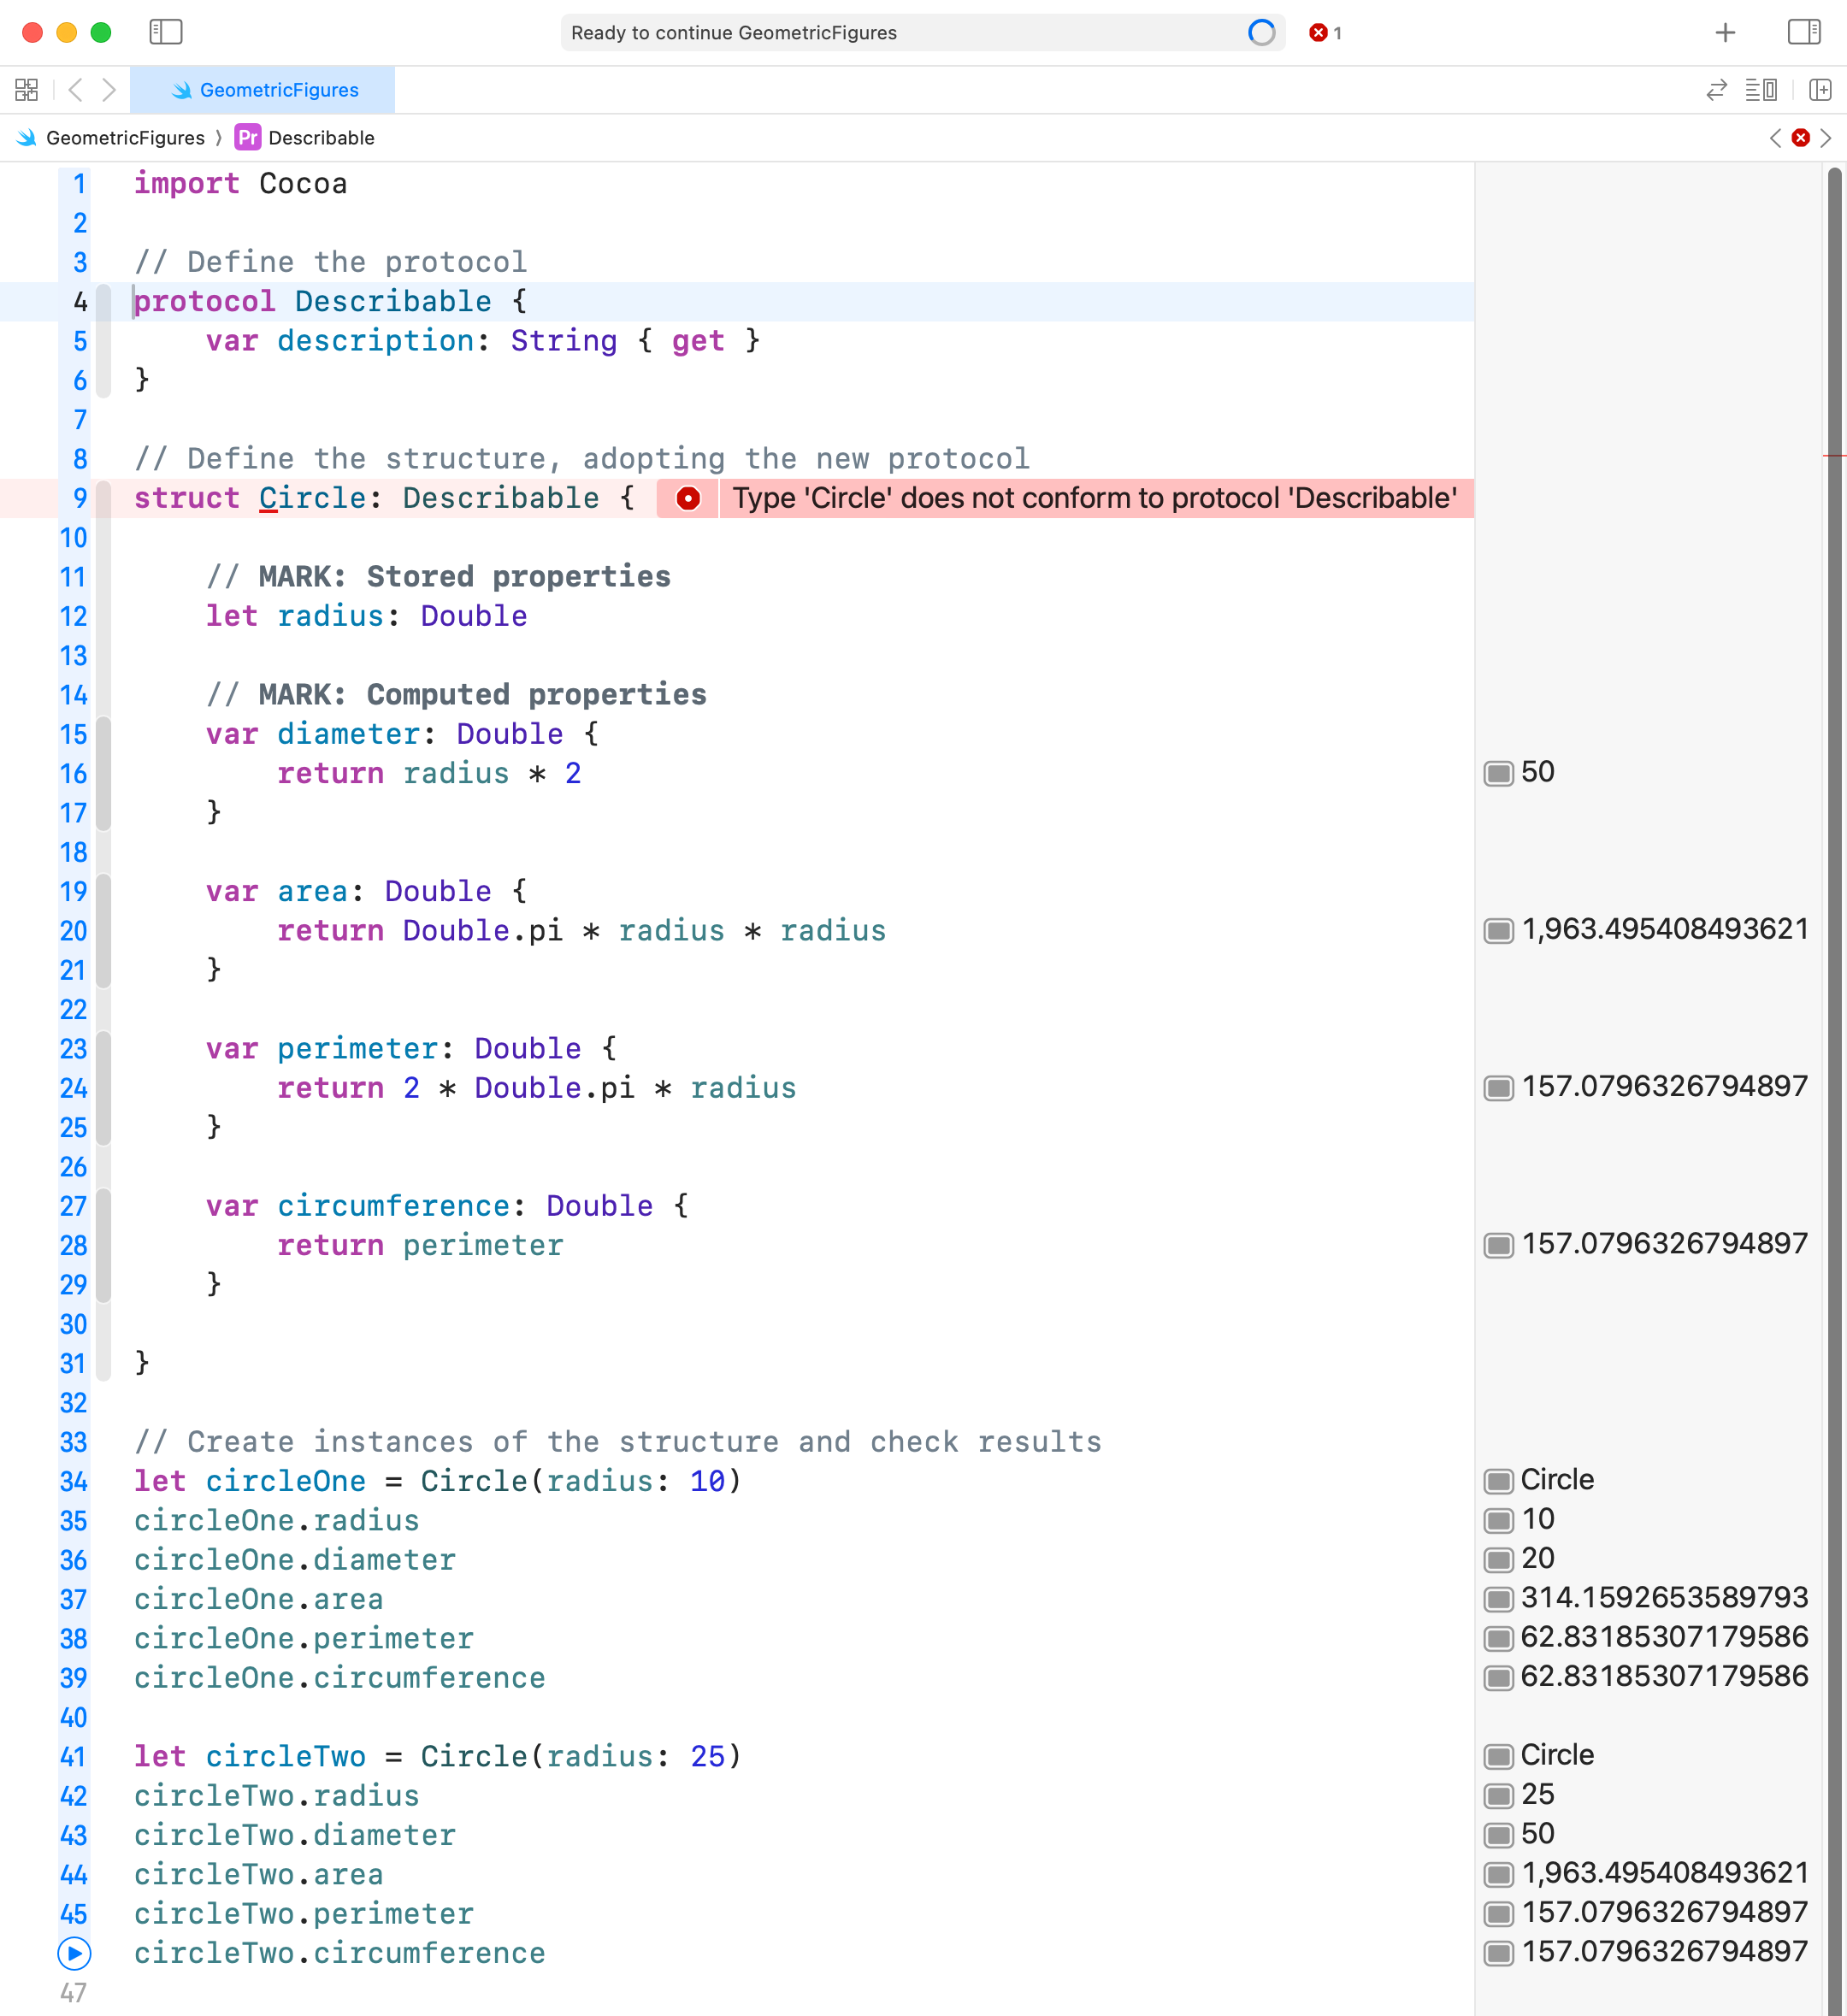
The Swift compiler throws an error, because currently, the Circle structure is not following the rules of the Describable protocol – it does not currently provide a property named description.
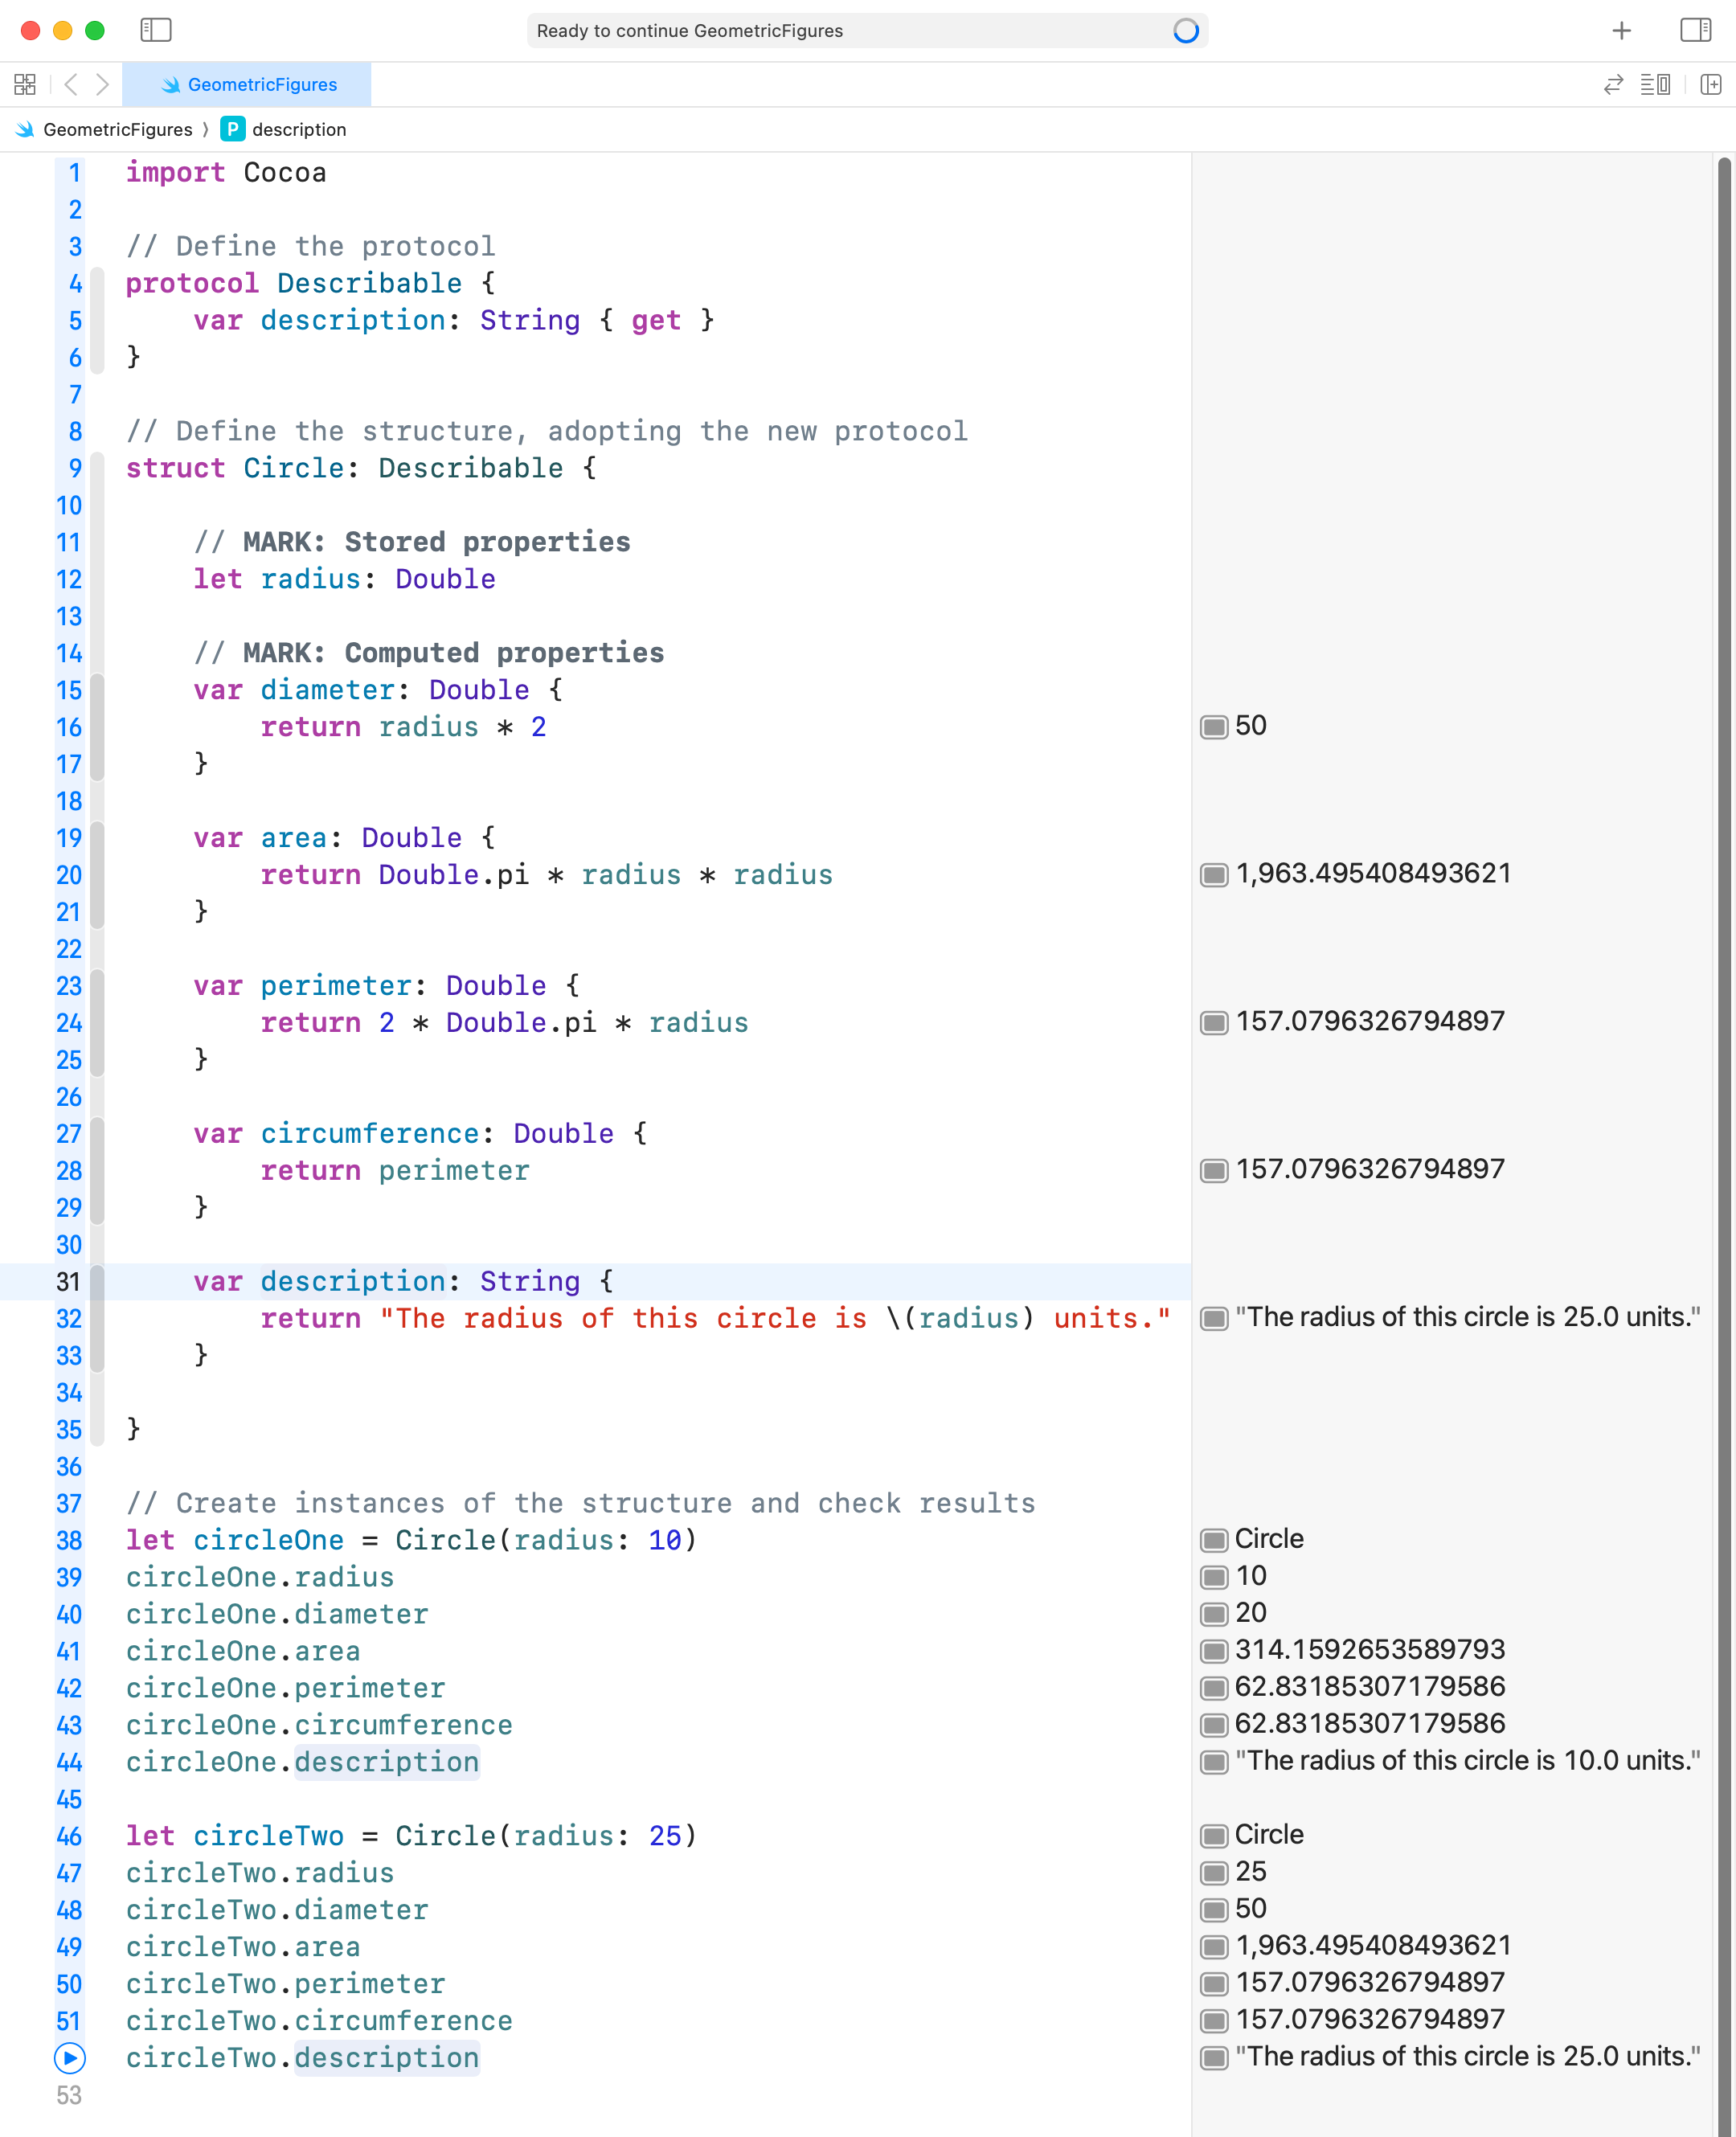
If Mr. Gordon fixes this by adding the required property (lines 31 to 33), the compiler error goes away, and then he can use the new property (lines 44 and 52) to get a description of each instance of the Circle type:
Ex. 1: Use a protocol
Copy this code into your clipboard:
protocol Describable {
	var description: String { get }
}
Now open your GeometricFigures playground.
Add the protocol code provided above the top of your playground file. Make your structure that describes a 2D or 3D figure use, or promise to follow the rules of, the Describable protocol.
Like Mr. Gordon did, invoke the description property on at least one instance of your structure, so you can verify that the new property is working.
SwiftUI
The programming language we are using this year is called Swift.
Other programming languages you may have heard of are: Python, Java, C, and so on.
Apple provides a framework – a collection of code – that we can use with the Swift programming language to easily author user interfaces.
That framework is called SwiftUI.
We will start learning how to use SwiftUI today.
SwiftUI uses structures that follow the rules of the View protocol.
A view is a structure in SwiftUI that is used to show something to the user.
It’s the parts of an app we can see.
How to position views is a key skill in building user interfaces for a software developer.
Stacks
SwiftUI uses three primary layout views:
VStack- Positions views contained inside of it vertically.
HStack- Positions views inside of it horizontally.
ZStack- Positions views inside of it using layers.
- The first view is the bottom layer.
- The final view is the top layer.
Learning how to do layout in SwiftUI is best done experimentally.
Example
Let’s try to build this view:
You can think of this view as a blueprint.
User interface designers call this a “wireframe” or a “block design”.
Push-out views
We will build this view using the Rectangle shape.
It is an example of a push-out view.
A Rectangle will push out to fill up as much space as possible, like this:

Then, we will build the view together! Here’s a video showing how to do this – please follow along:
TIP
If you do not have the iOS Simulator installed within Xcode yet, you can download and use this Xcode playground as an alternative.
Ex. 2: Build additional layouts
Use what you have learned by following along with Mr. Gordon in the video to build as many of the layouts shown further below as possible.
TIP
When documenting your work in your post for today on Notion, for each layout you completed, please include a screenshot of what layout you were aiming for and how it ended up looking.
For example:
.png)
Here are the layouts to practice reproducing:
