Recall the MVVM design pattern and the role of each layer:
flowchart LR

id1["<b>Model</b><br/>Describes data"] --> id2["<b>View Model</b><br/>Manages the state of data<br/>Contains business logic"]
id2 --> id3["<b>View(s)</b><br/>Presents data"]
id3 --> id2
Today you are going to dynamically populate the view model using information from a remote database:
flowchart TB
    subgraph topRow [ ]
        id4[(Remote Database)]
    end
    subgraph bottomRow [ ]
        direction LR
        id1["<b>Model</b><br/>Describes data"] --> id2["<b>View Model</b><br/>Manages the state of data<br/>Contains business logic"]
        id2 <--> id3["<b>View(s)</b><br/>Presents data"]
    end
    id4 <--> id2
    style topRow fill:none,stroke:none
    style bottomRow fill:none,stroke:none
Prerequisite
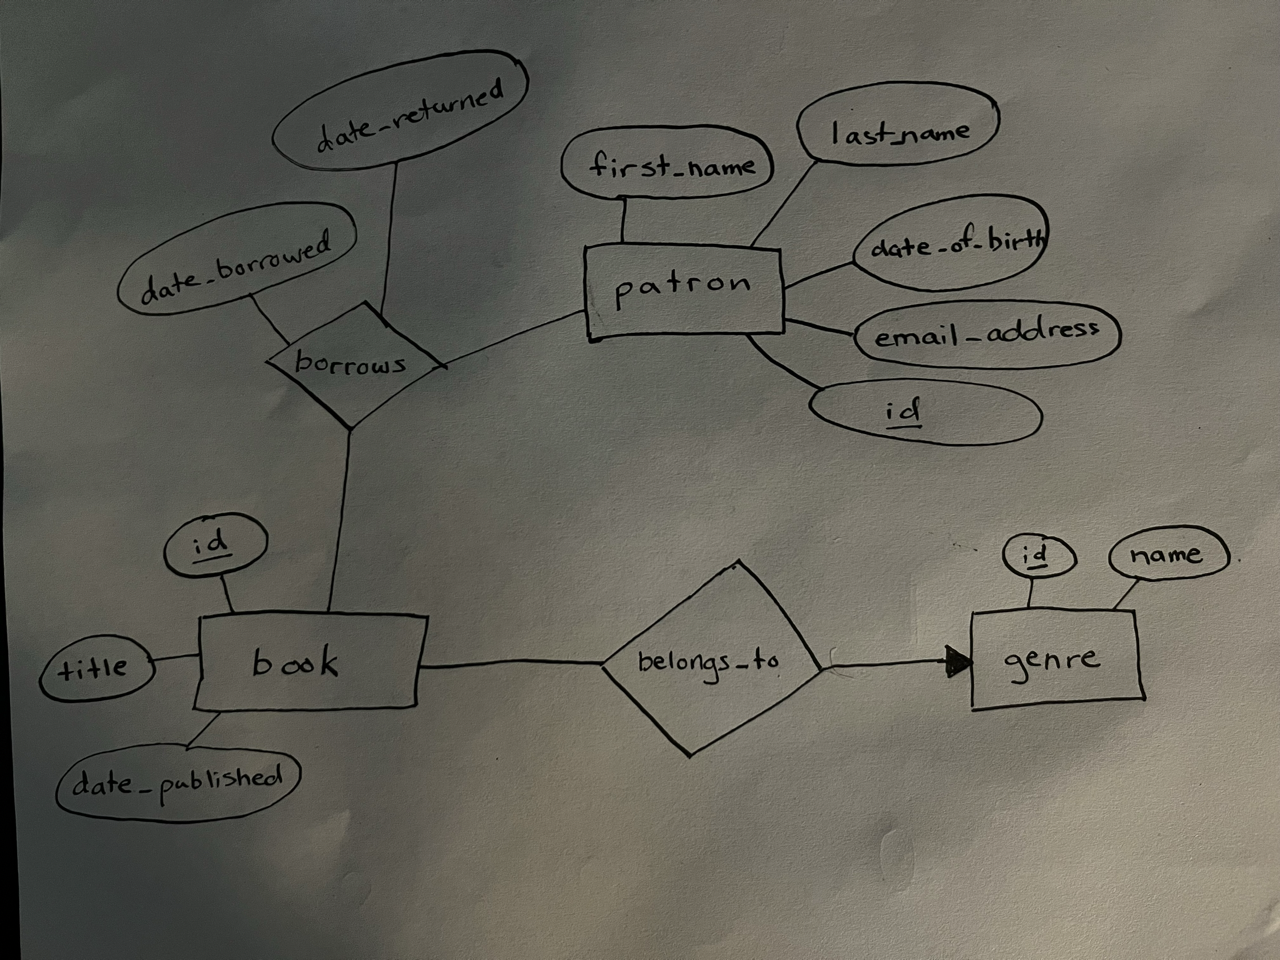
This lesson assumes you completed the Entity-Relationship Diagrams exercise from an earlier class, by authoring an ER diagram that is something like this:
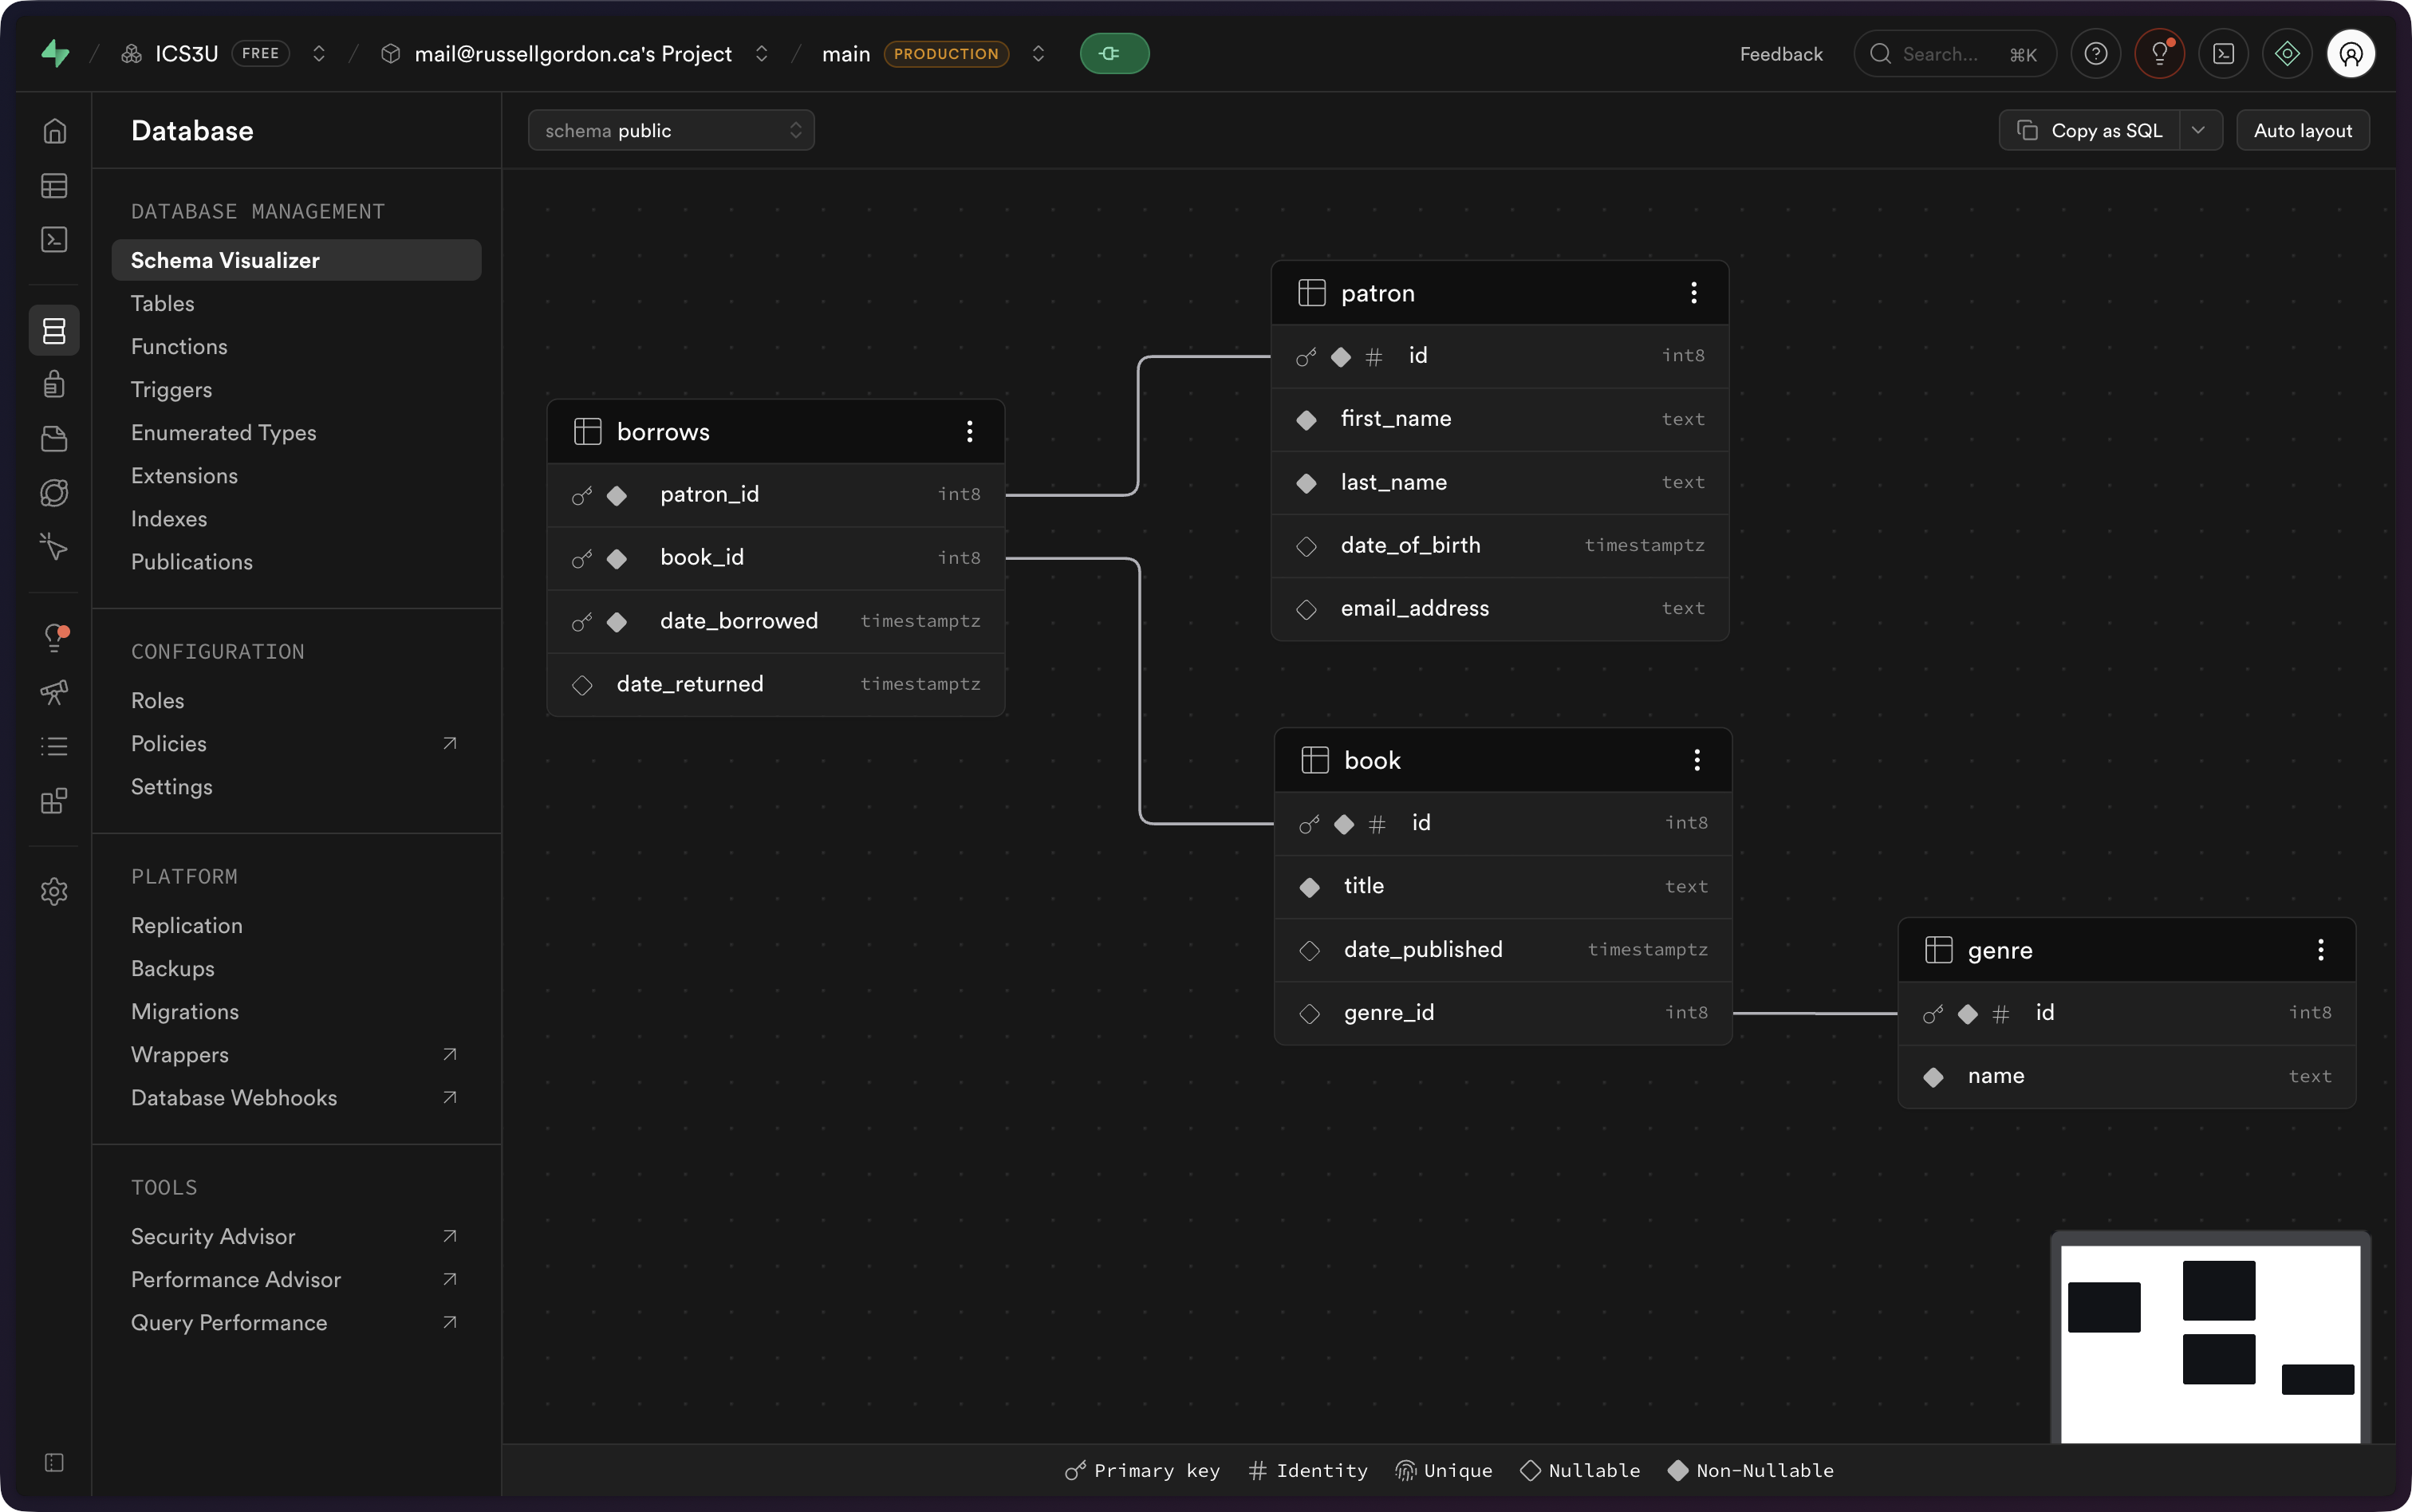
… and that you used it to create a database within a project hosted at Supabase – something like this:
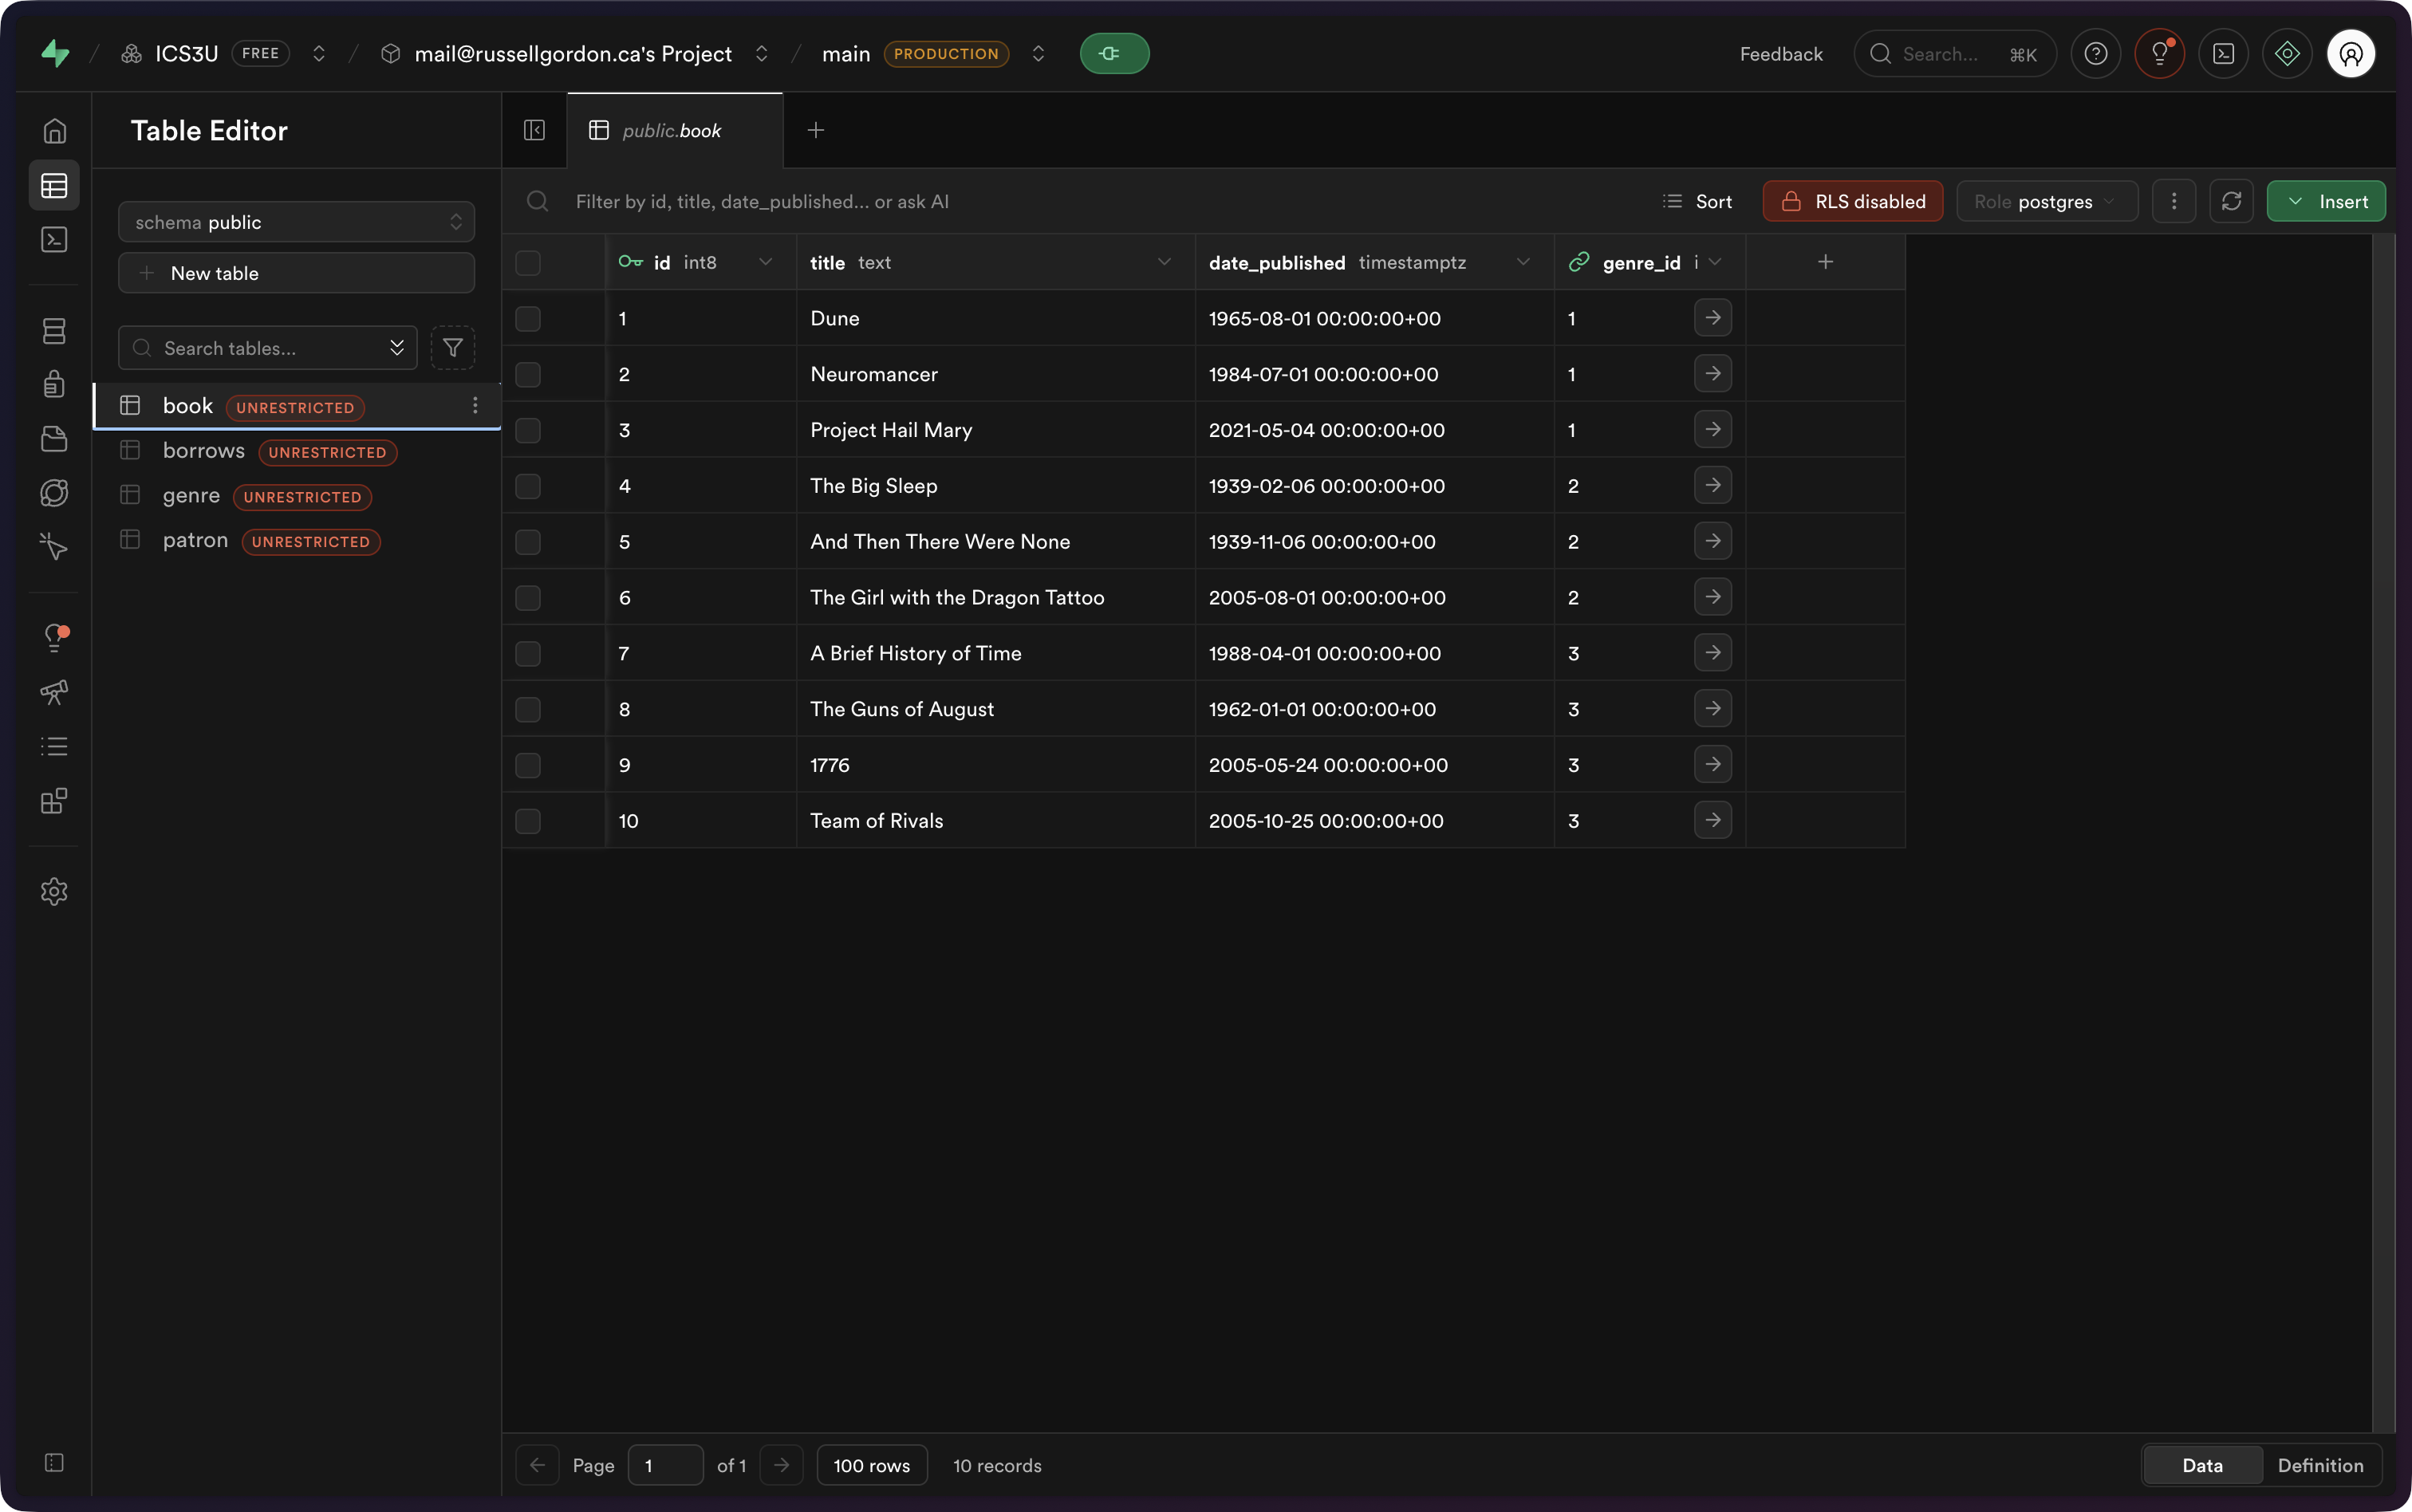
… and that the tables within the database were populated with some example data, such as this:
… and this:

NOTE
It’s OK if the layout of your database and the example data differ a bit from what is shown above. The key is that you have a database table to read from which contains some example data.
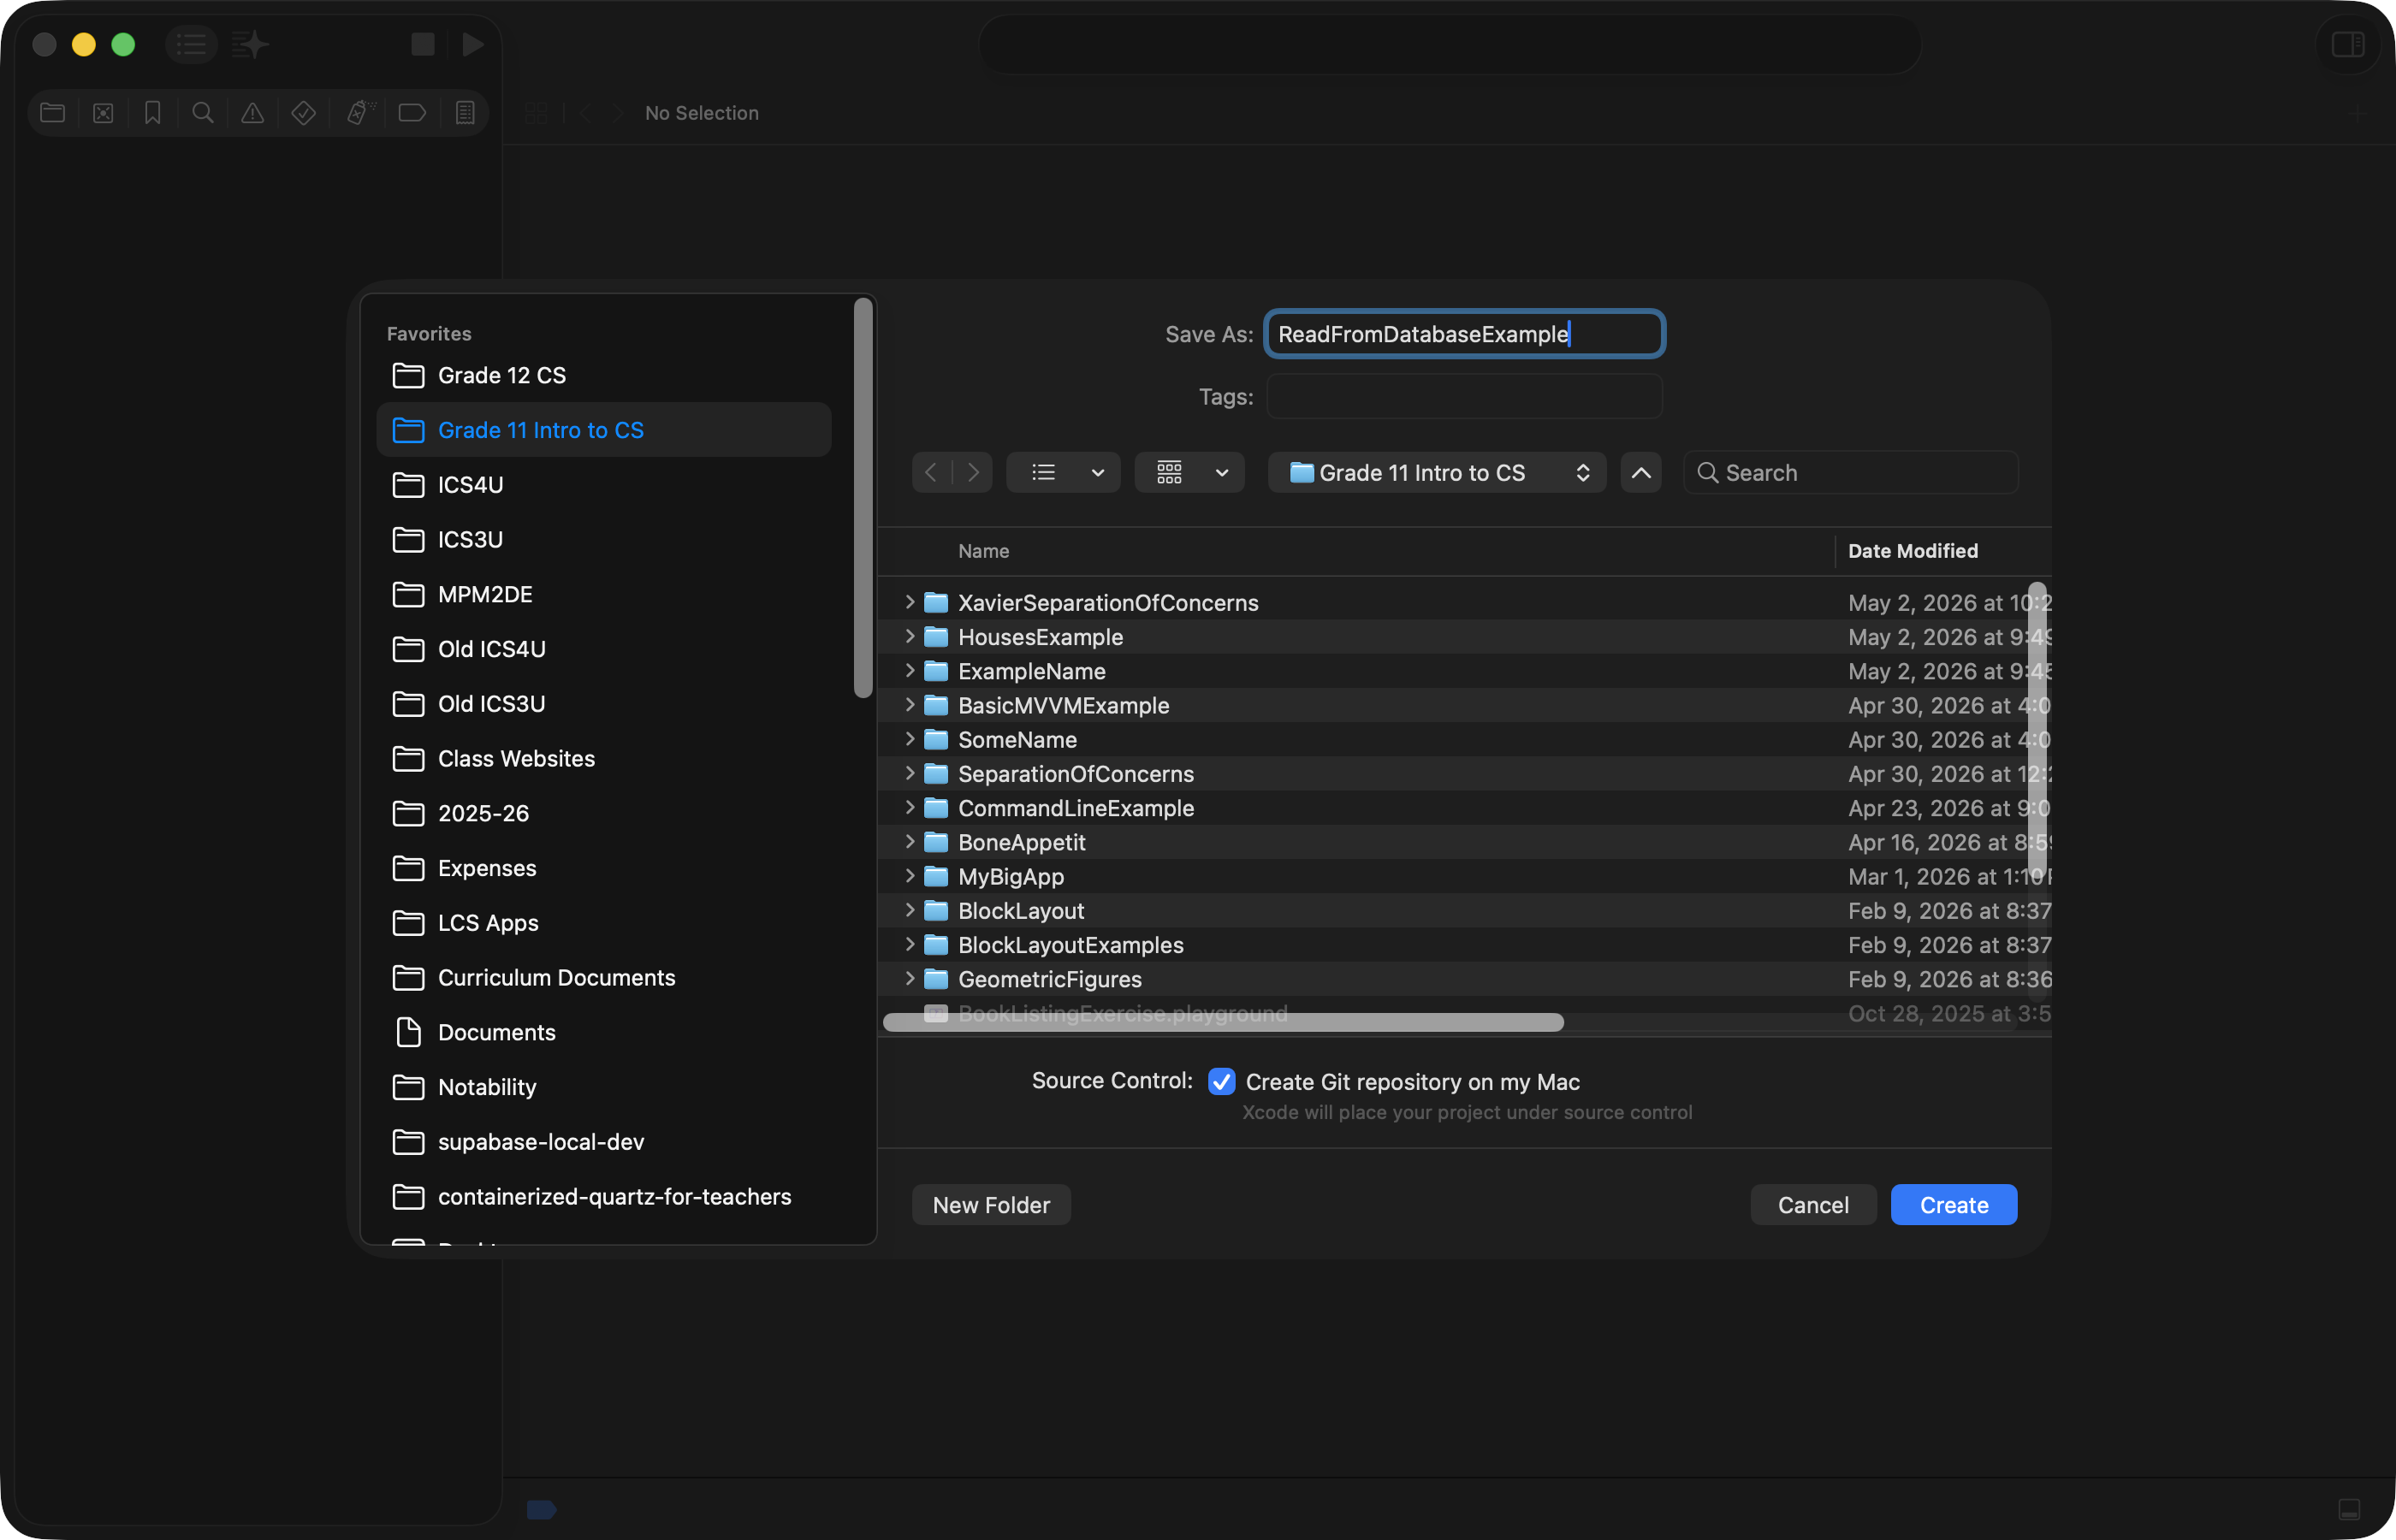
Starting point
To begin, create a new iOS project using the Basic MVVM template named ReadFromDatabaseExample:
… like this:
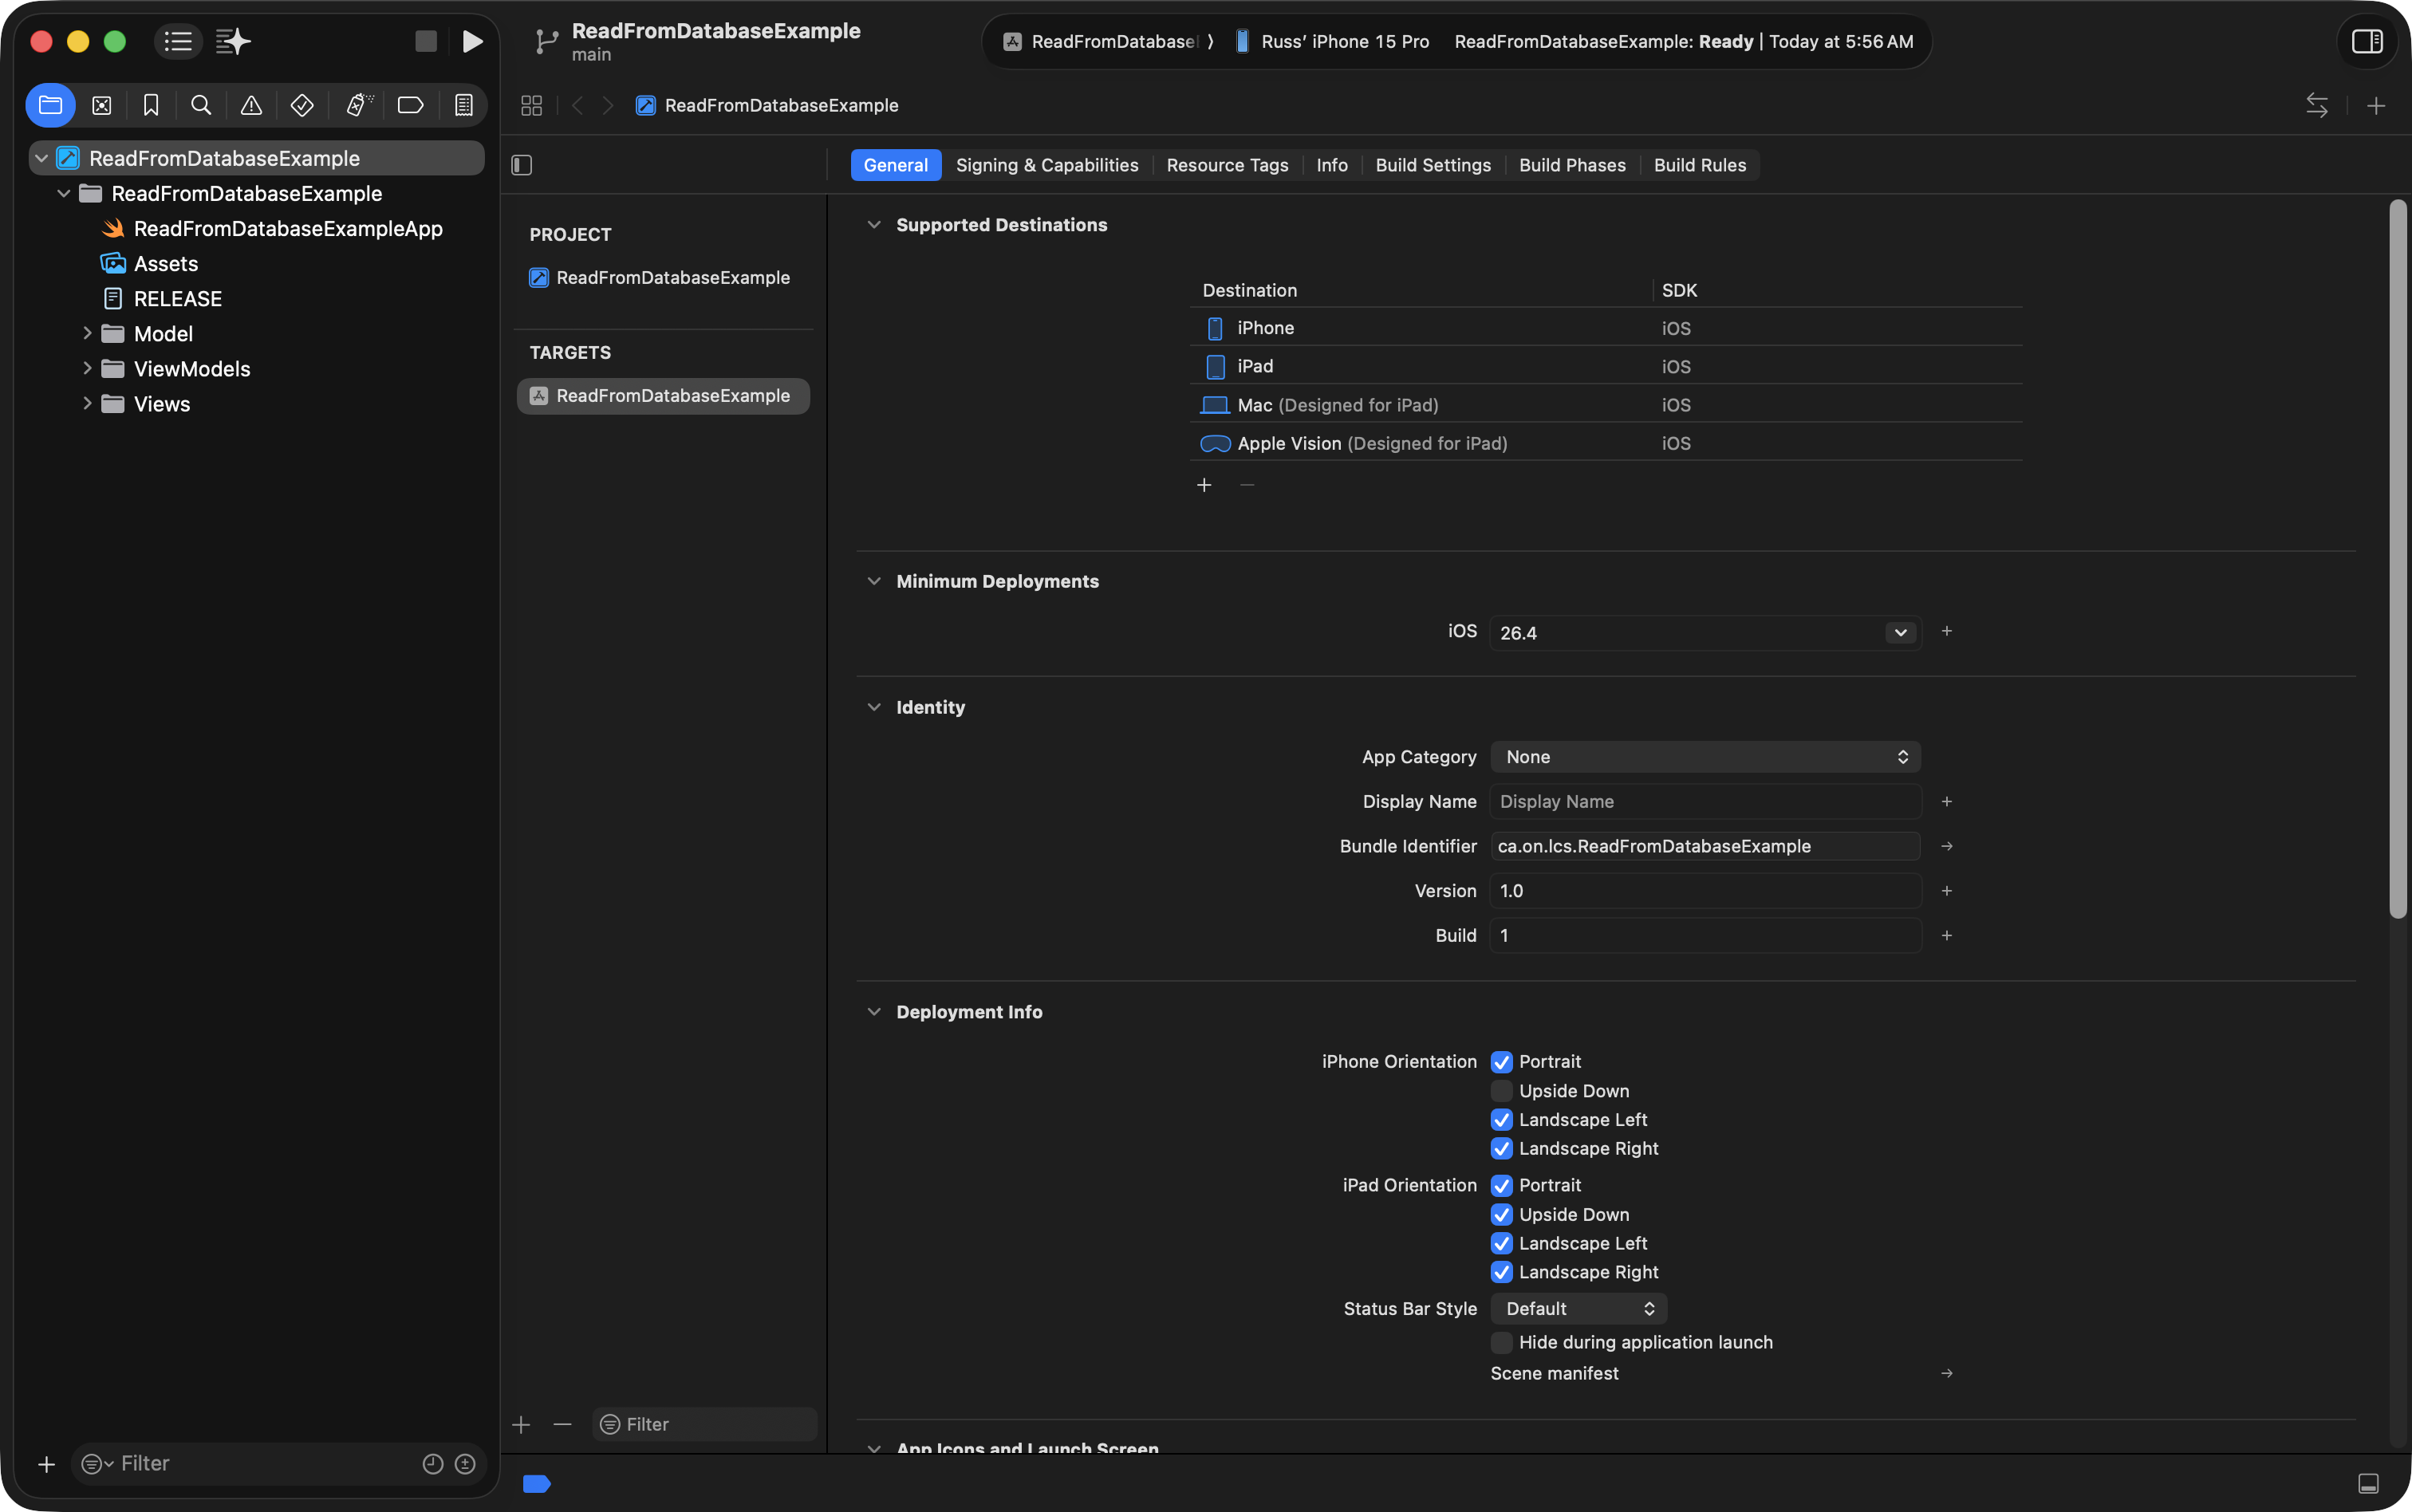
You should have a project that looks like this when finished:
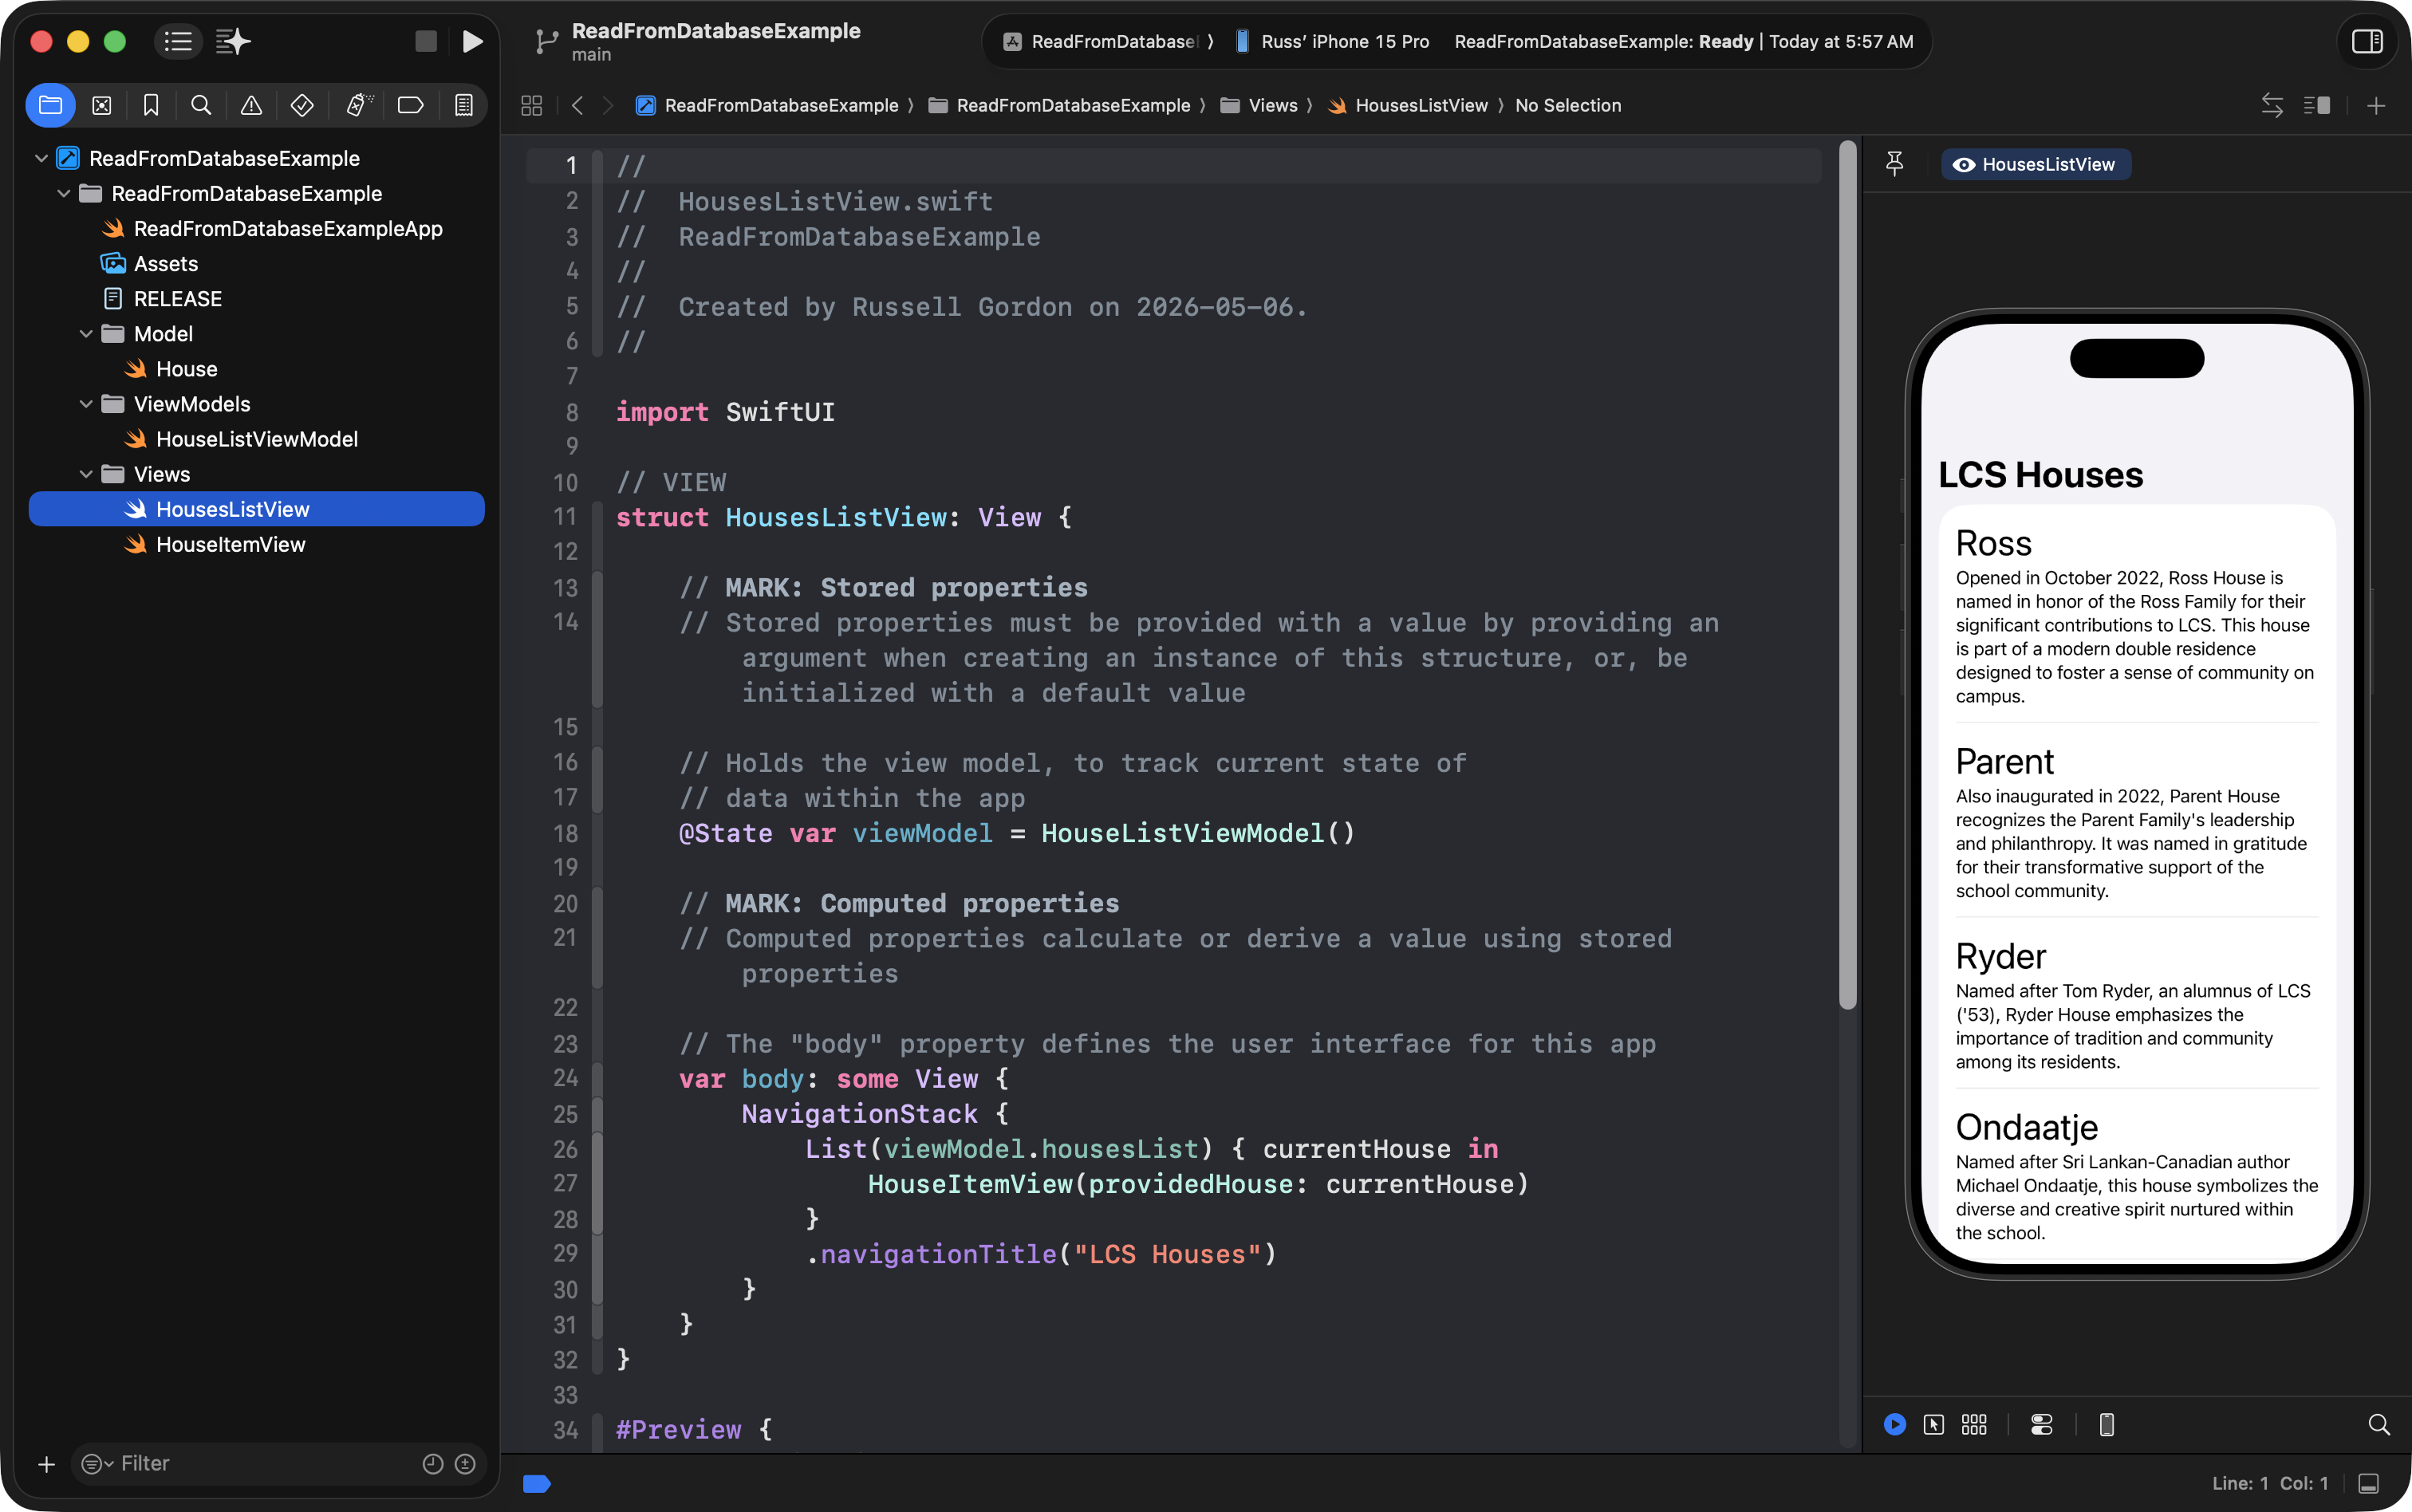
Click the disclosure triangles next to each group at left, then preview HousesListView:
Add required framework
To use a remote database like Supabase, you must add a package dependency to your project.
What is a package dependency?
Remember this image from the very start of the year:
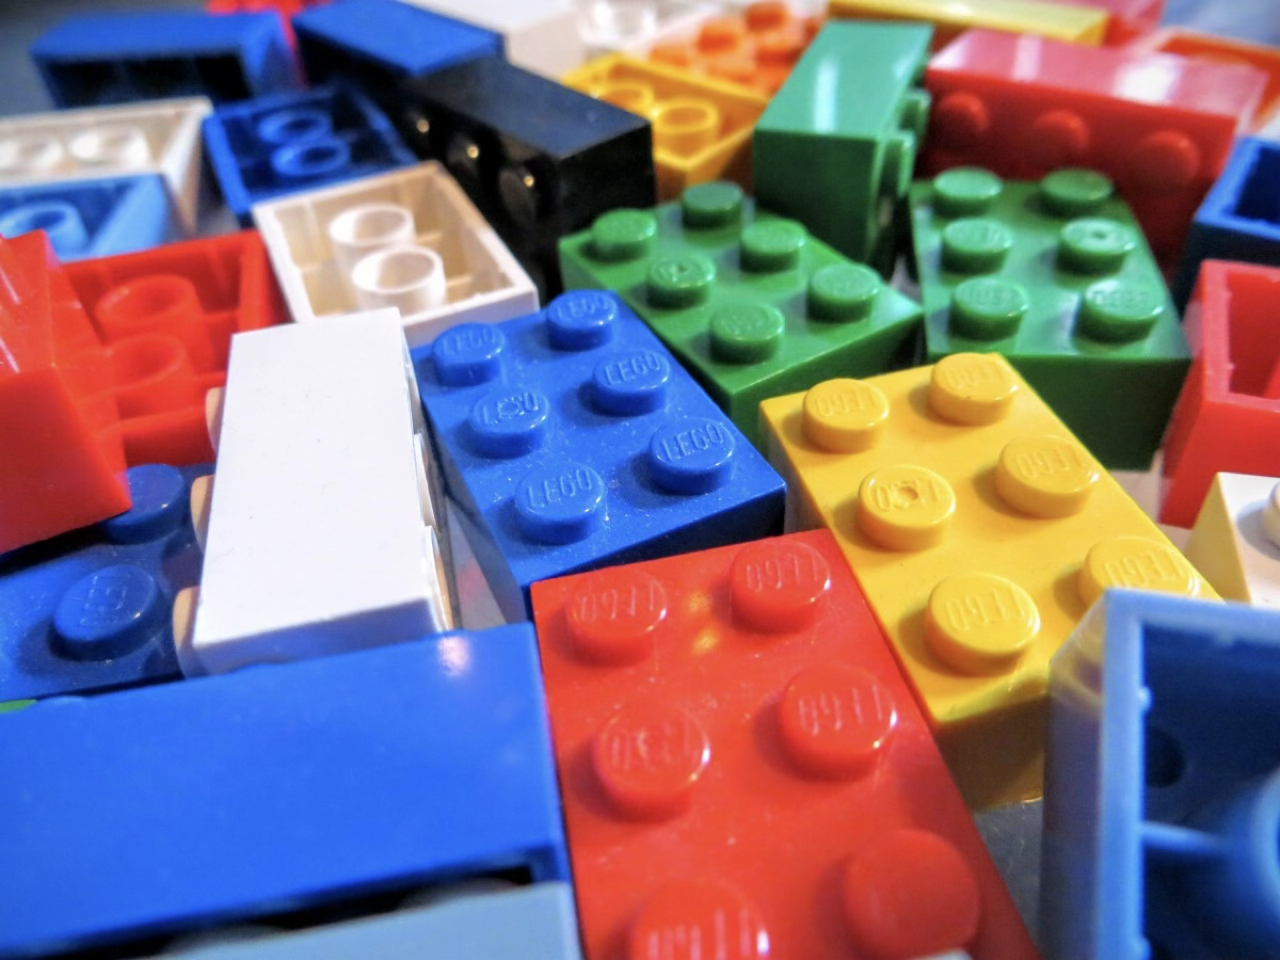
A package dependency is just another “piece of LEGO” – a collection of code – authored by others.
In this case, the Supabase package dependency allows us to connect to the remote database we created.
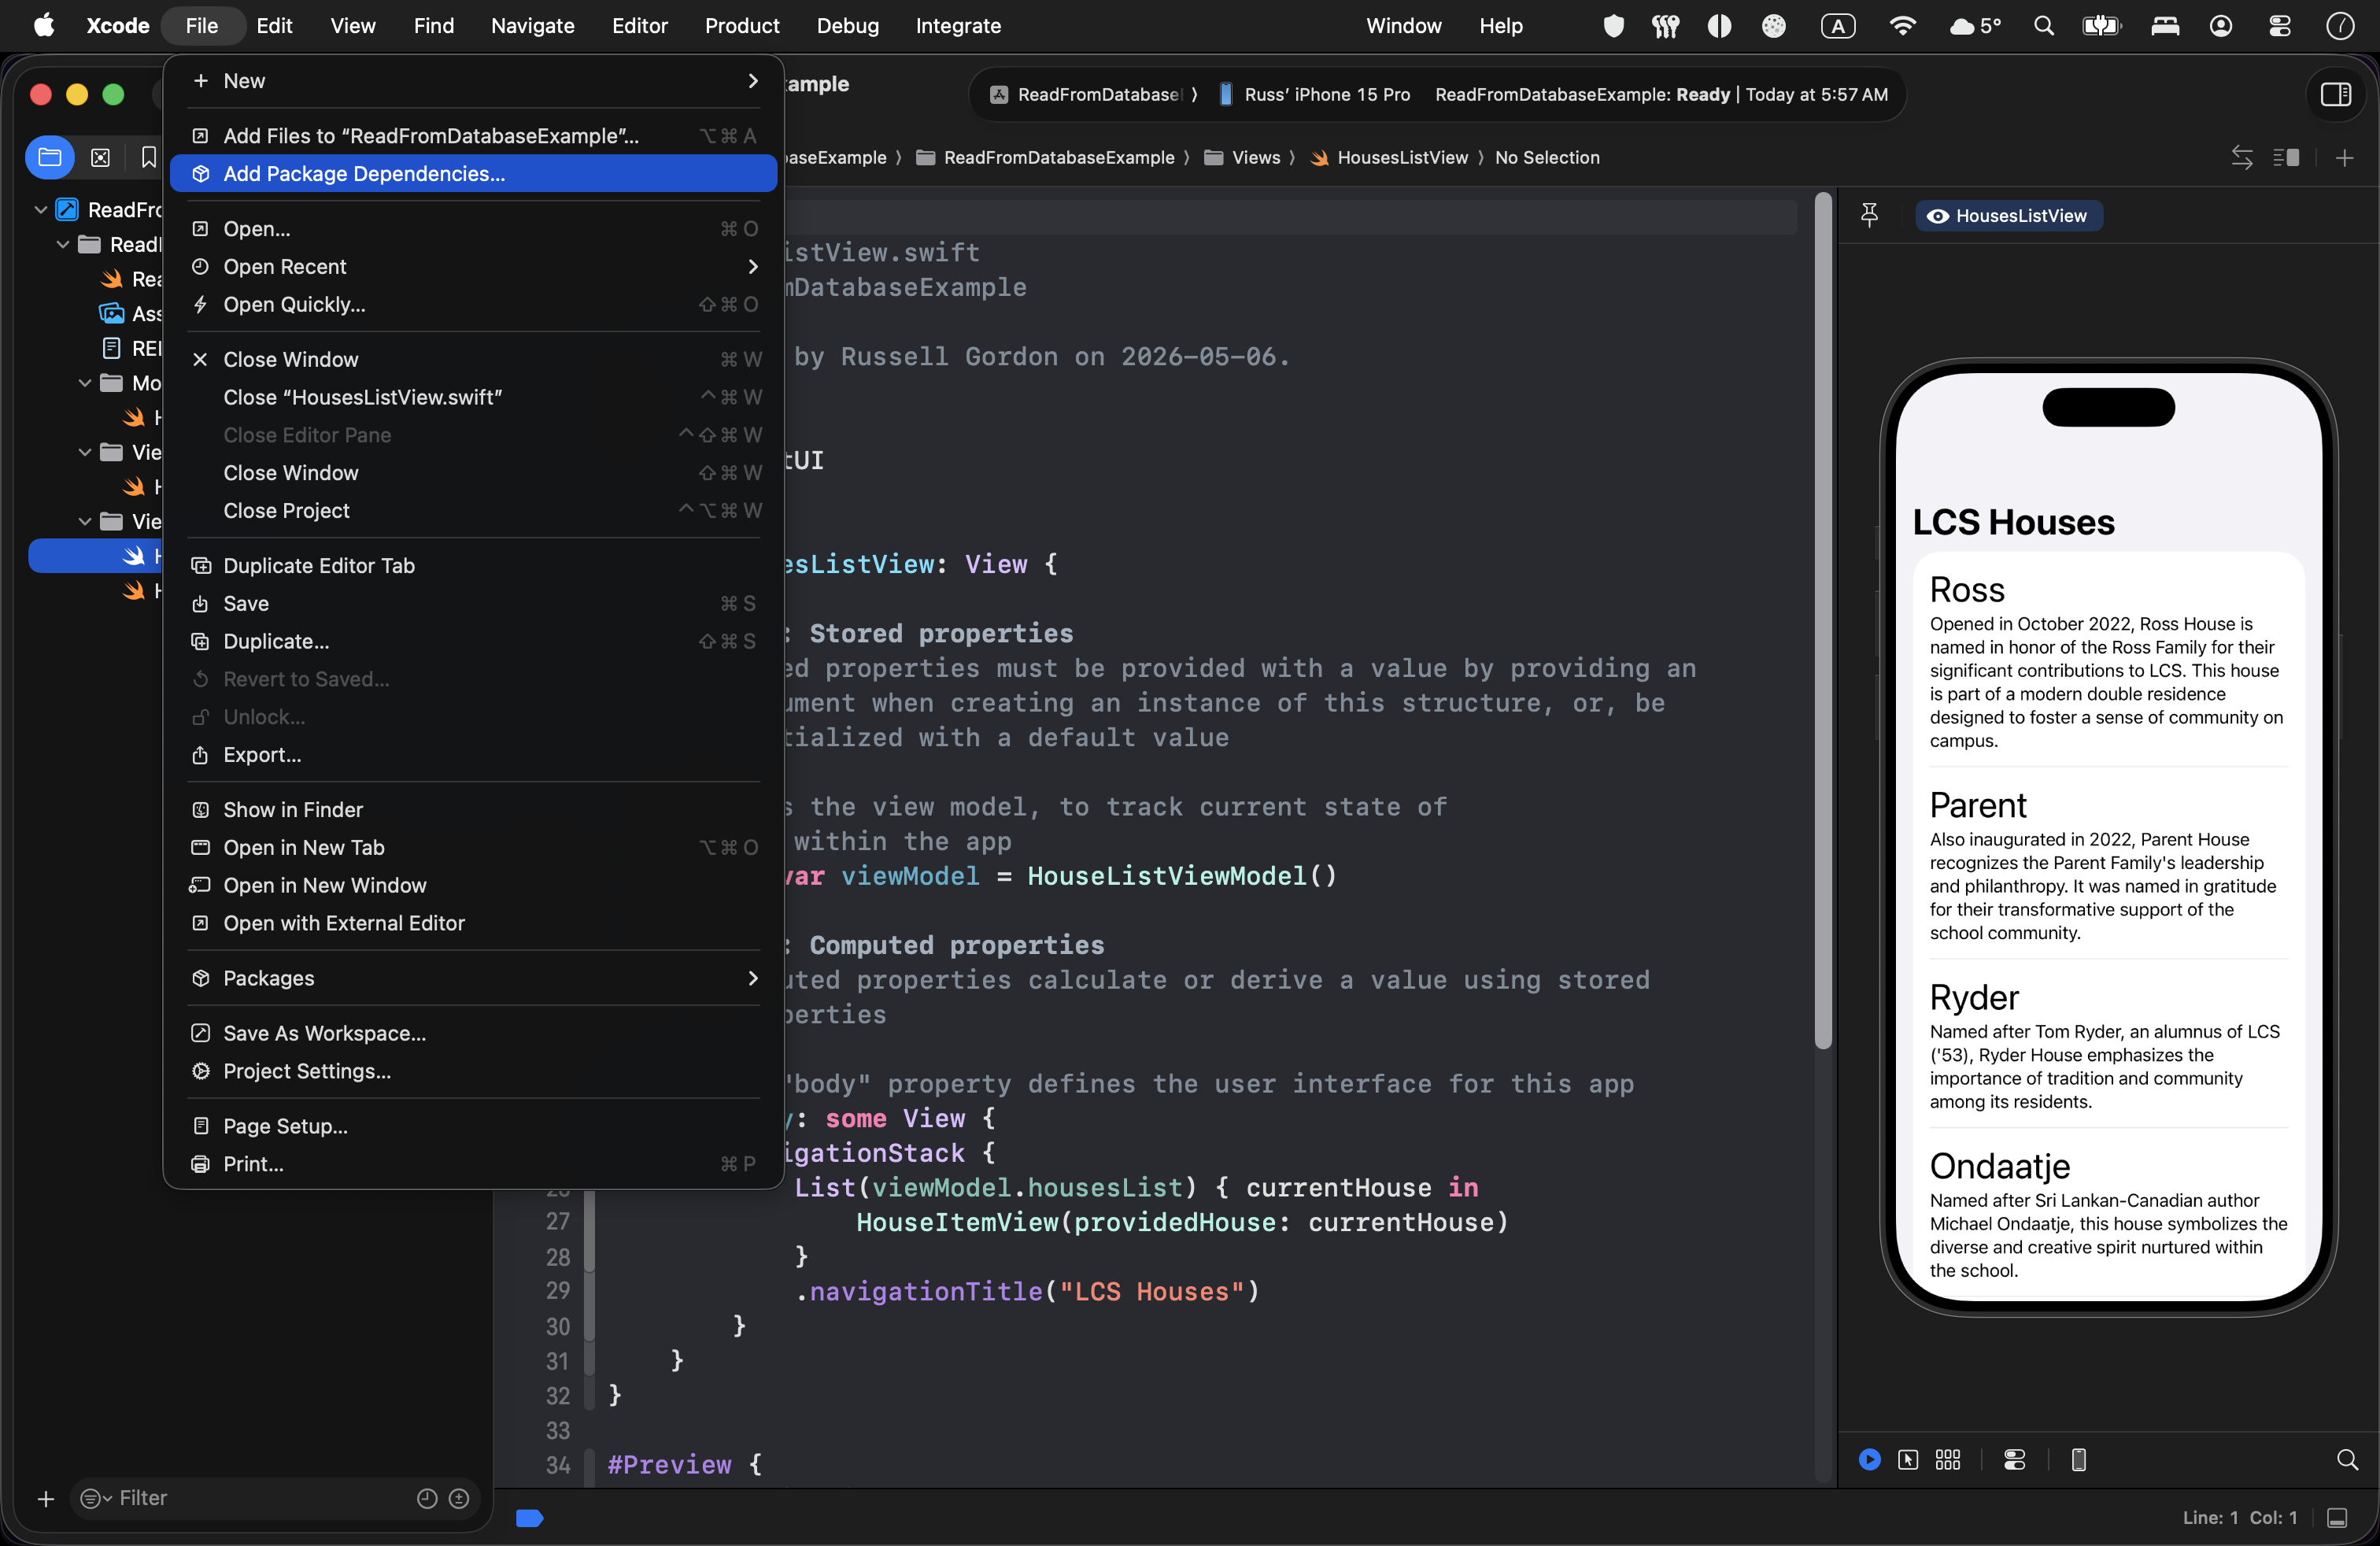
So, choose File > Add Package Dependencies…:
In the Search or Enter Package URL field at top left:
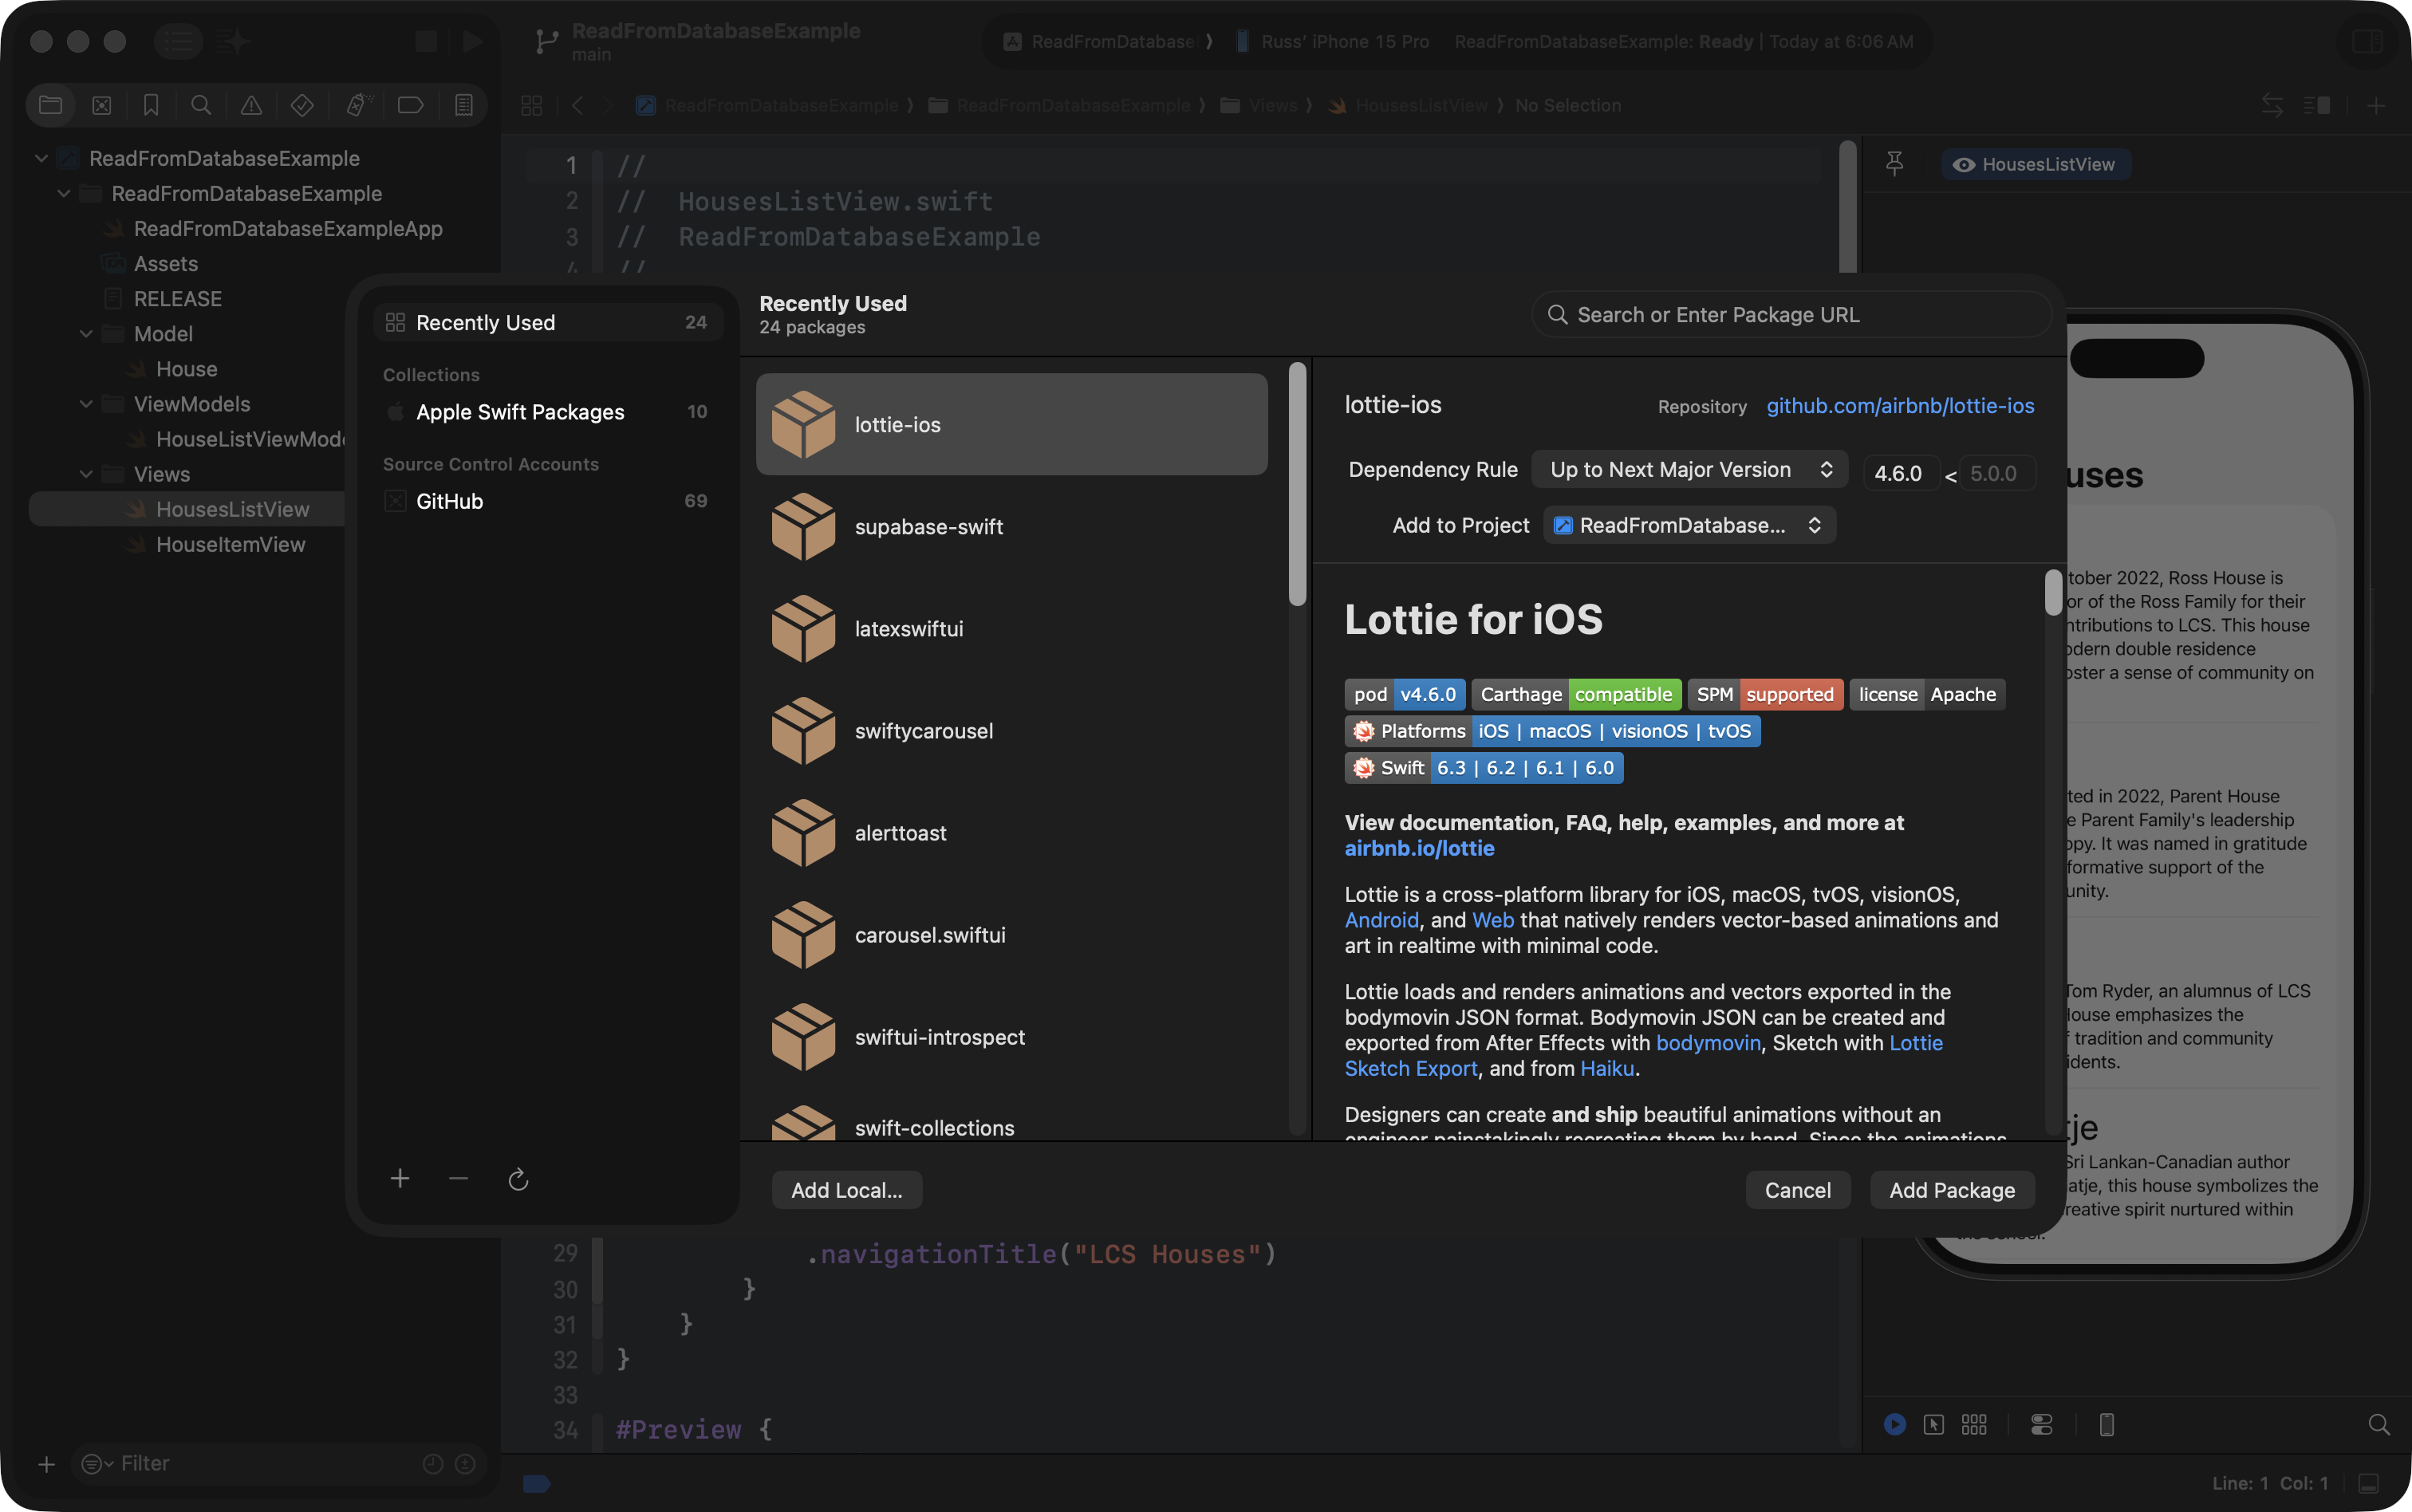
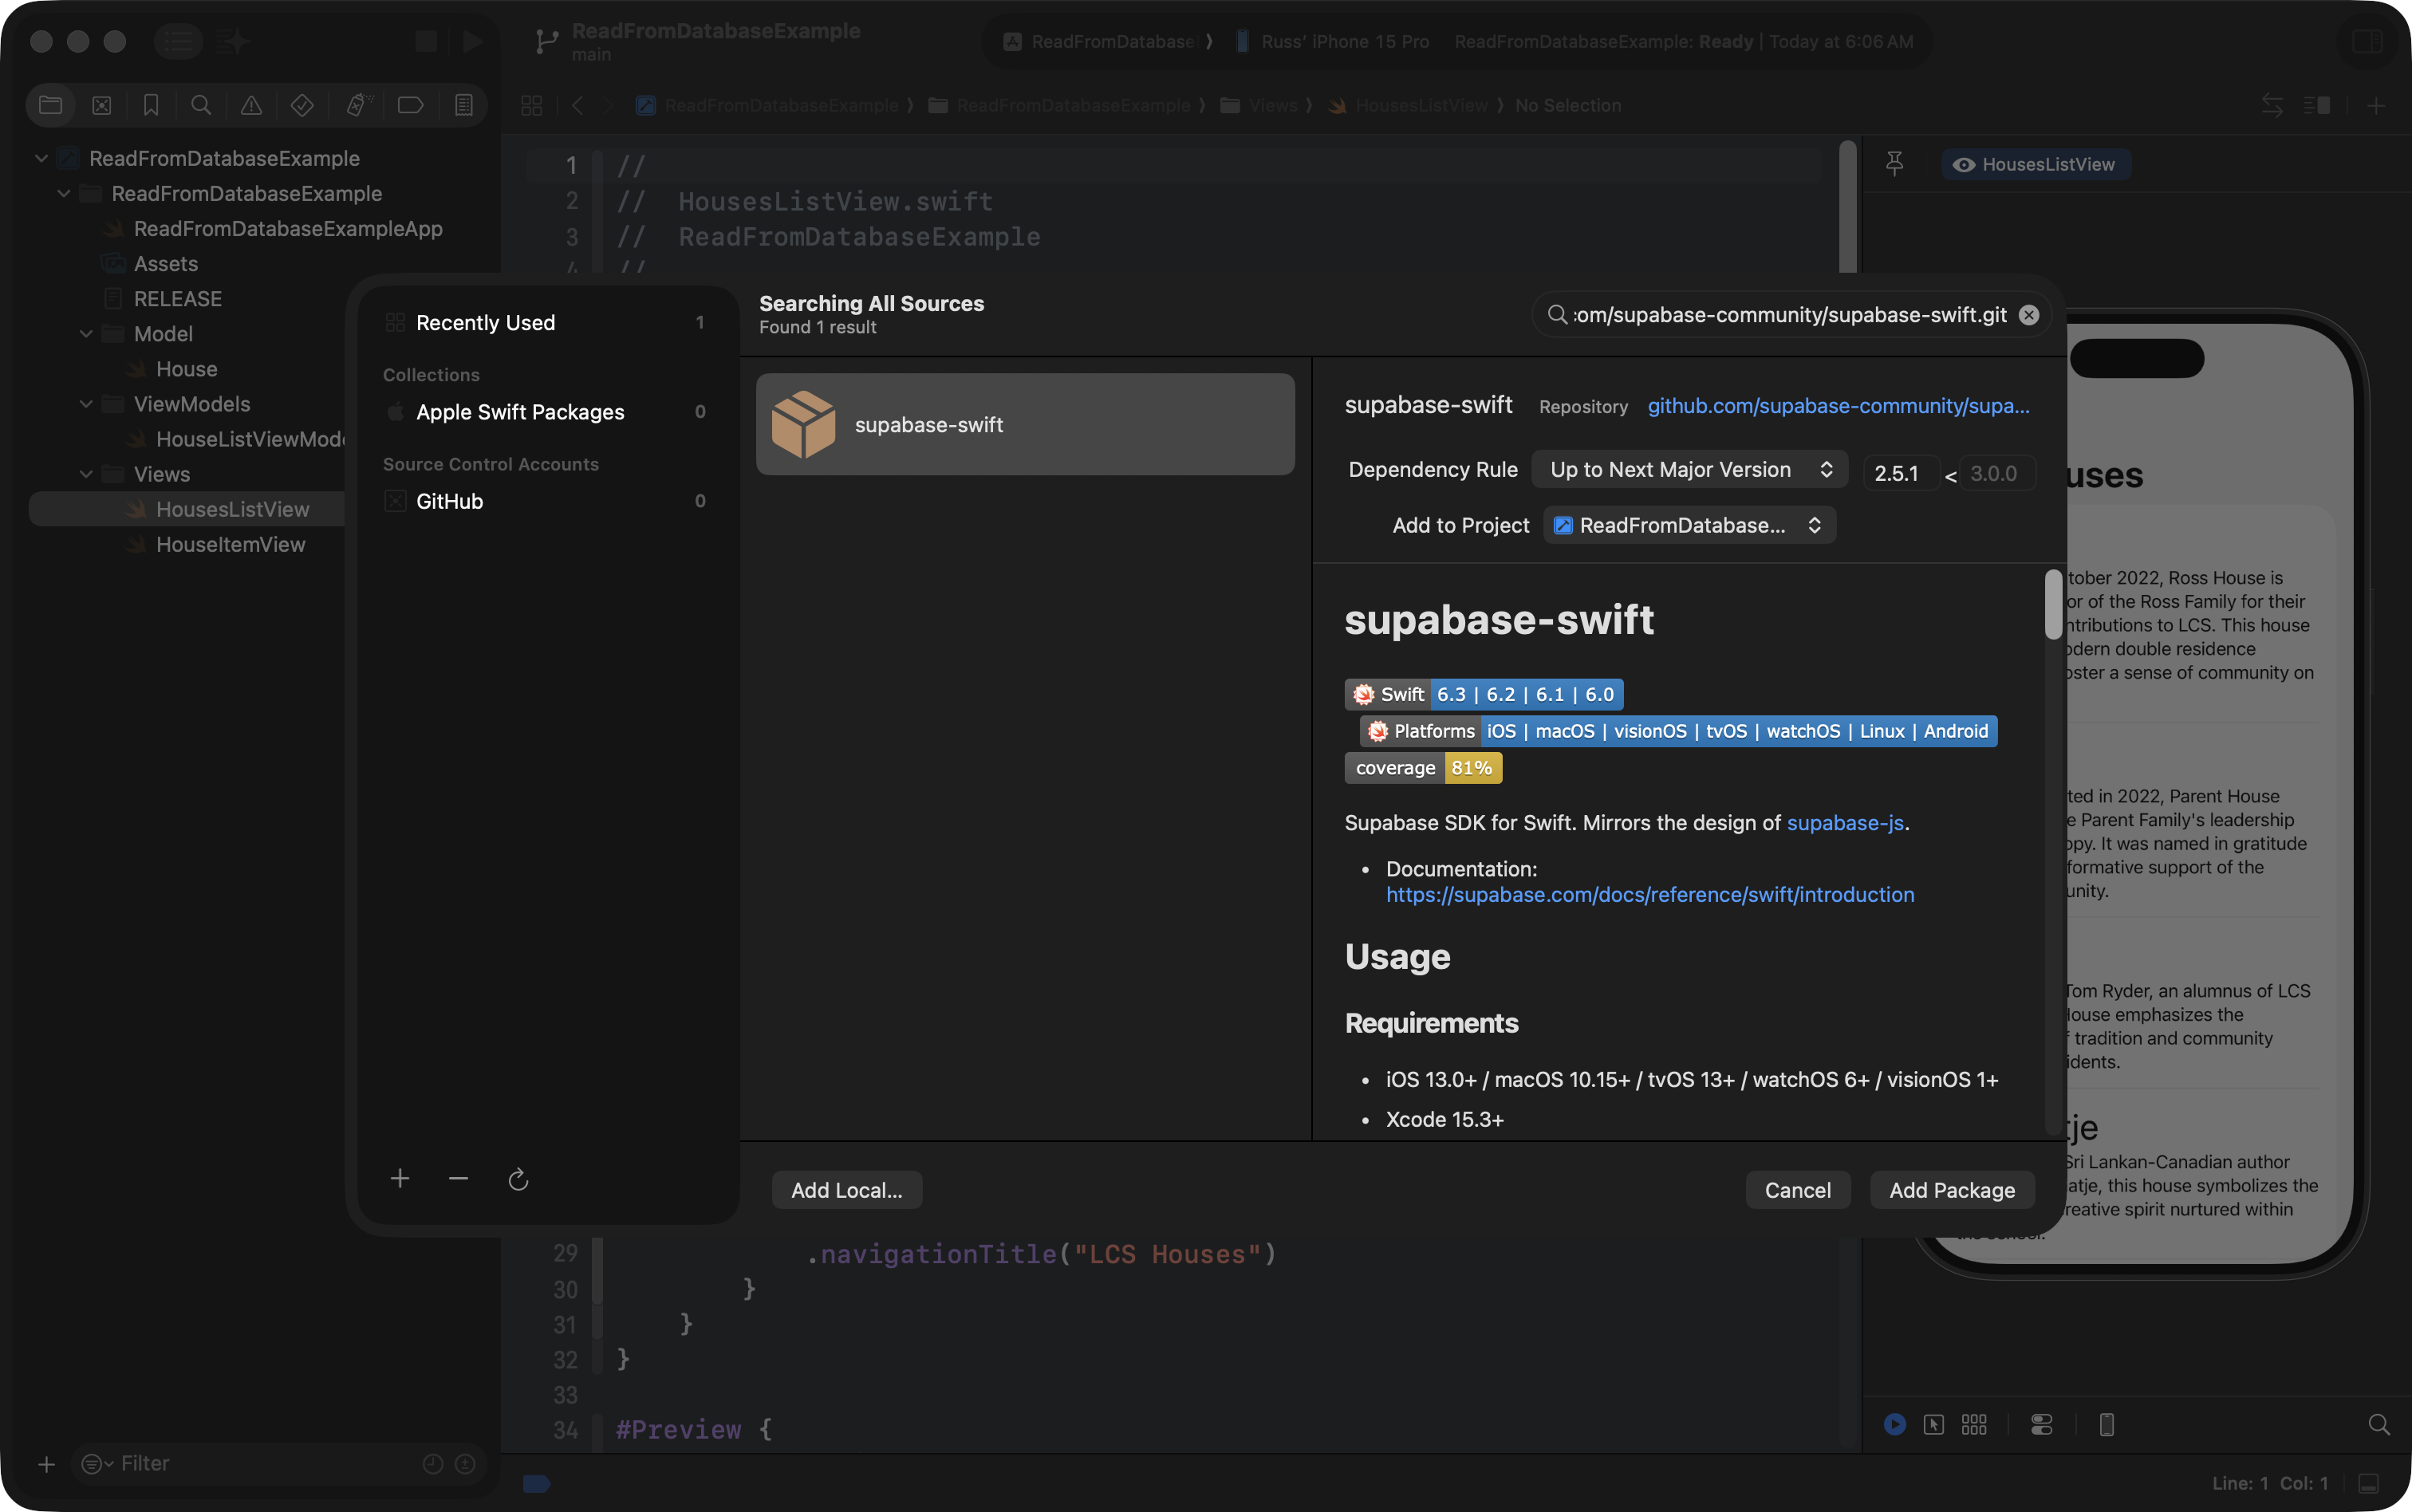
… paste this address:
https://github.com/supabase-community/supabase-swift.git
… so that this package shows up:
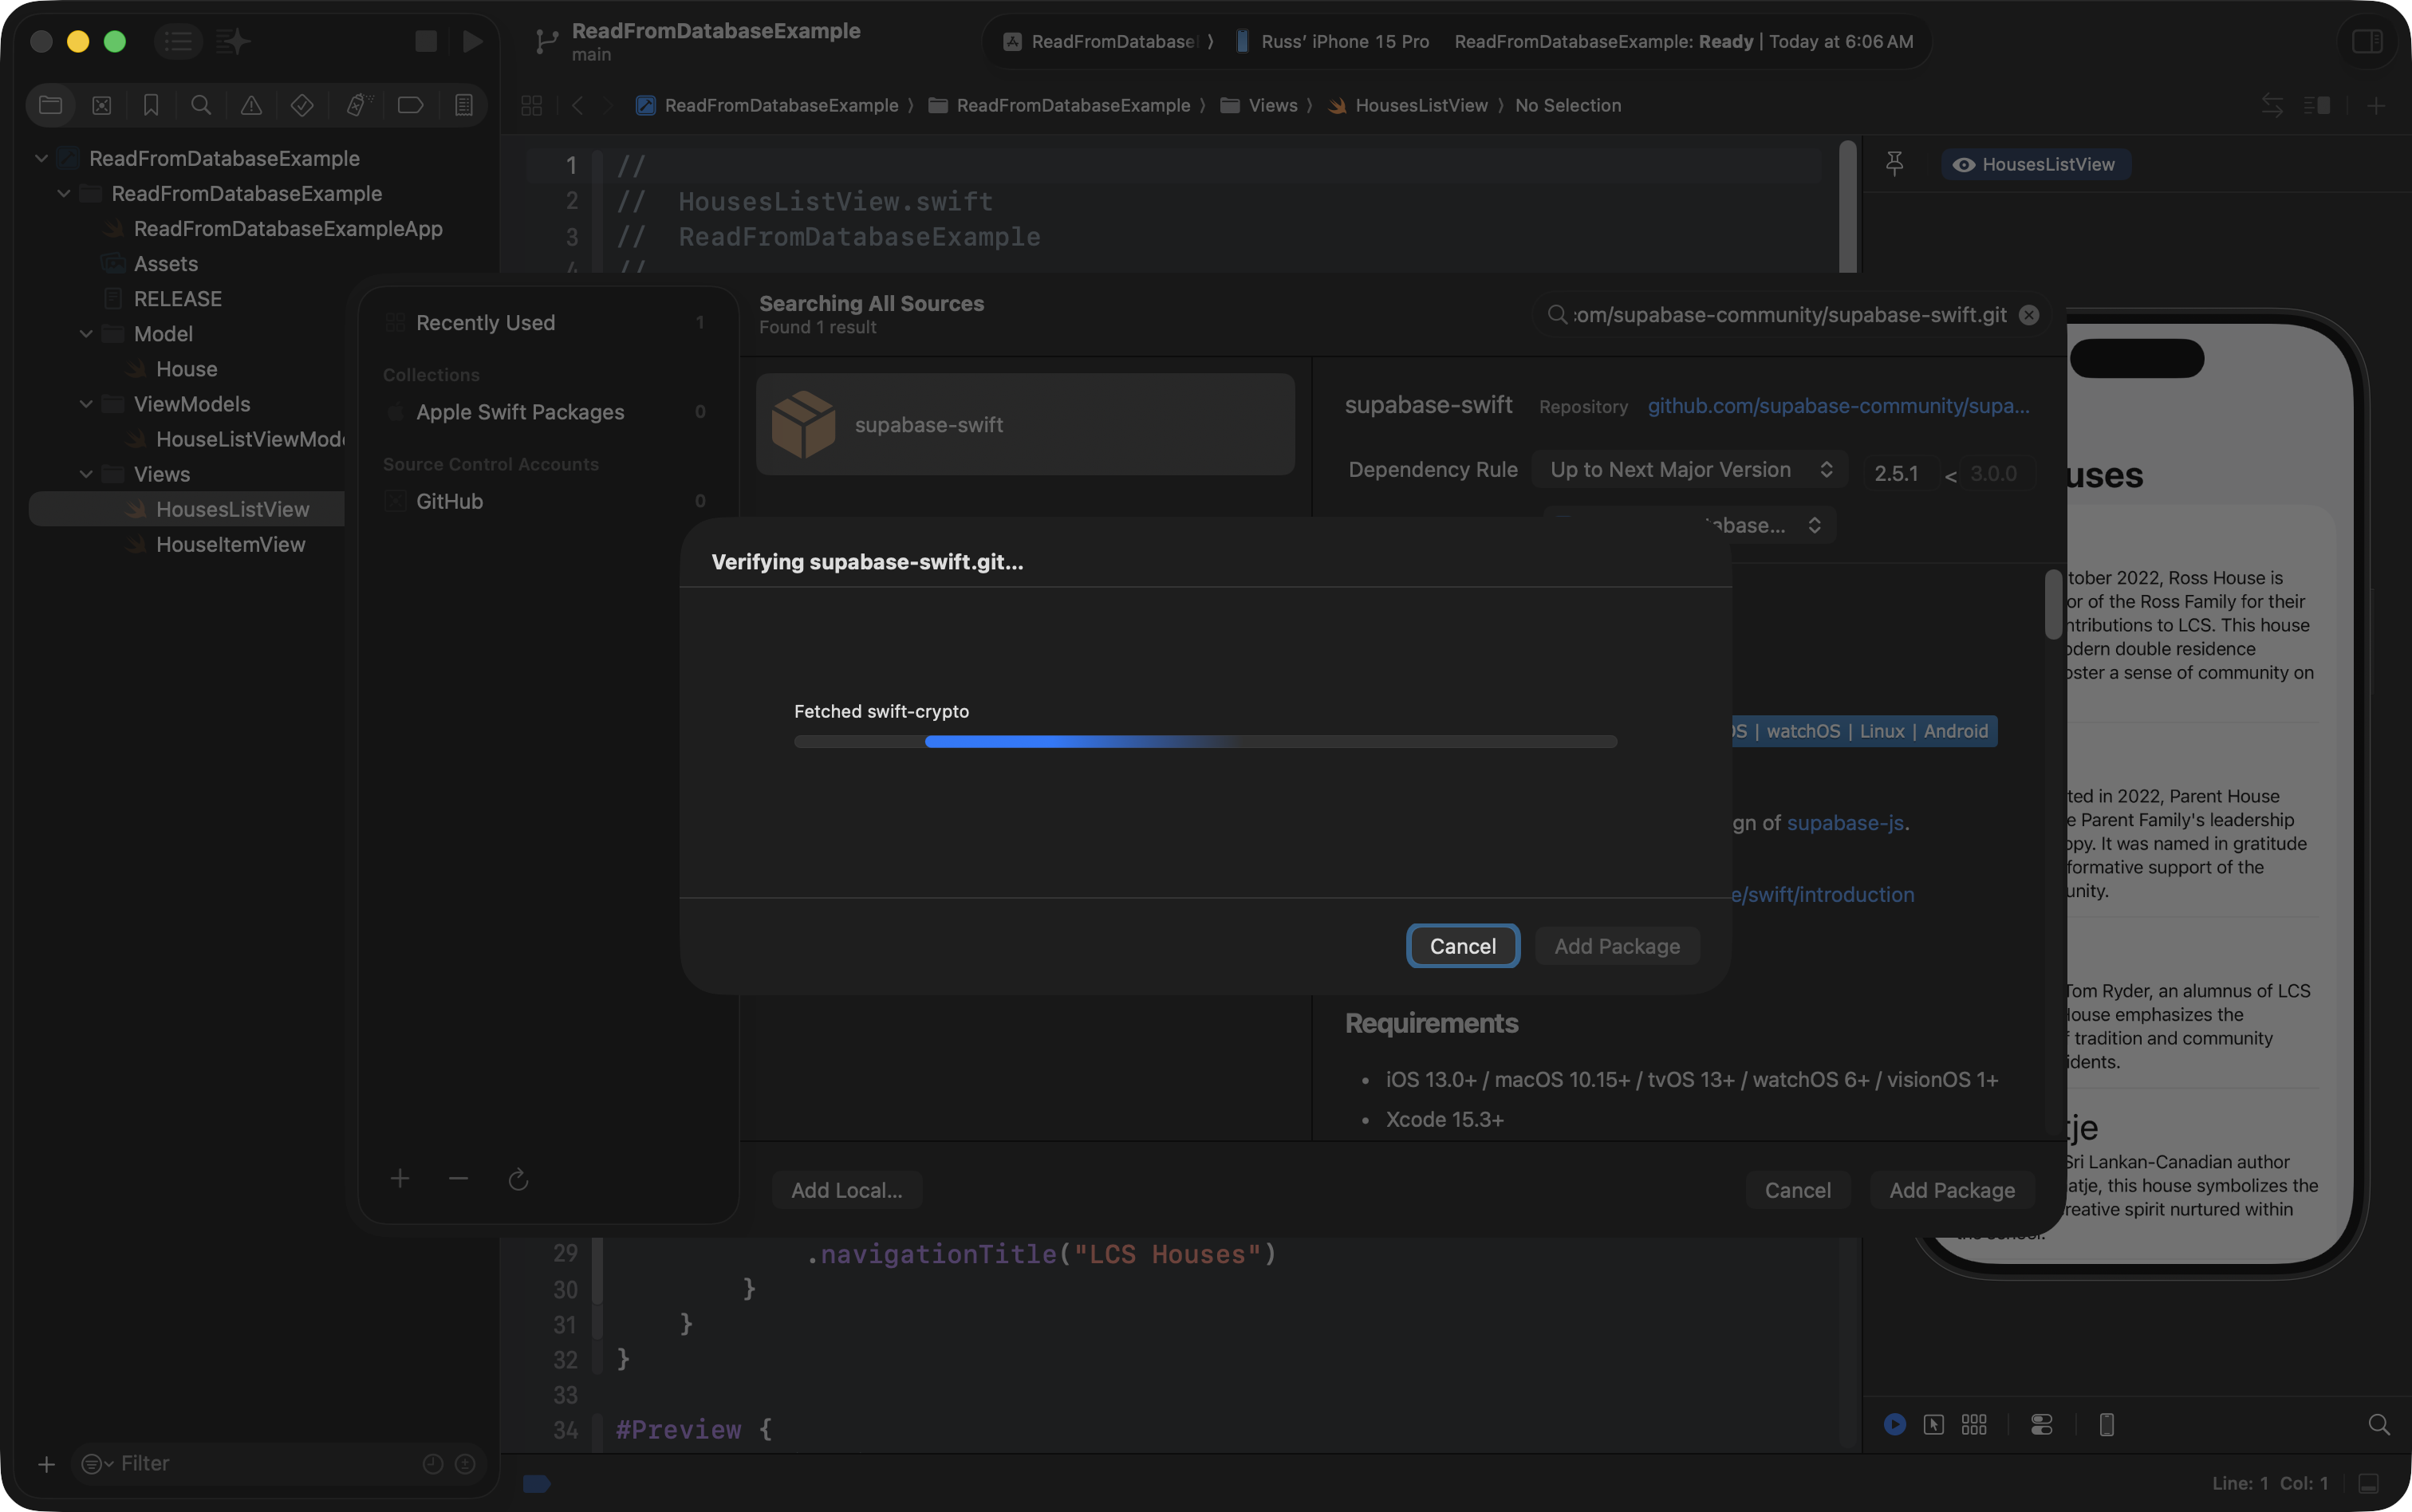
… now press Add Package, and you will see this window, briefly:
After a moment, you will see this window:
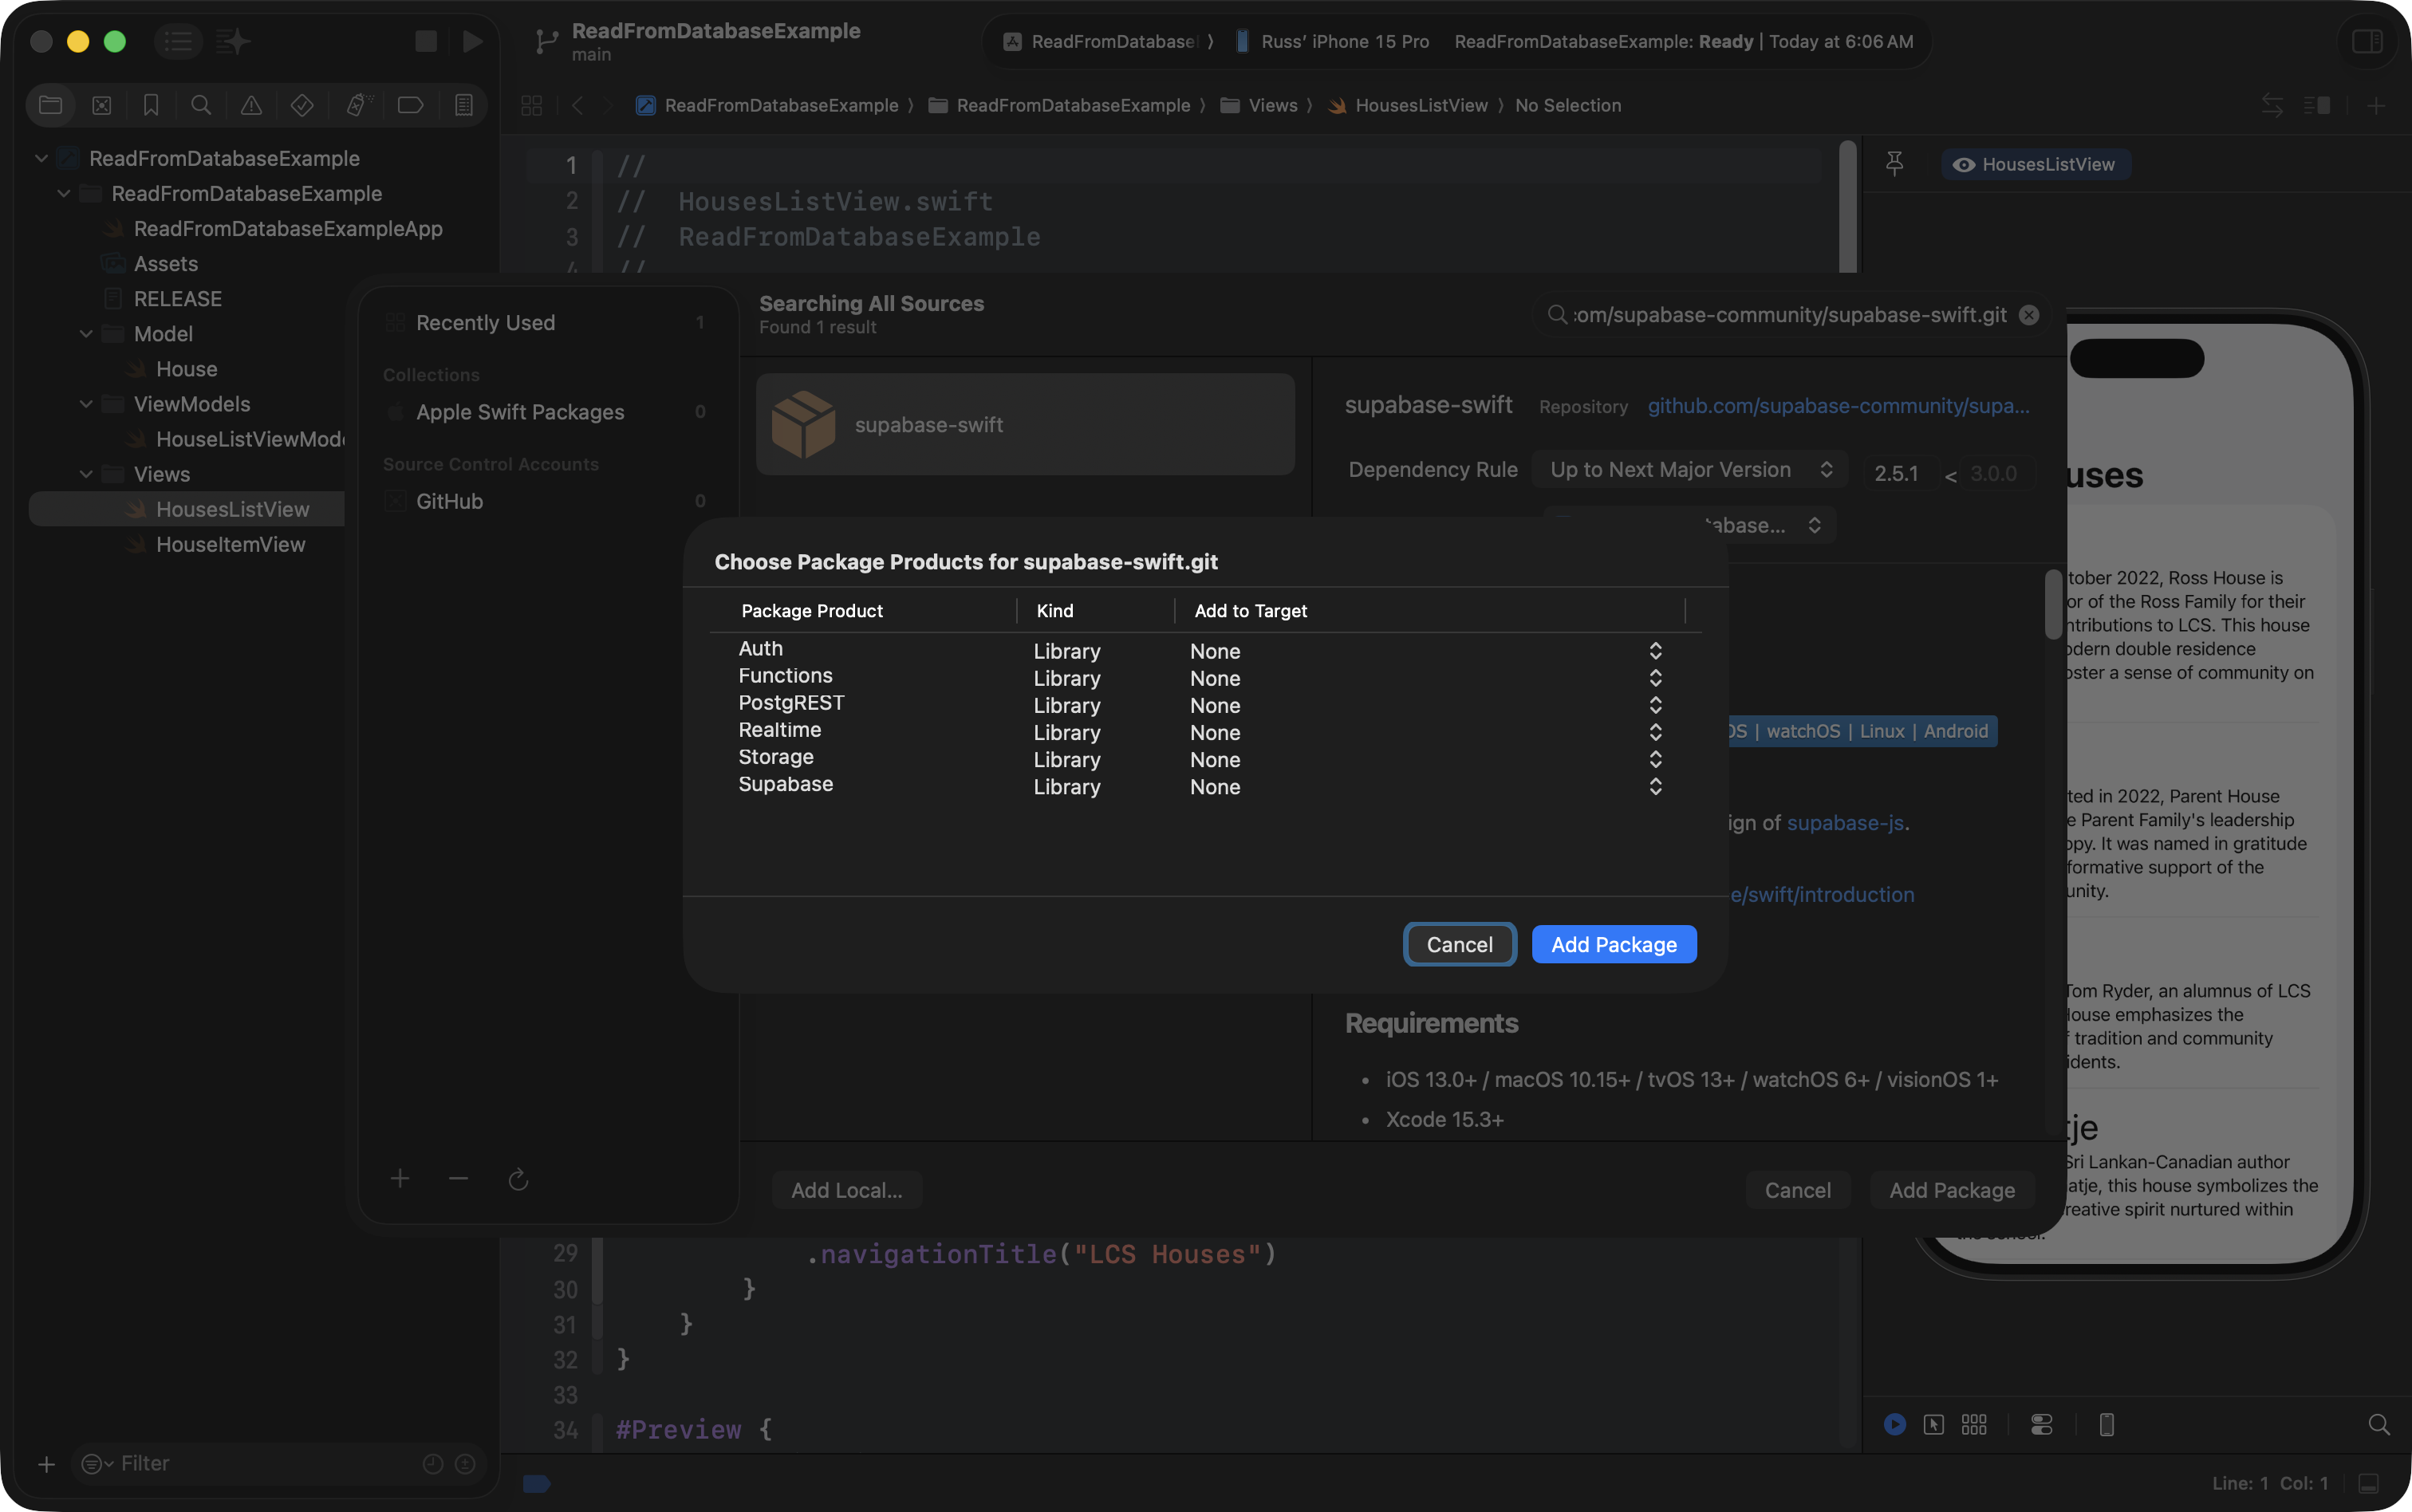
If necessary, drag the bottom-left corner to resize the window so you can see all six package products, then use the menus so that all six package products are being added to the ReadFromDatabaseExample target, like this:
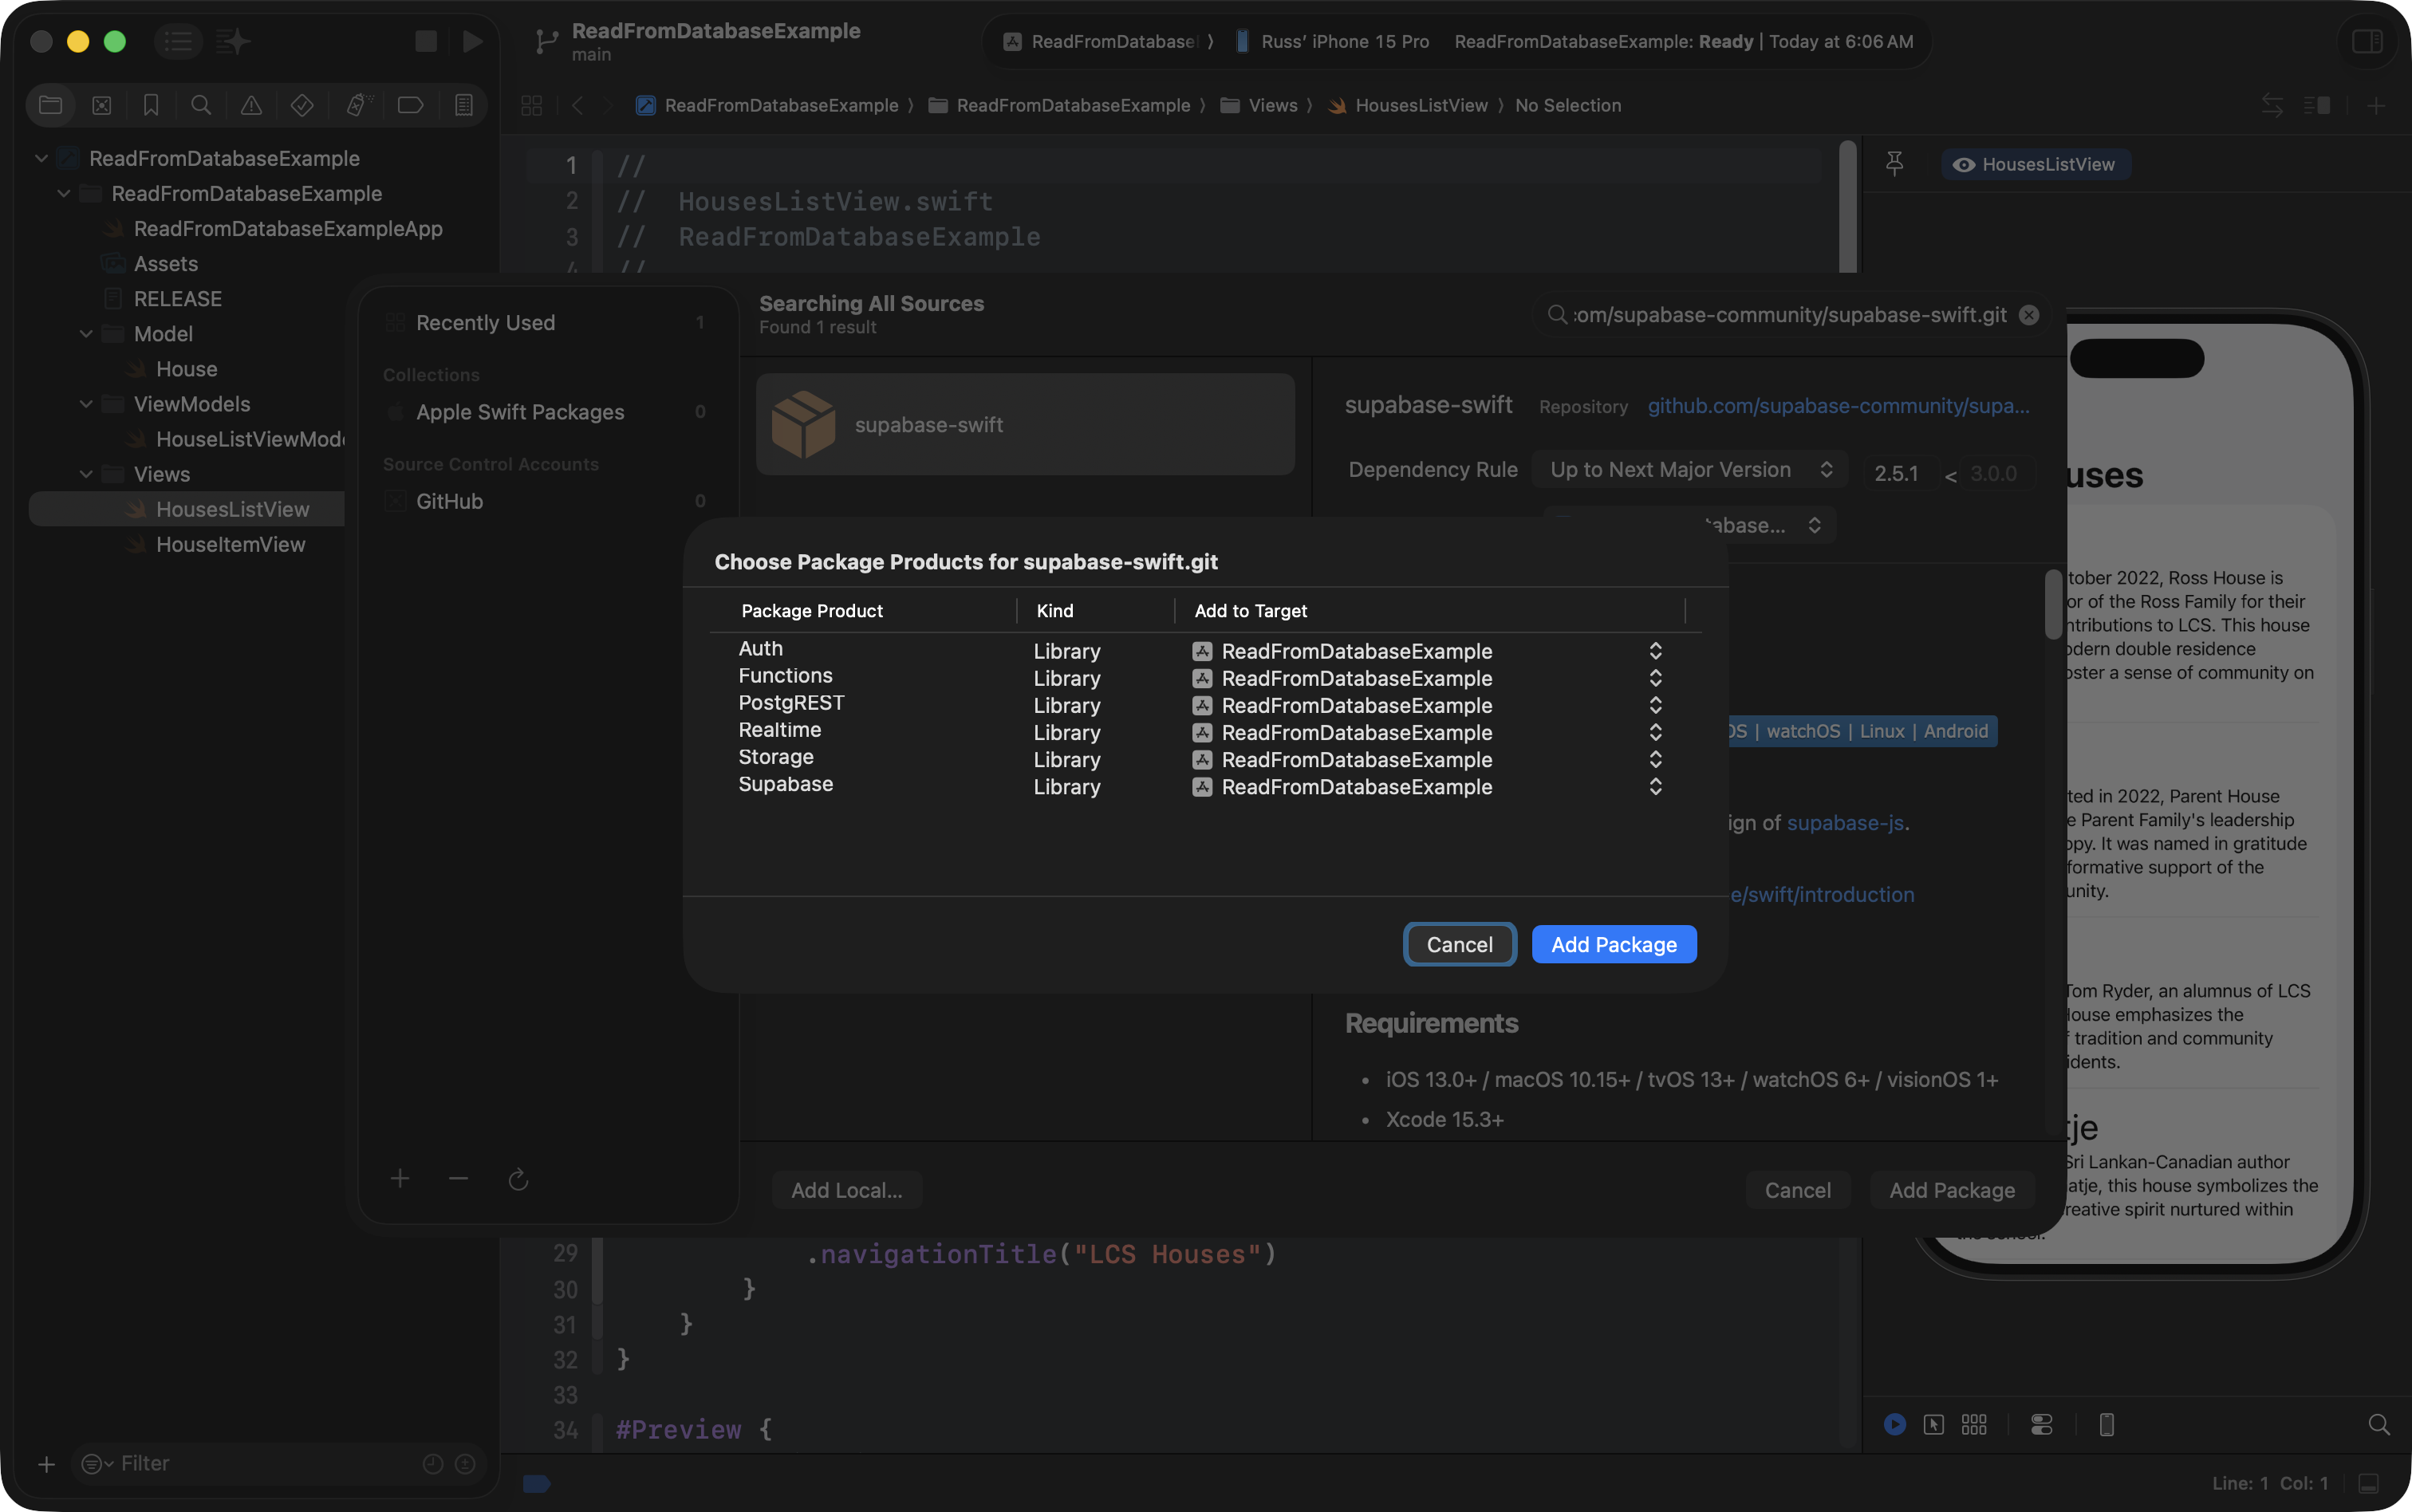
Now, press Add Package again, and in a moment, you will see your project like this:
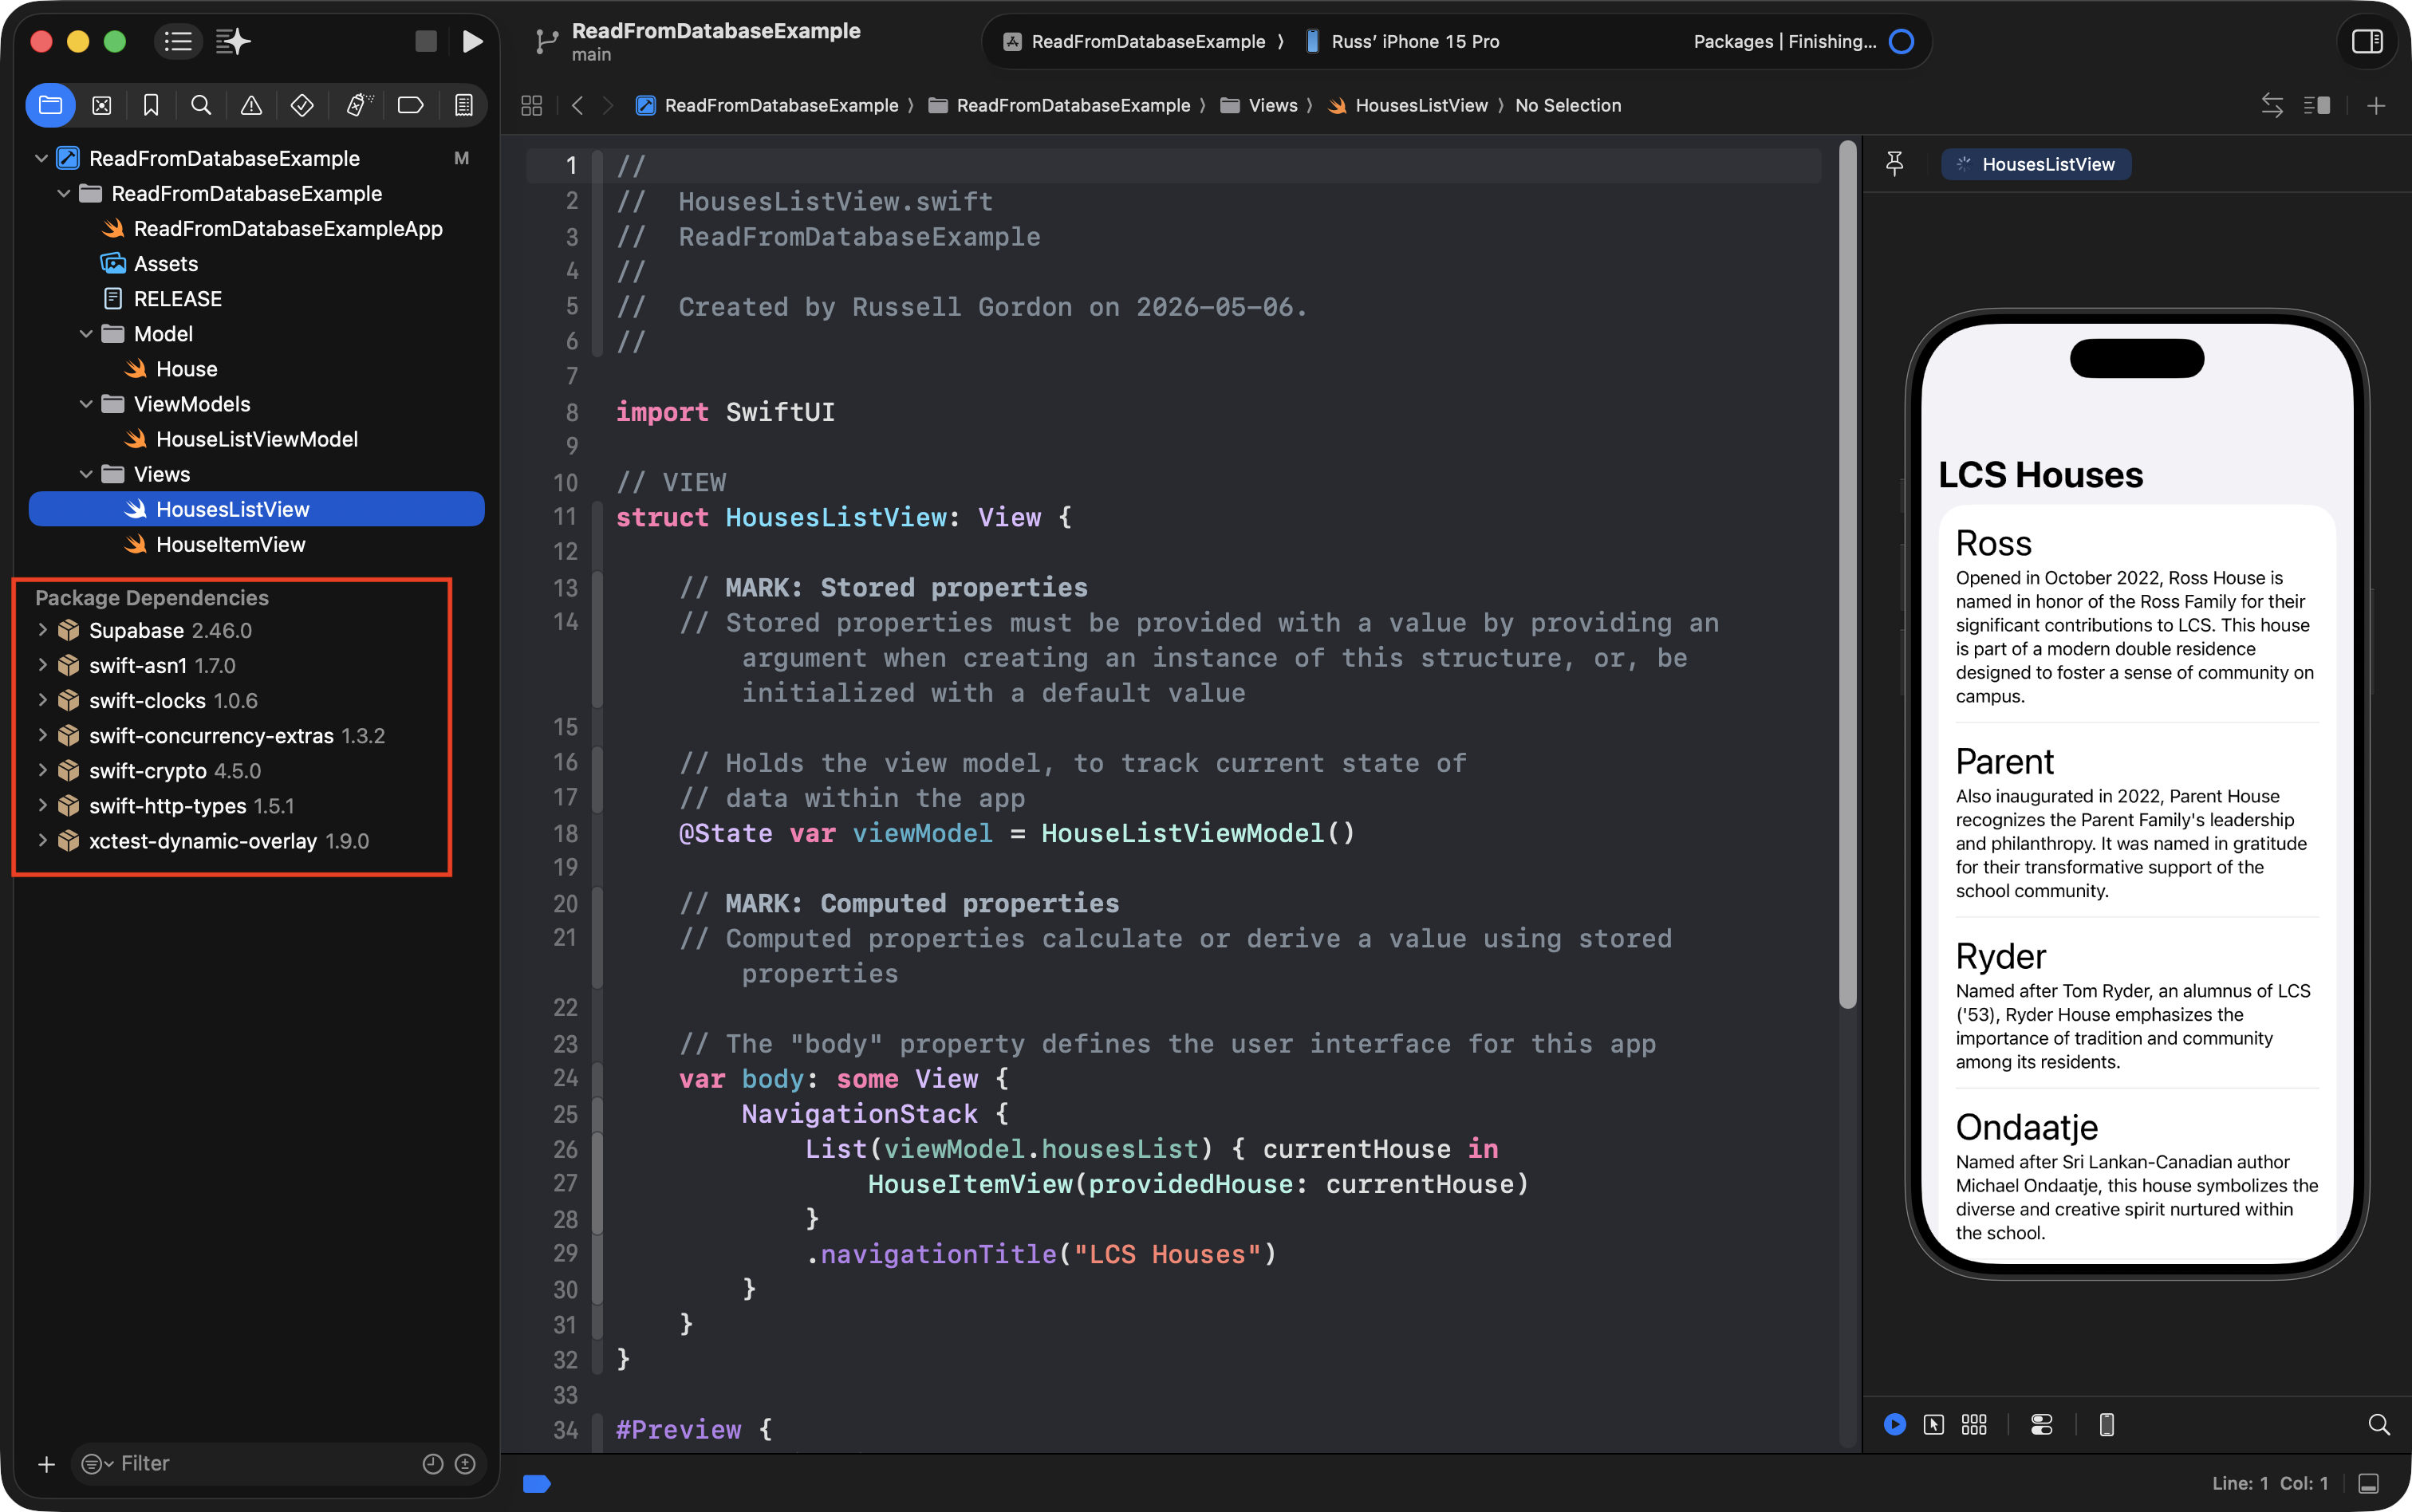
These are the package dependencies required to read from a remote database hosted at Supabase.
Commit your changes at this point in time using Option-Command-C and use this commit message:
Added package dependency to enable communication with remote database.
Add helper file
Your project needs to identify itself to Supabase – it must declare which database to connect to, and provide proof that it is allowed to “talk” to that database.
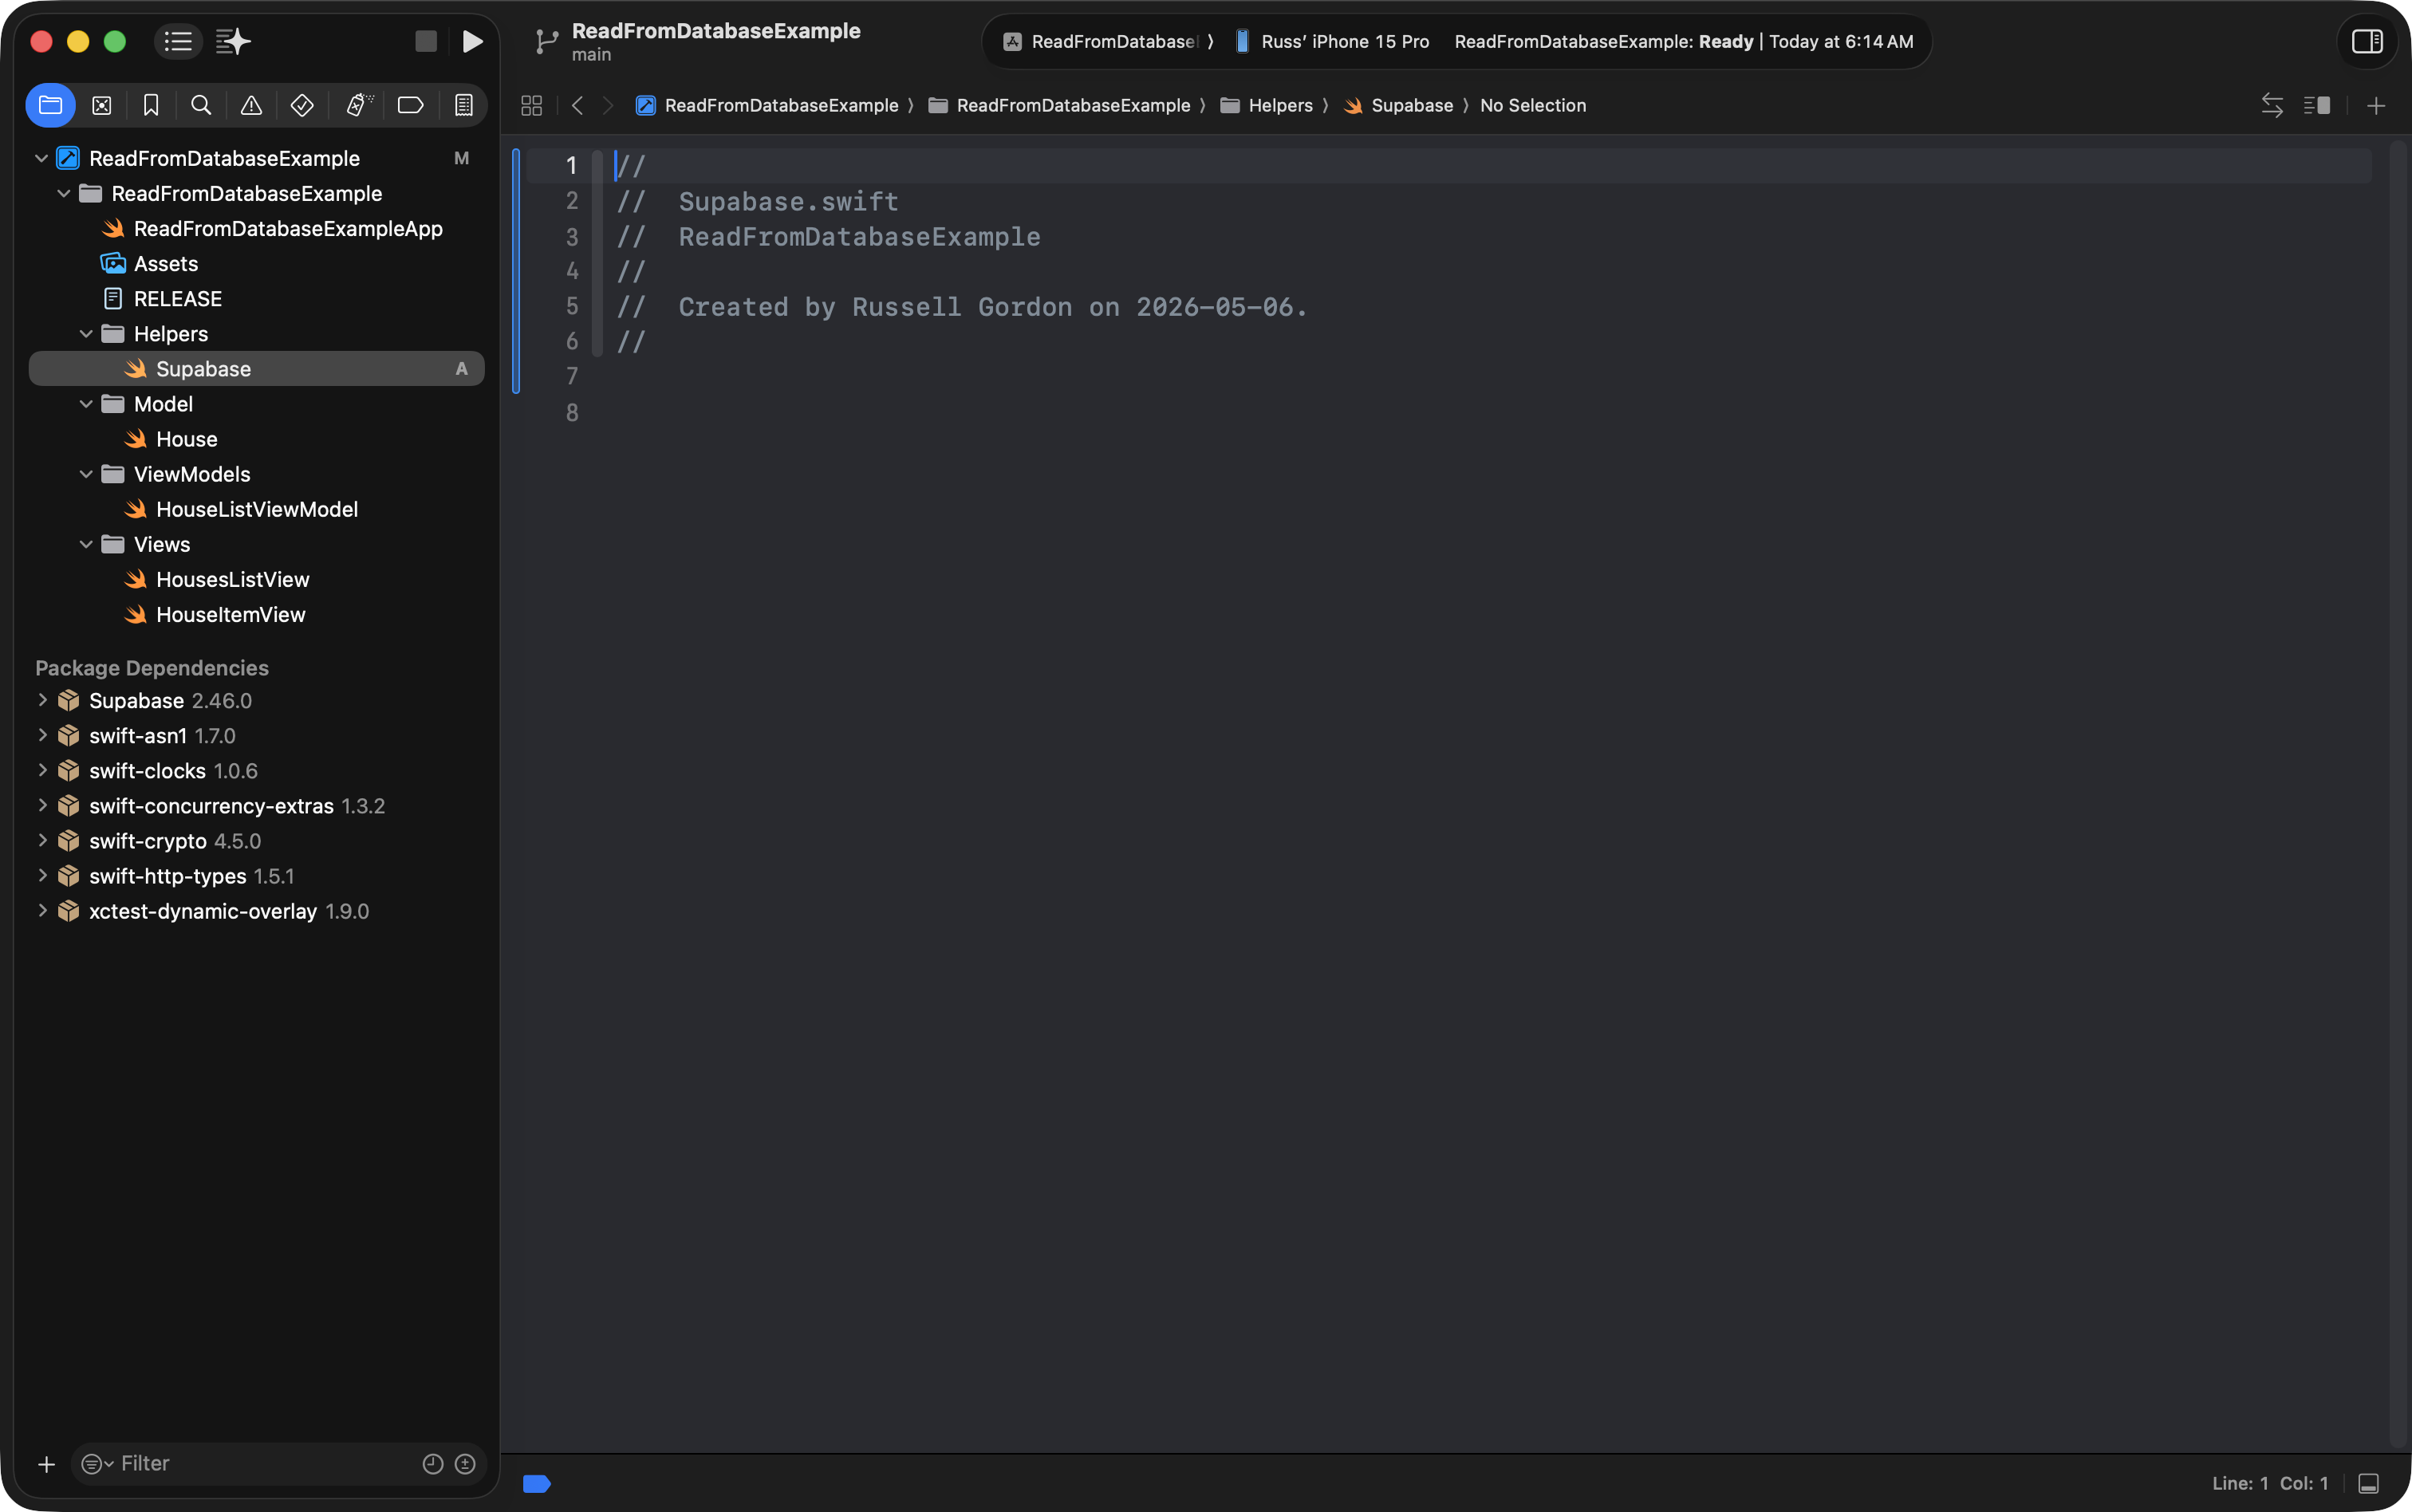
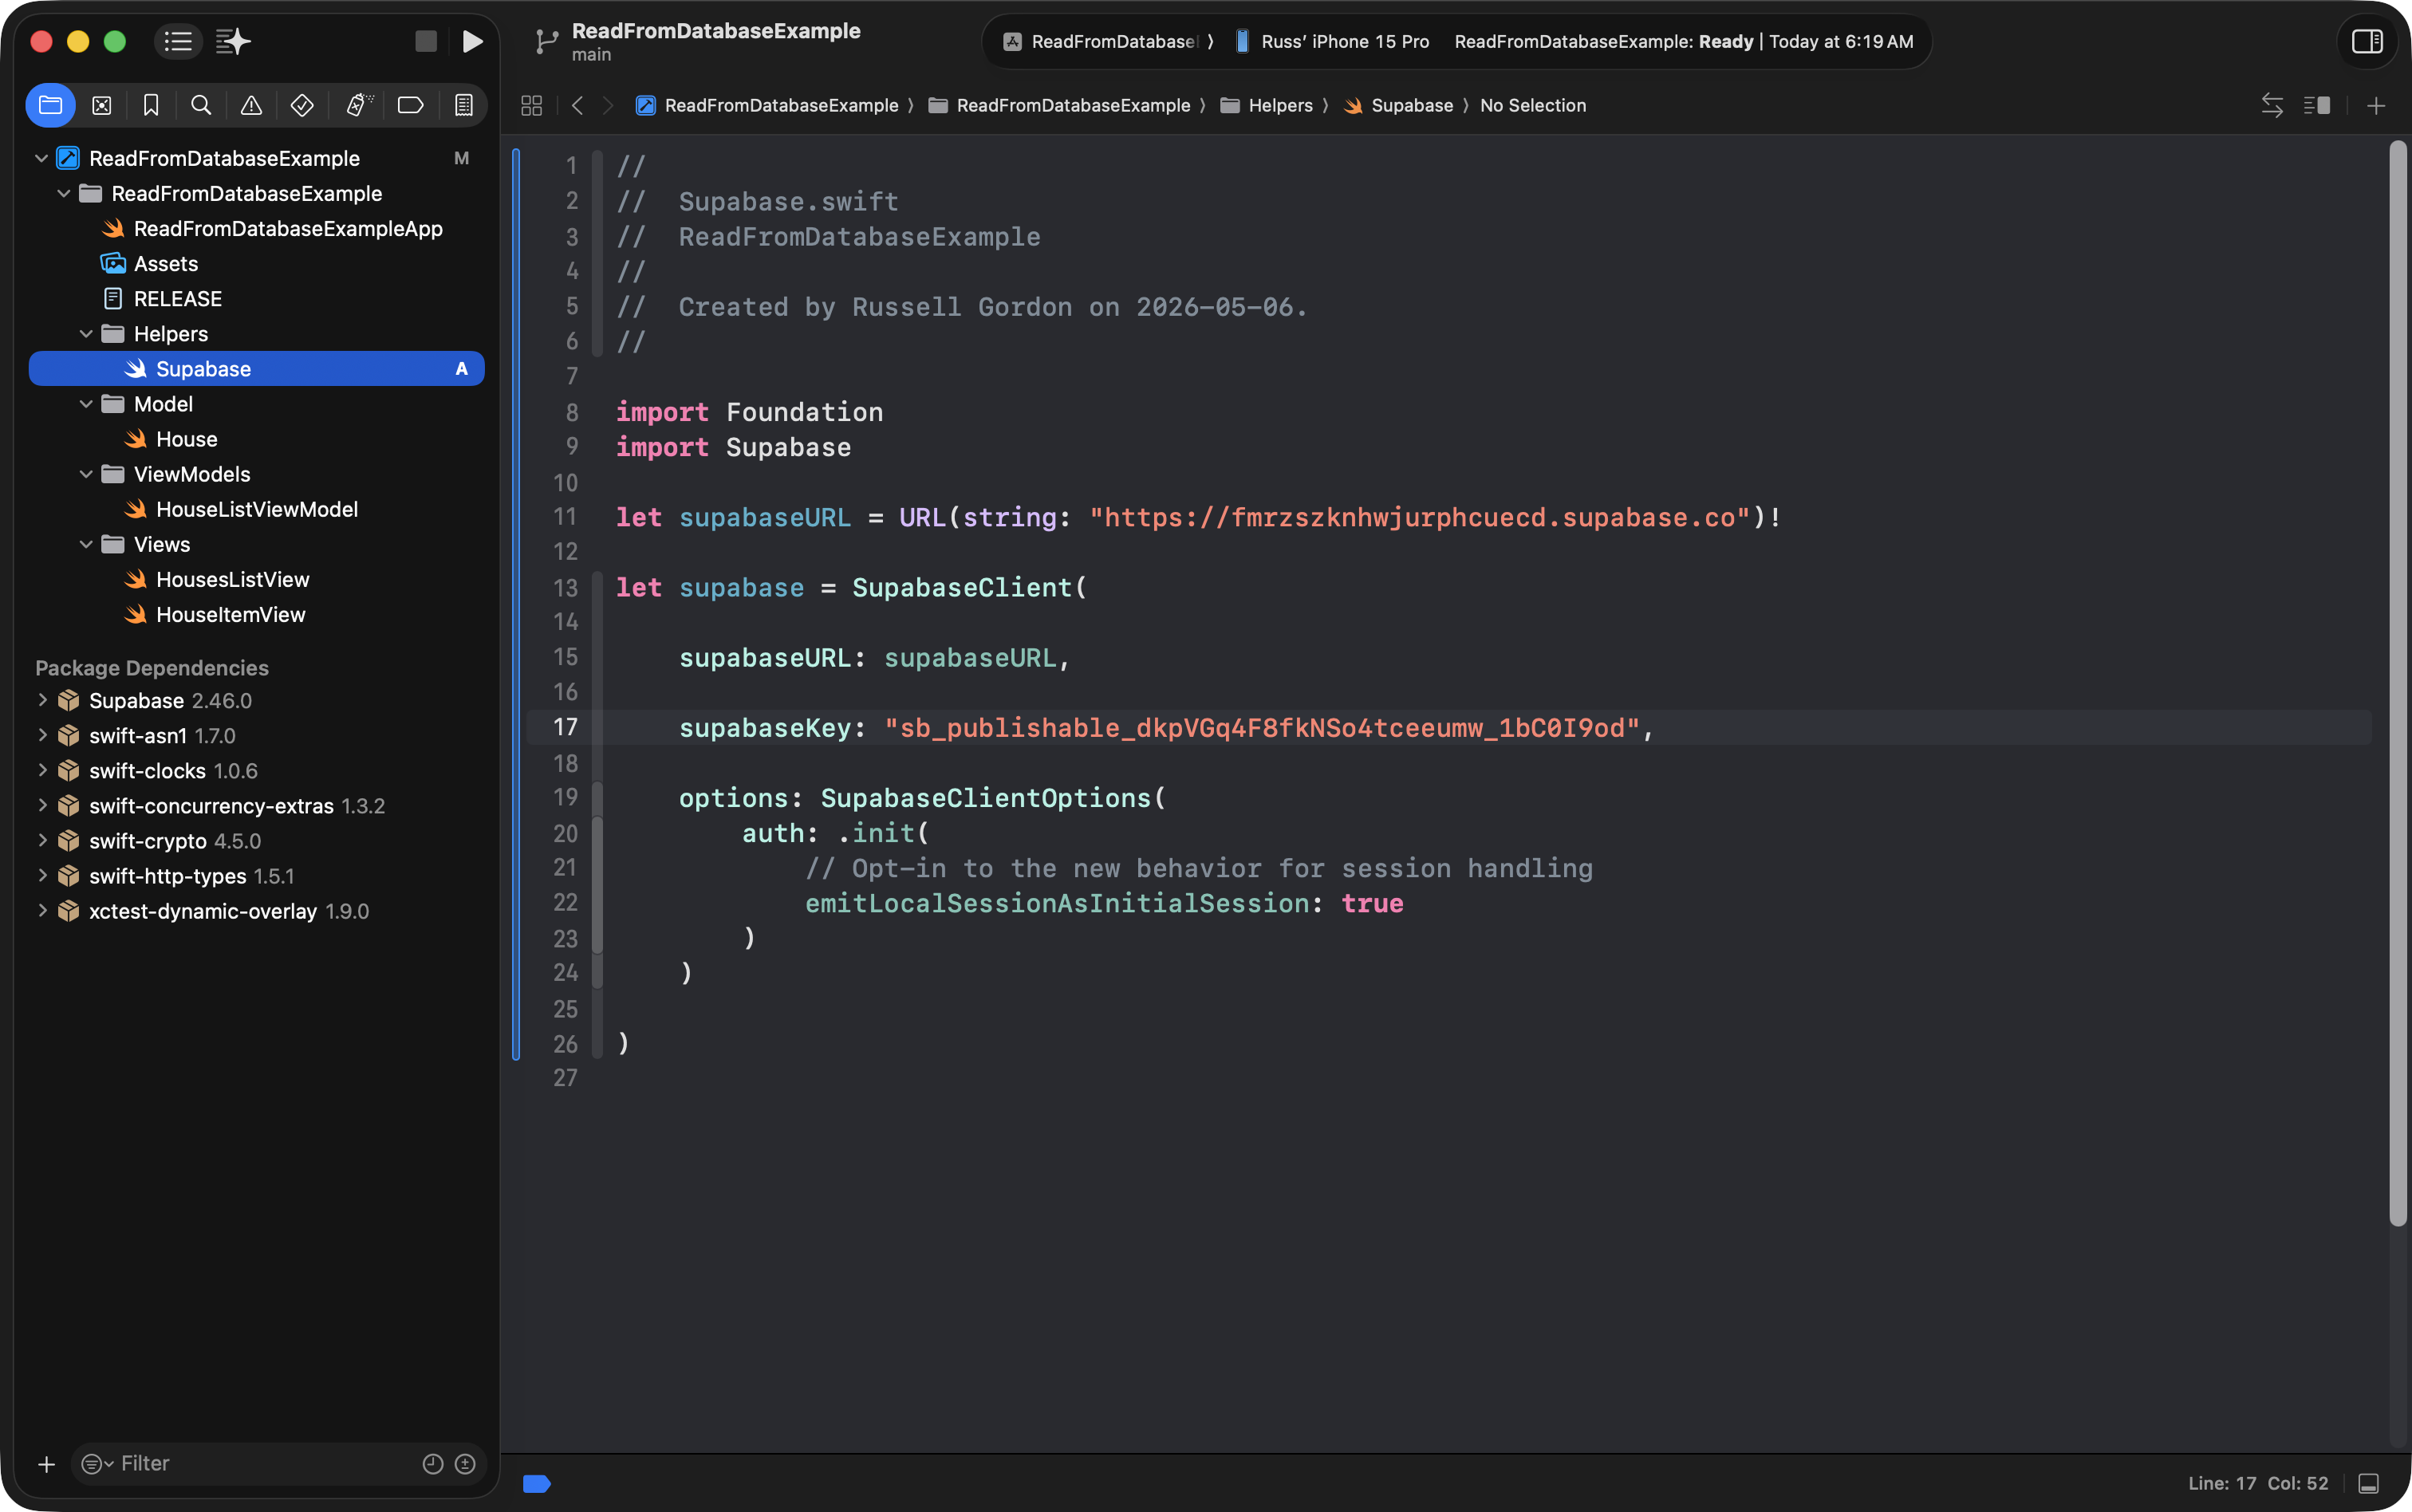
To do that, please create a new group named Helpers and a new empty file named Supabase.swift, like this:
Then copy-paste this code into the file:
import Foundation
import Supabase

let supabaseURL = URL(string: "PROJECT_URL")!

let supabase = SupabaseClient(

    supabaseURL: supabaseURL,

    supabaseKey: "PROJECT_KEY",

    options: SupabaseClientOptions(
        auth: .init(
            // Opt-in to the new behavior for session handling
            emitLocalSessionAsInitialSession: true
        )
    )

)
… like so:
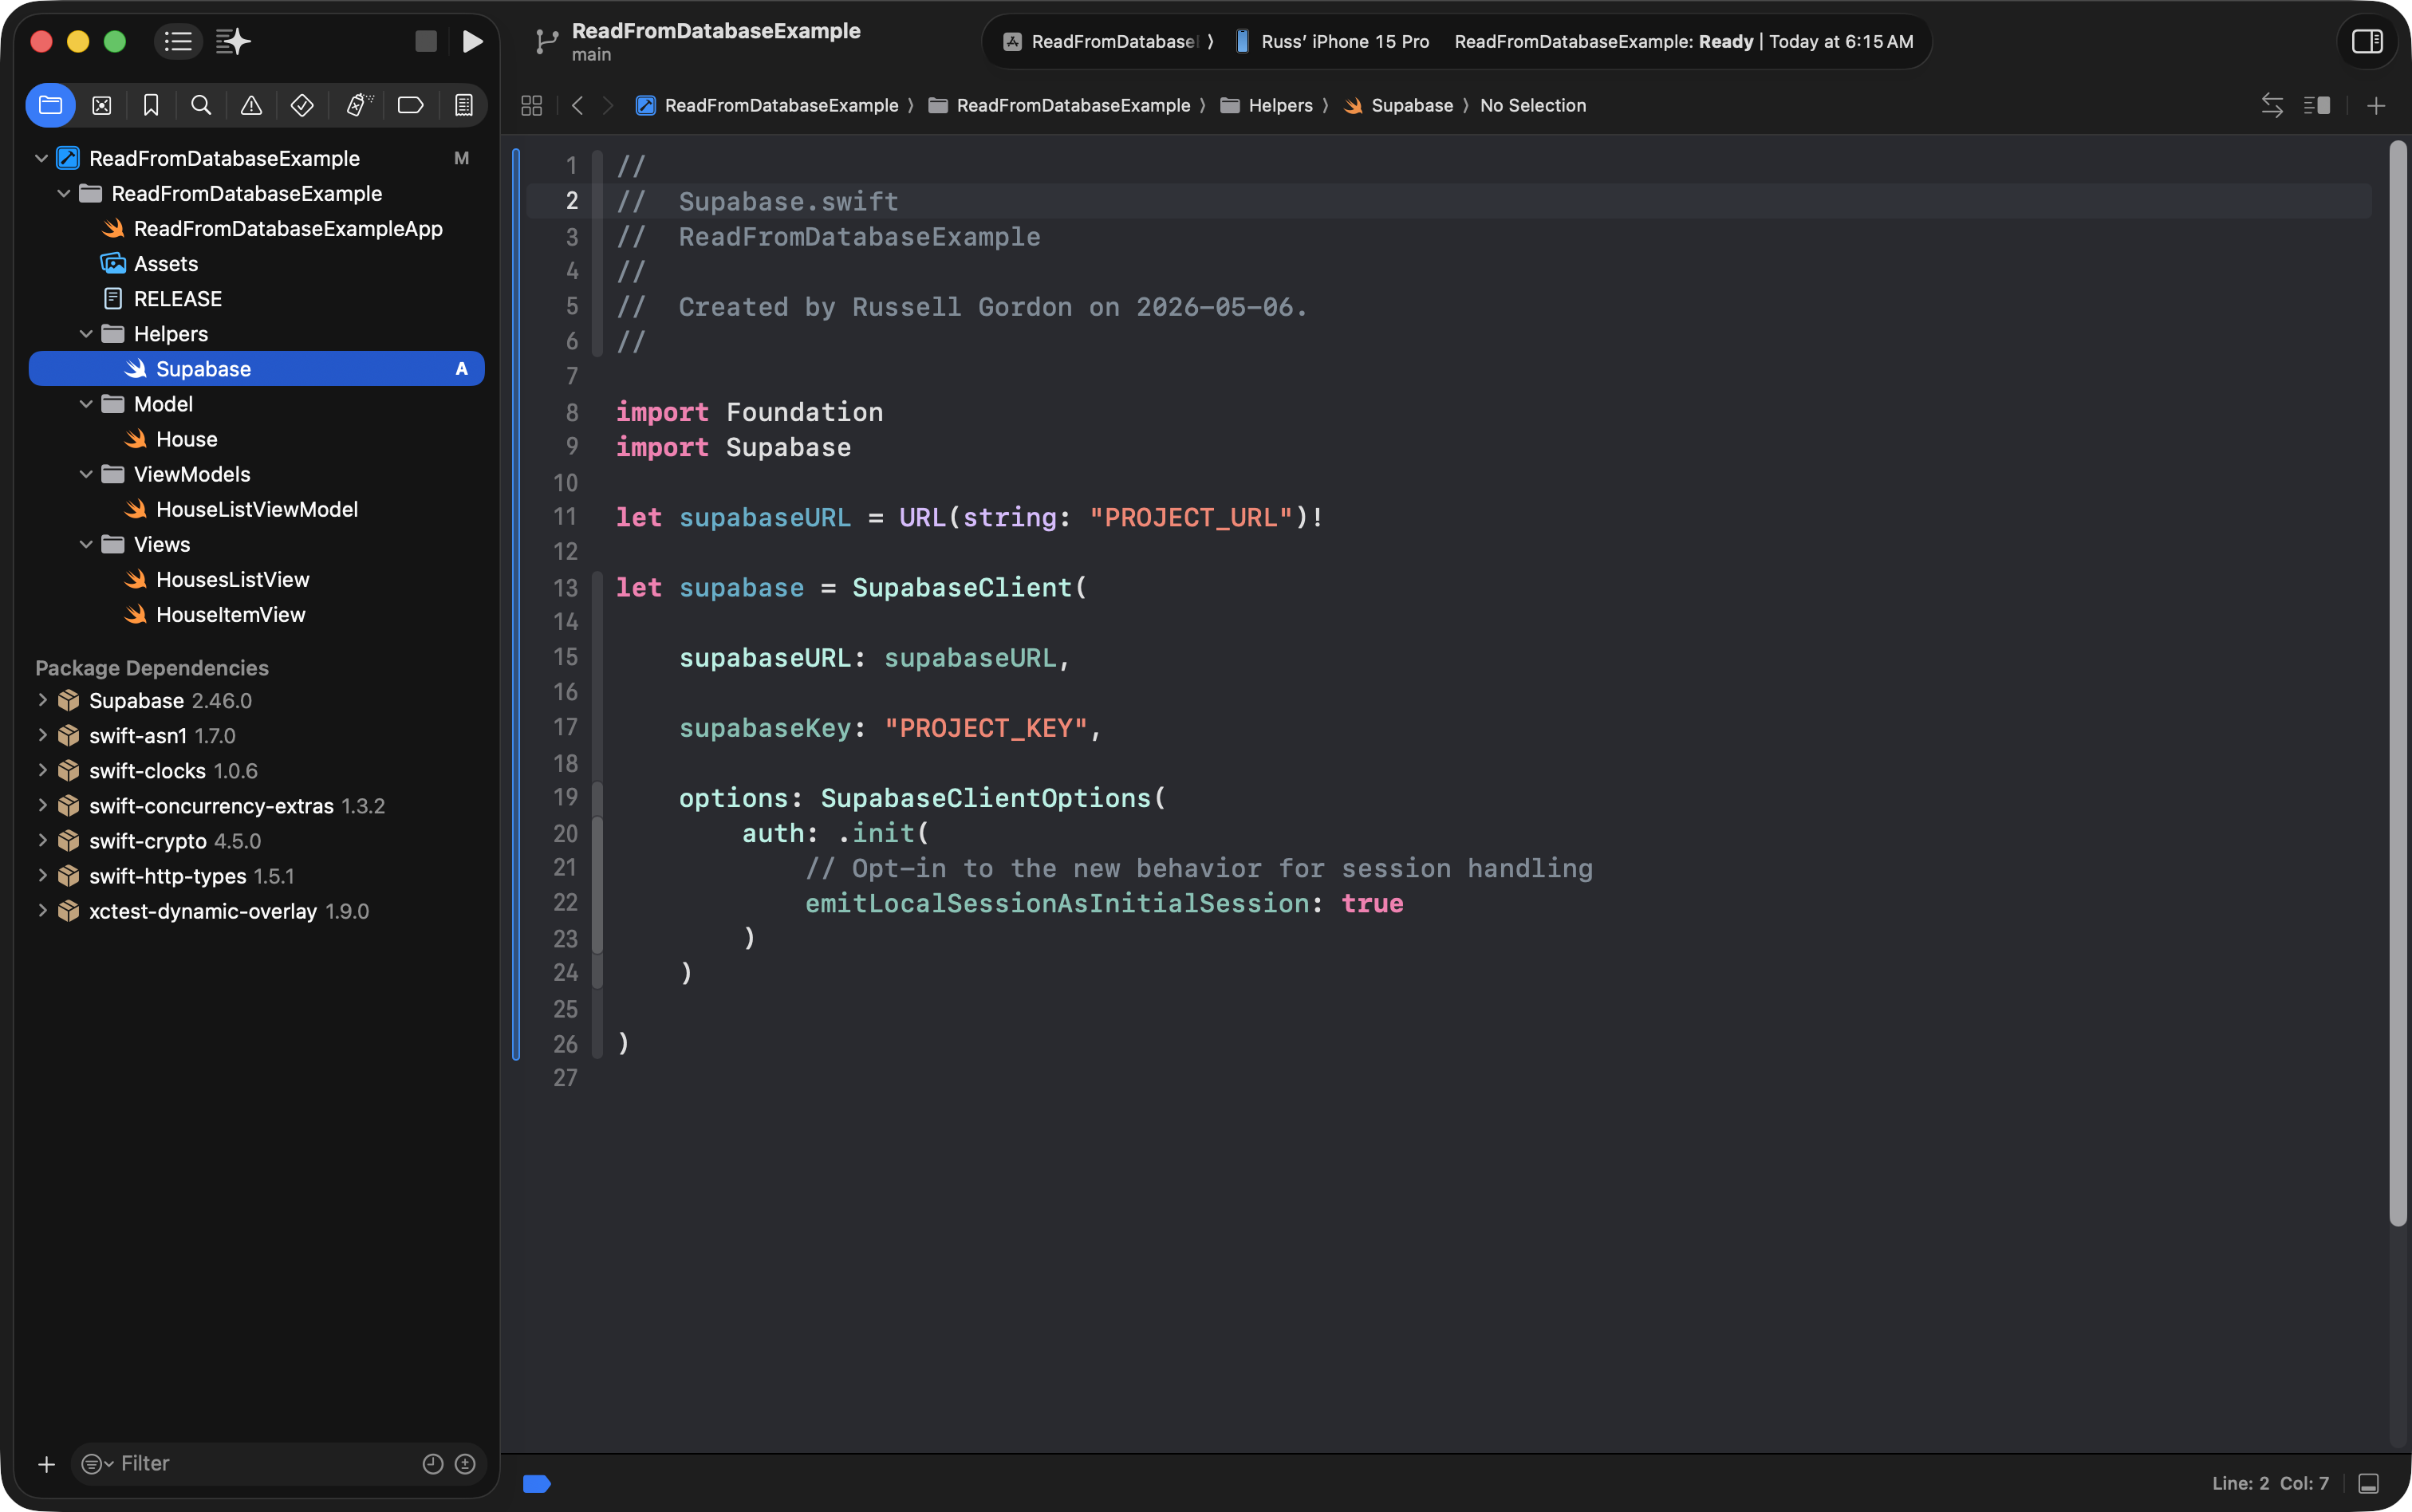
You need to replace the PROJECT_URL placeholder and the PROJECT_KEY placeholders.
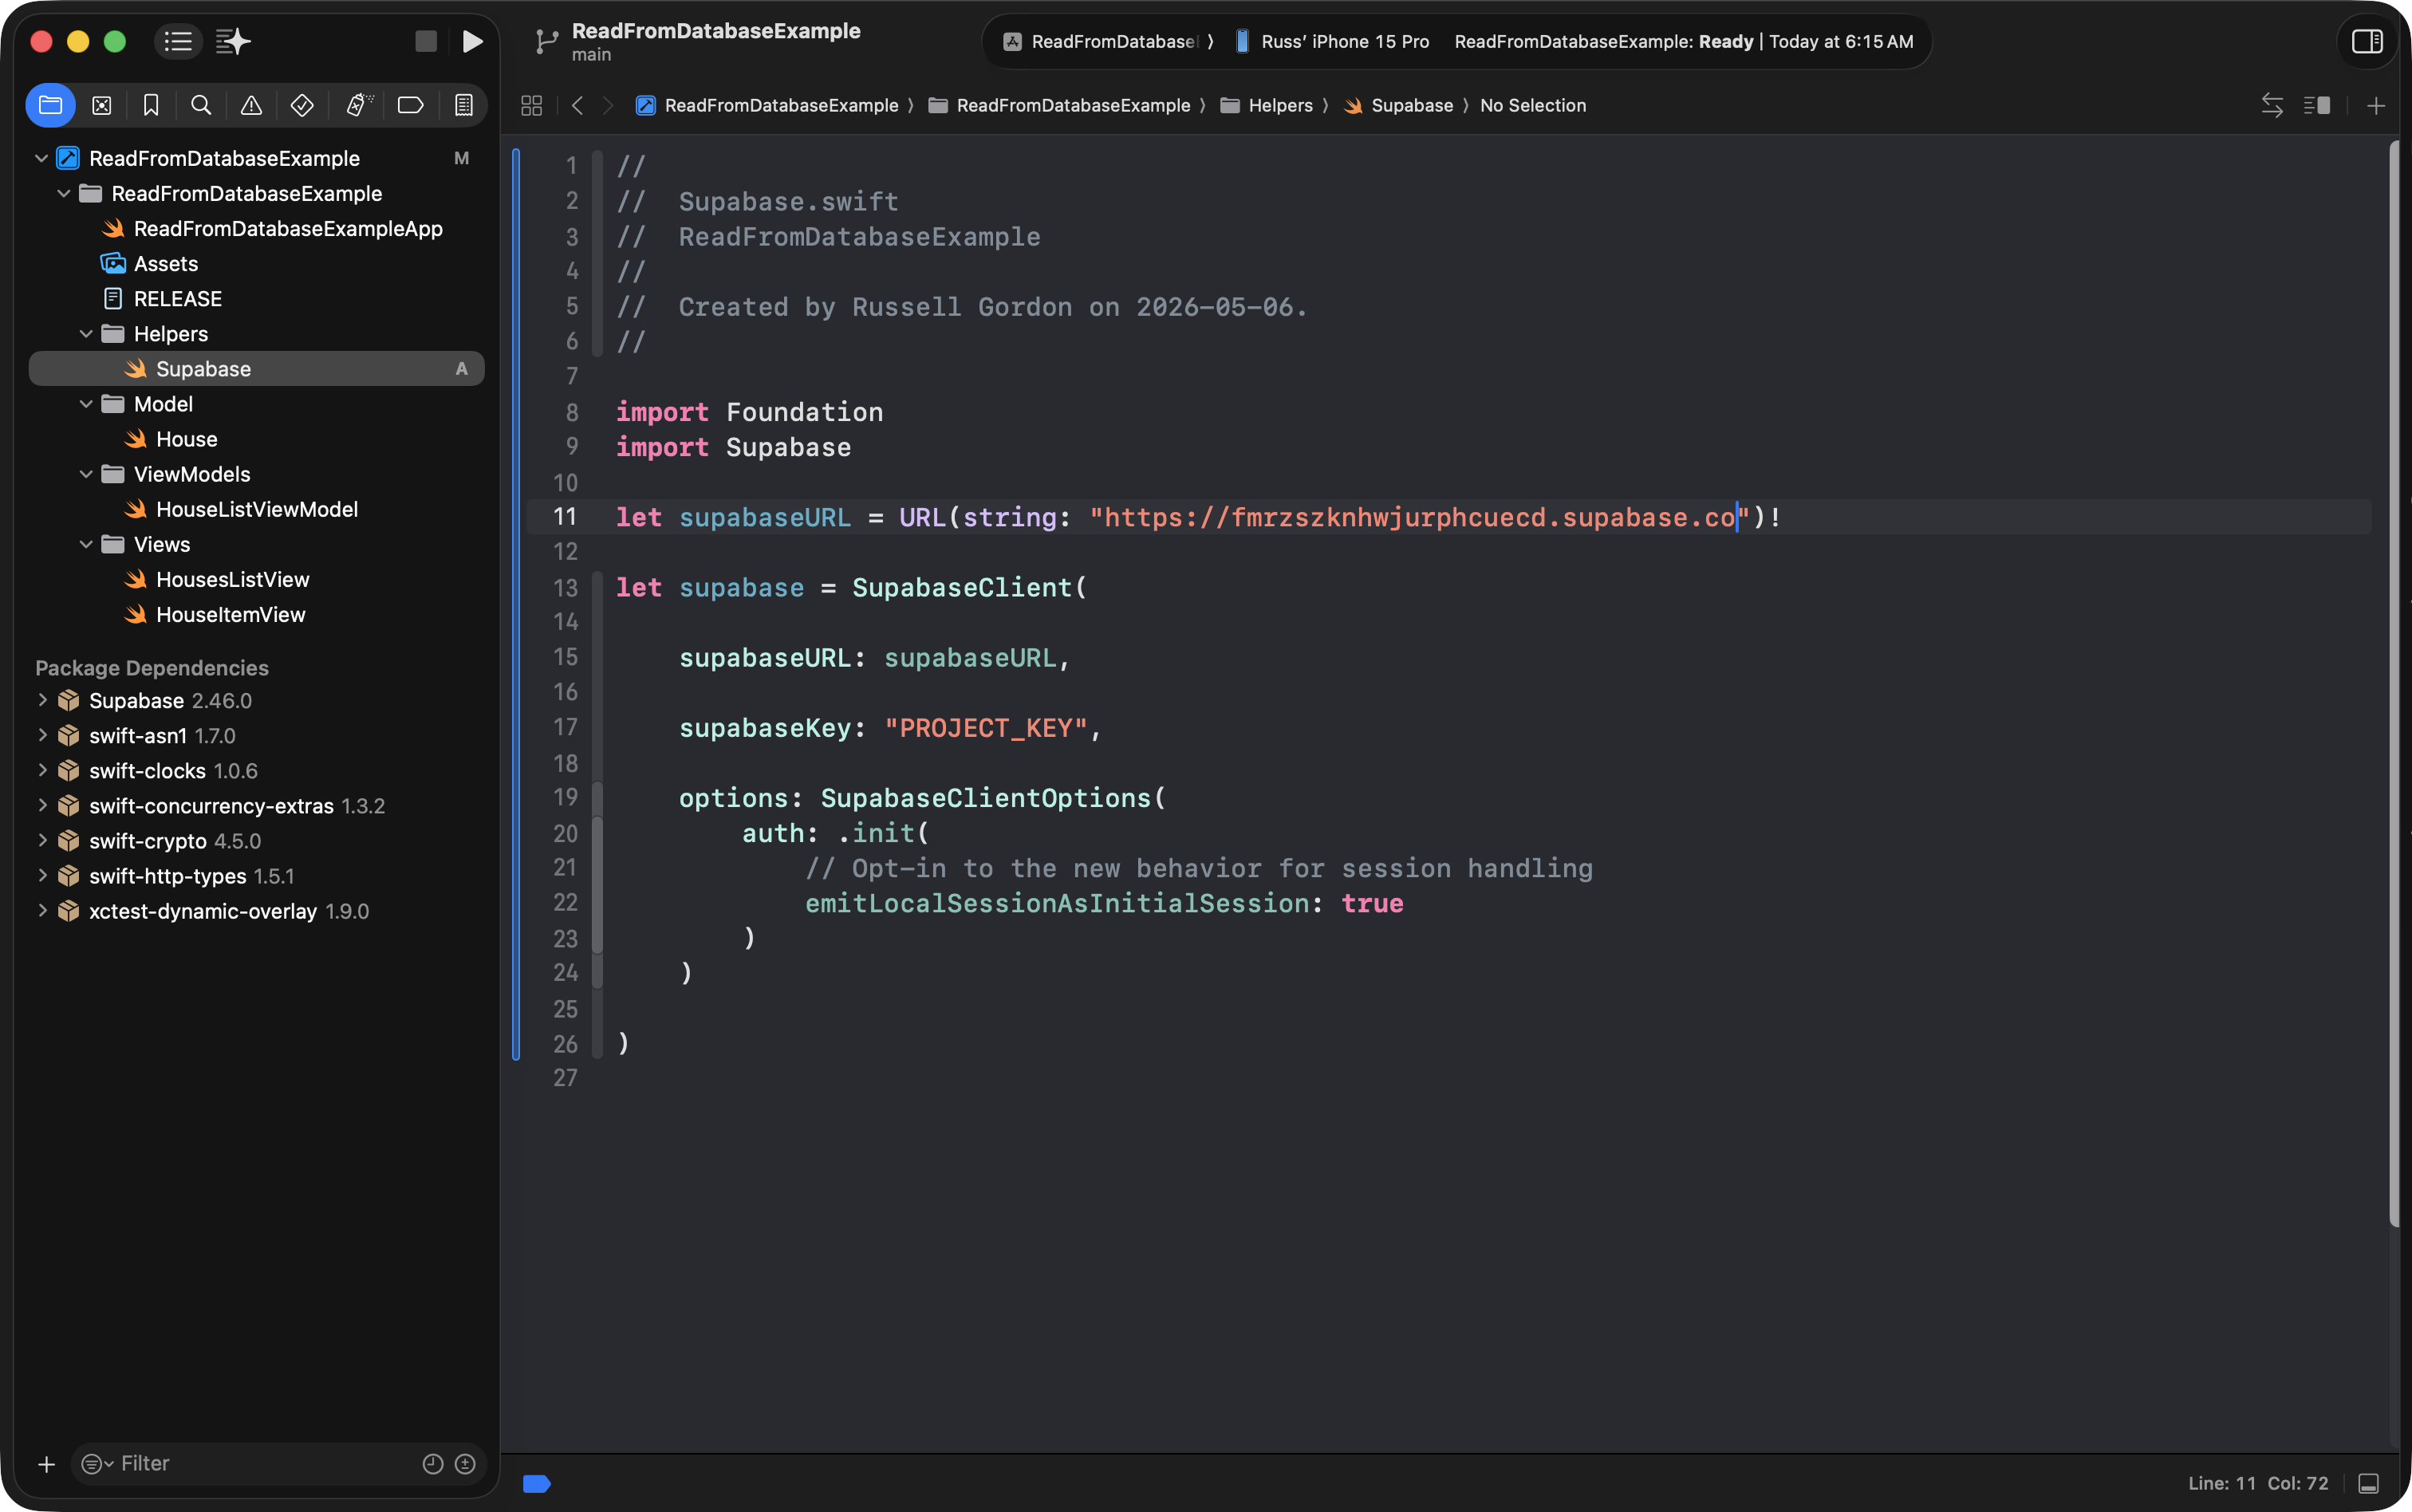
First, obtain the PROJECT_URL value here within your Supabase project:
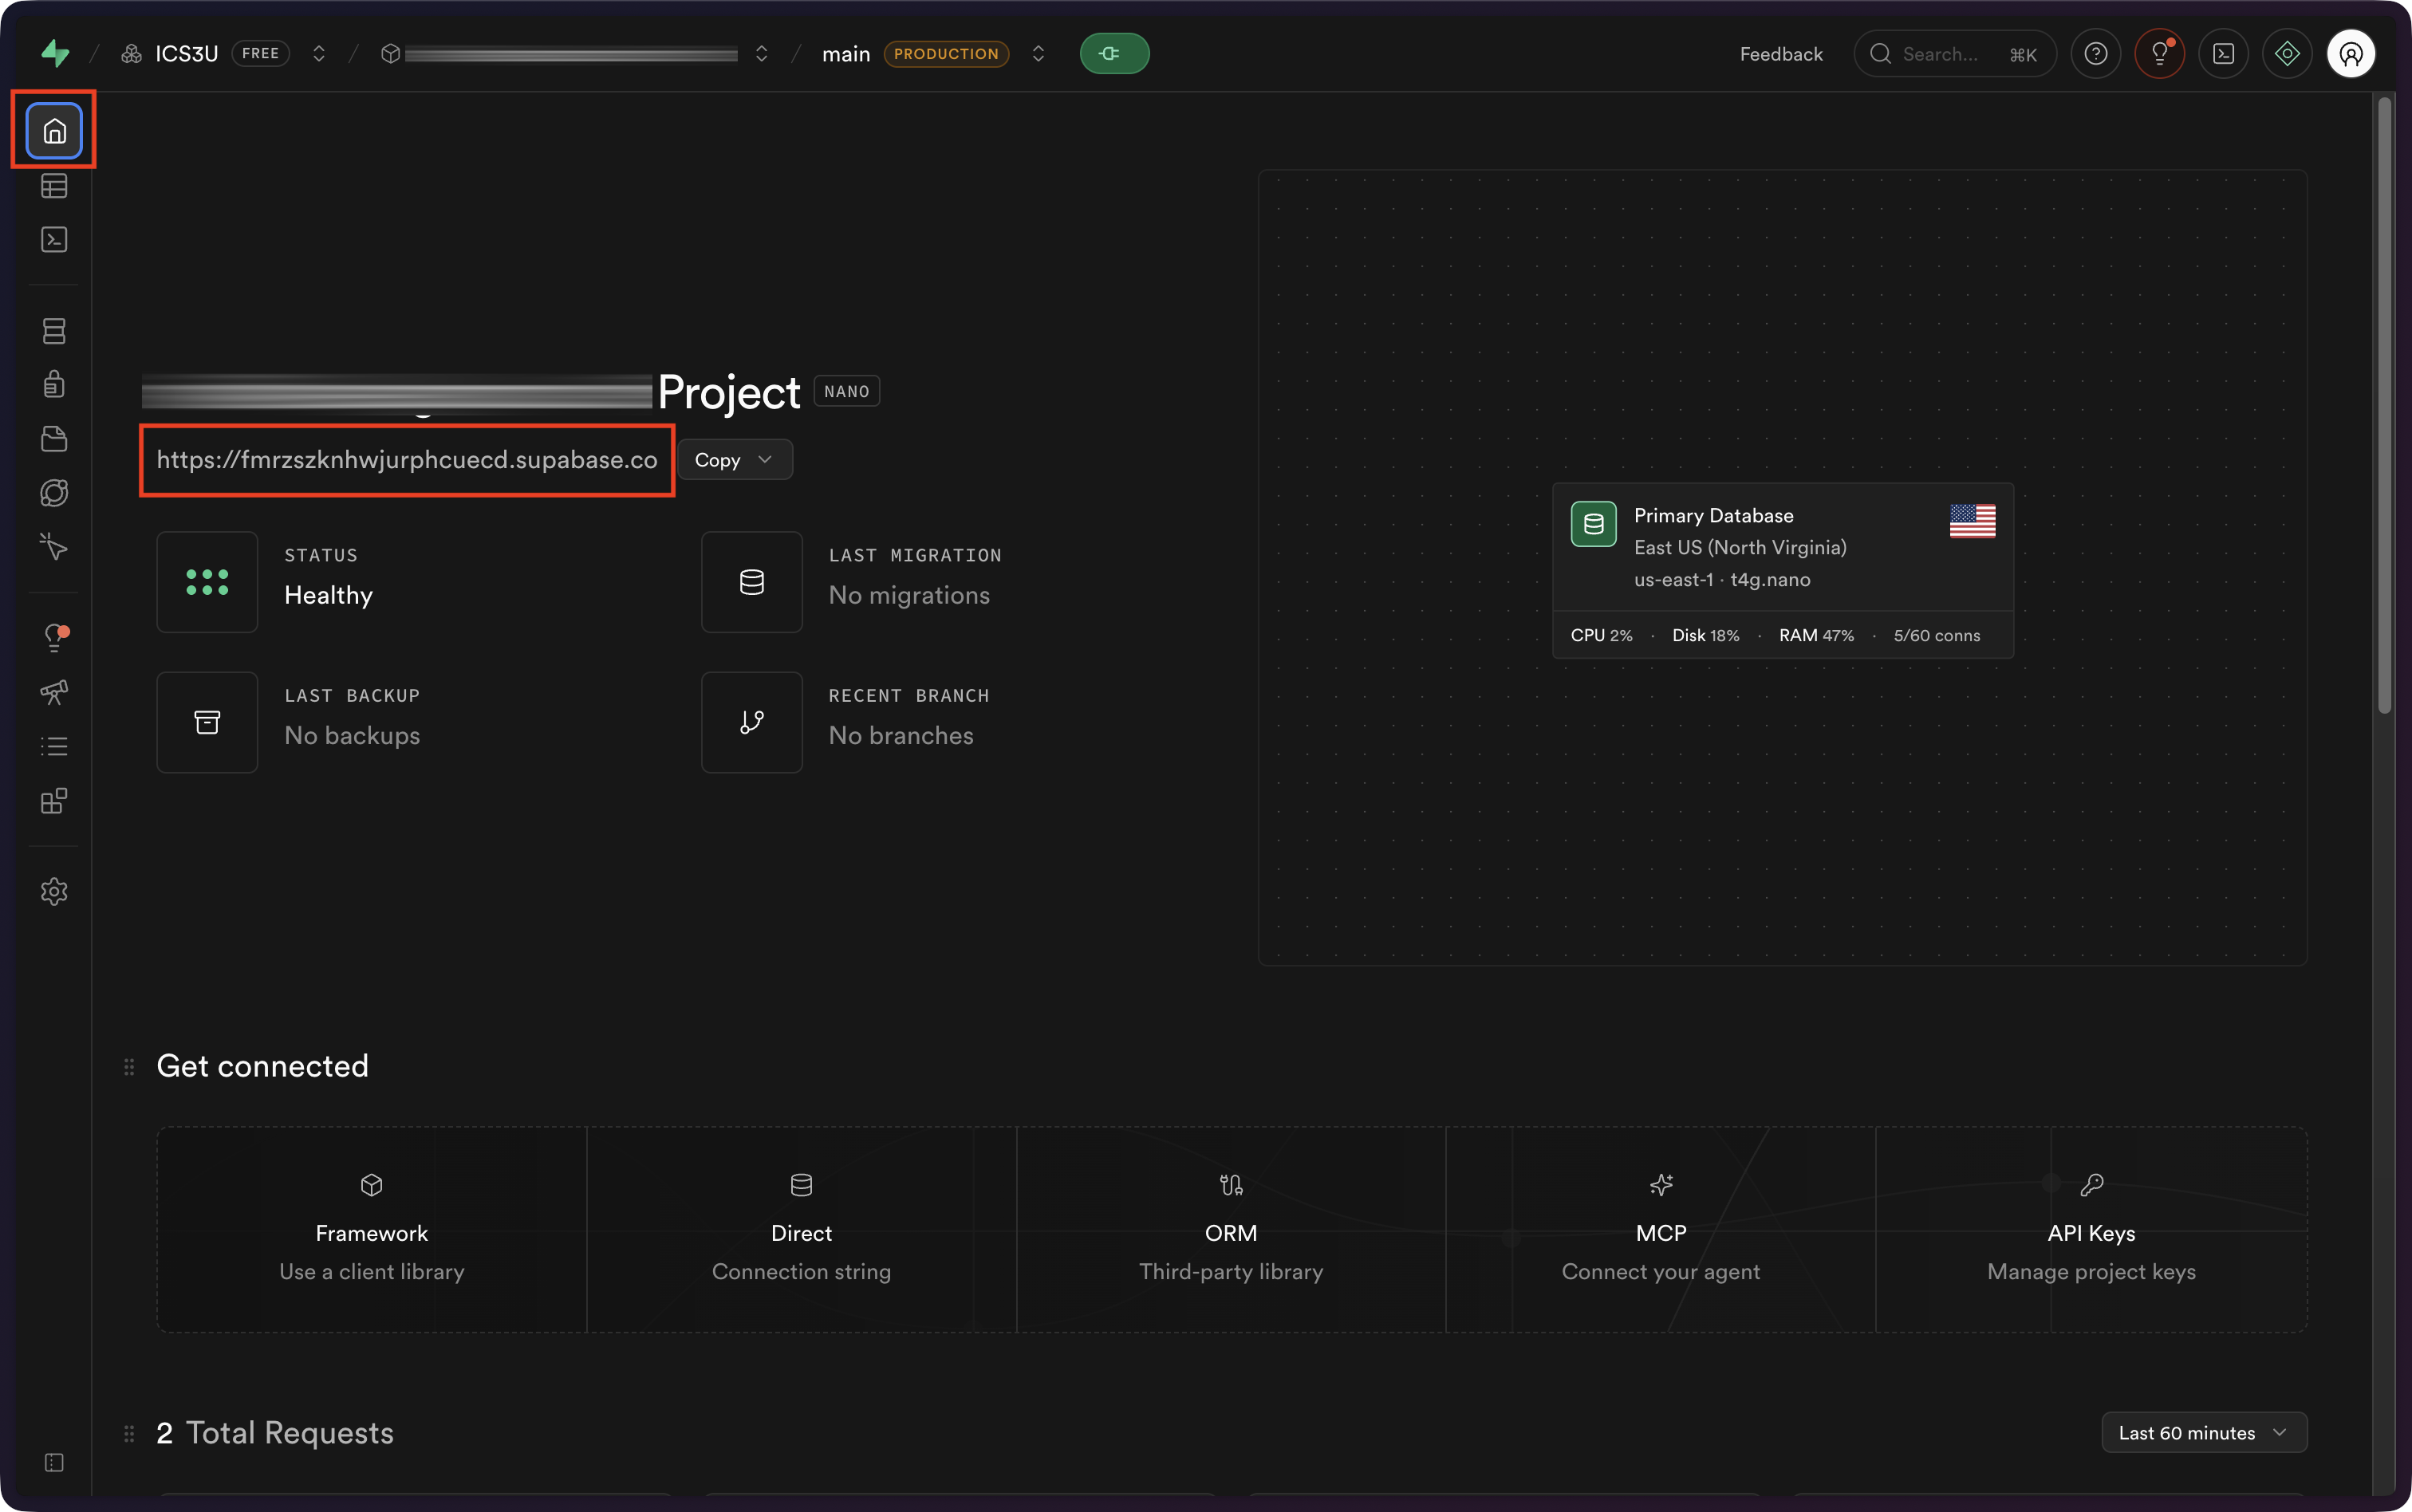
… then paste it into the file, like so:
Then, obtain the PROJECT_KEY value here within your Supabase project:
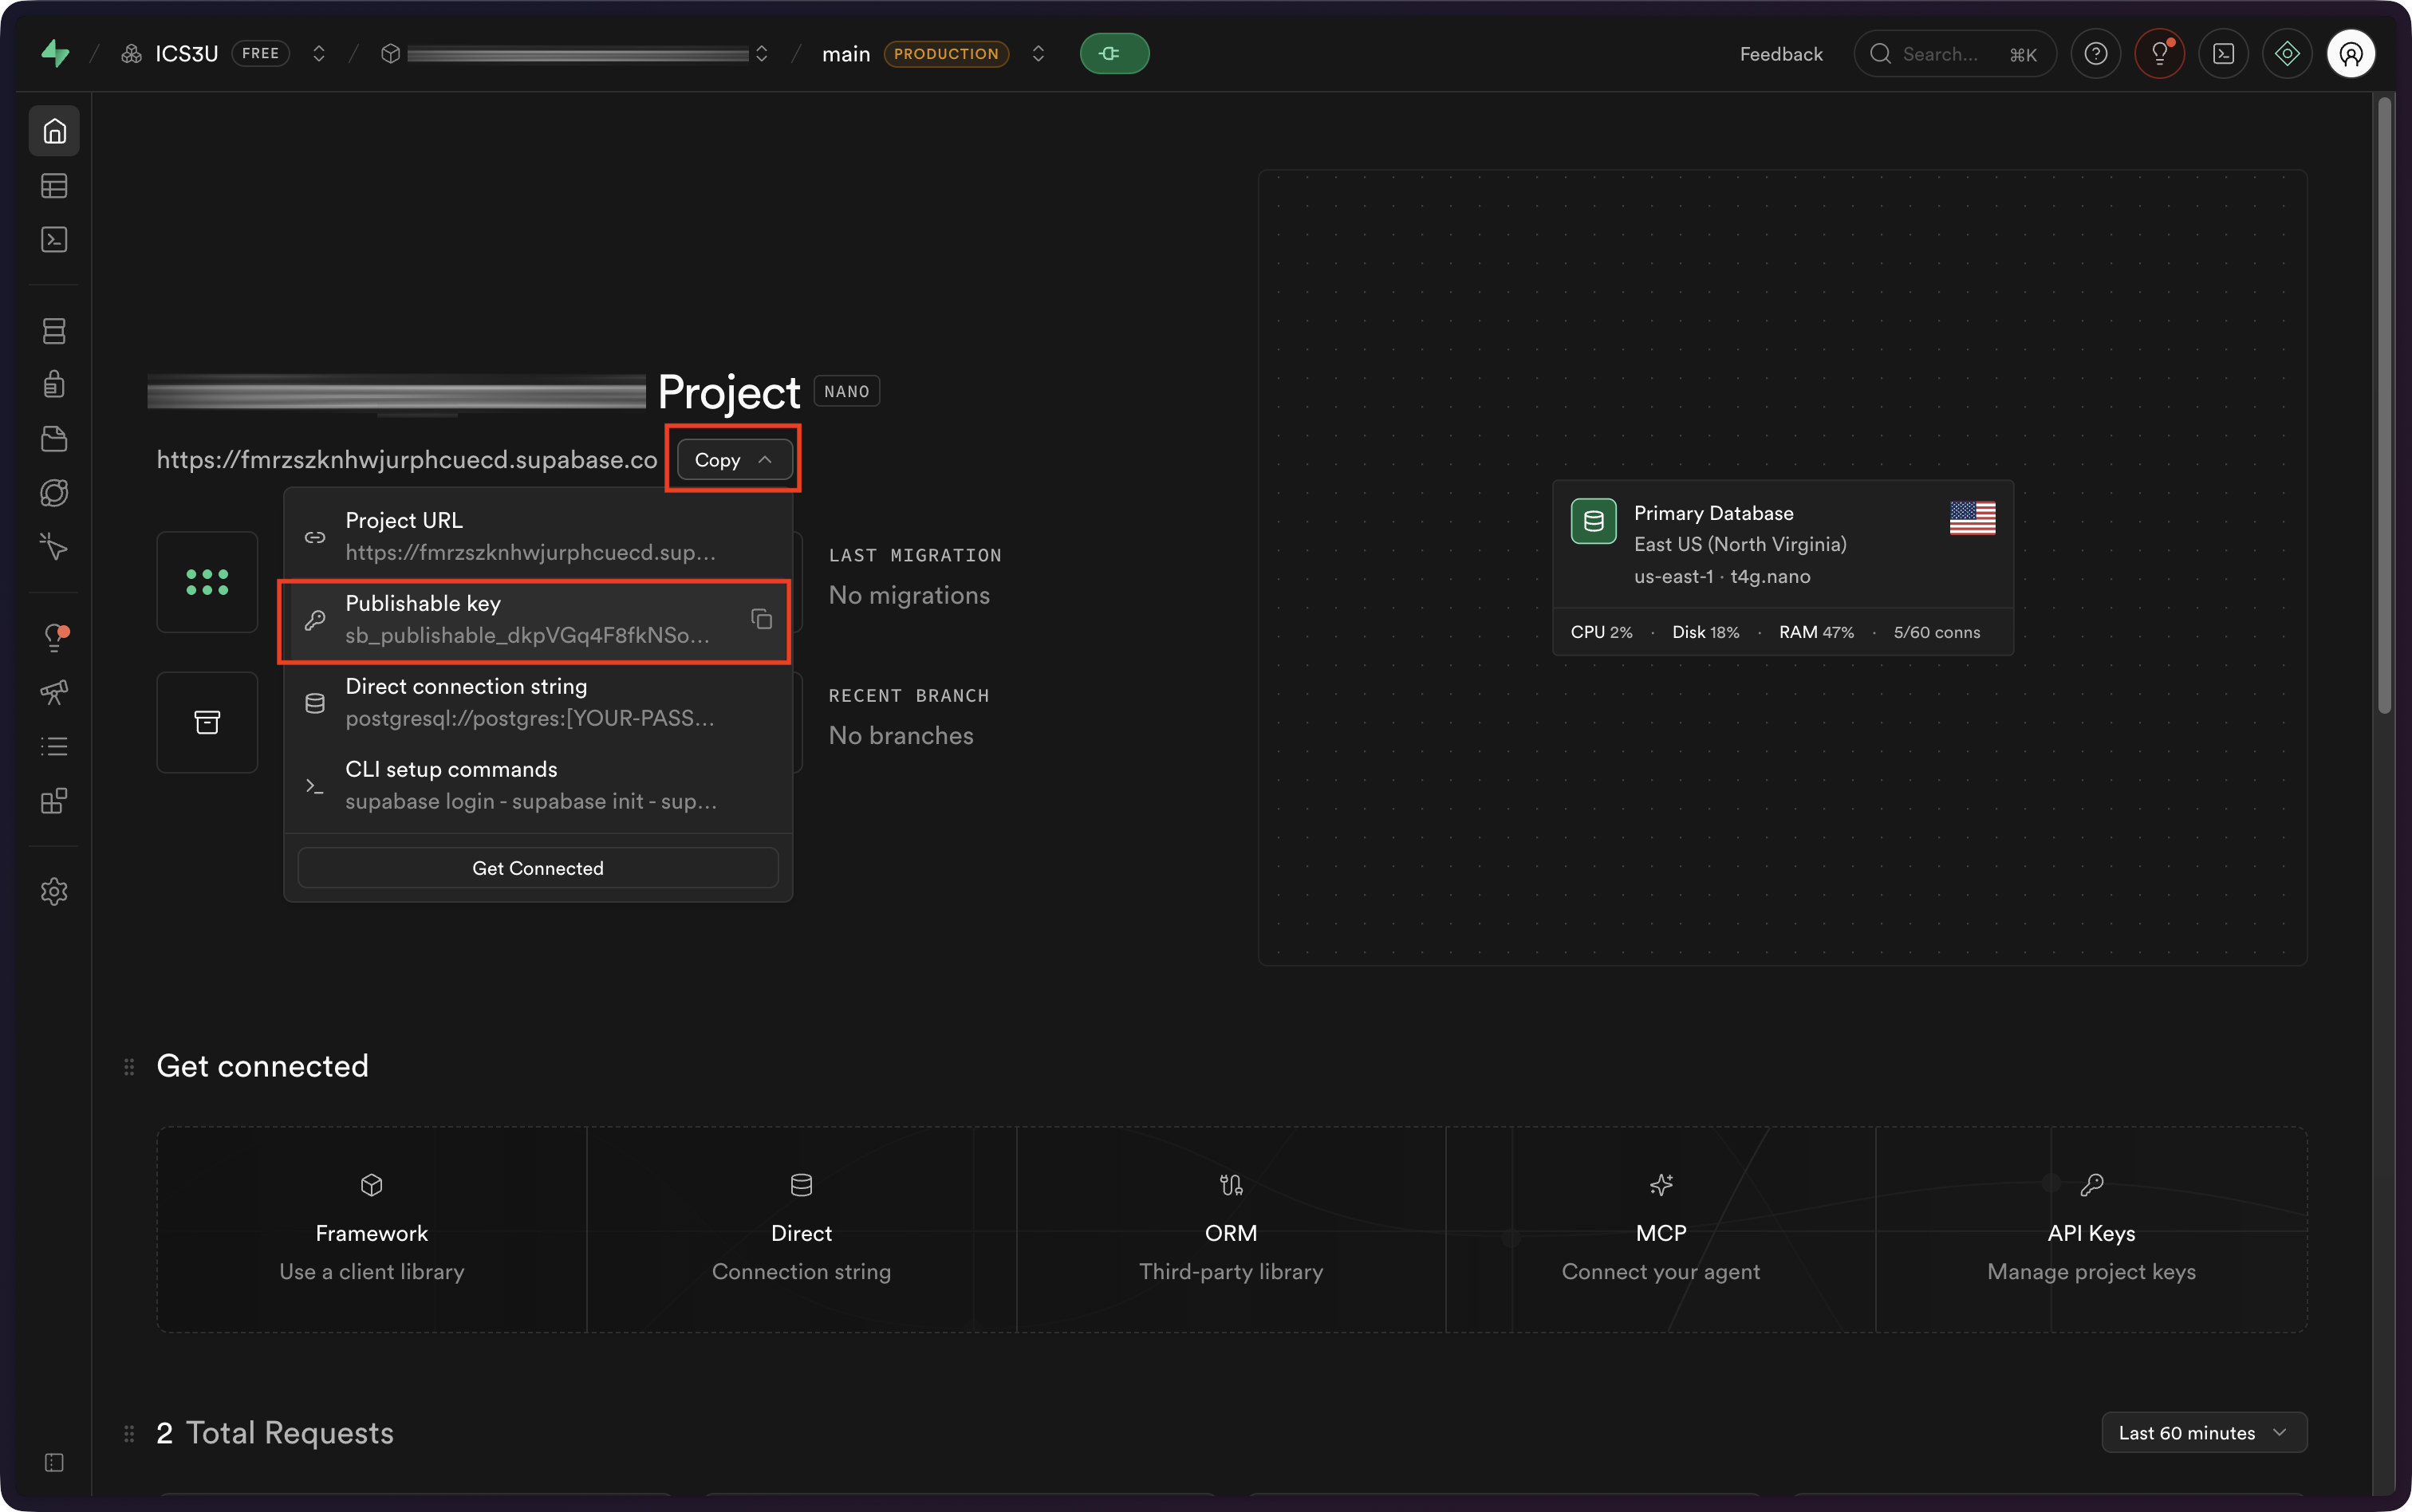
… then paste it into the file, like so:
Now commit your changes using Option-Command-C and this commit message:
Added information required to connect to Supabase-hosted database.
Read from a database table
For now, a simple SELECT query can be used to obtain all the columns and all the rows from our example database – if needed based on your end-of-year app plans, you can later read more about writing queries:
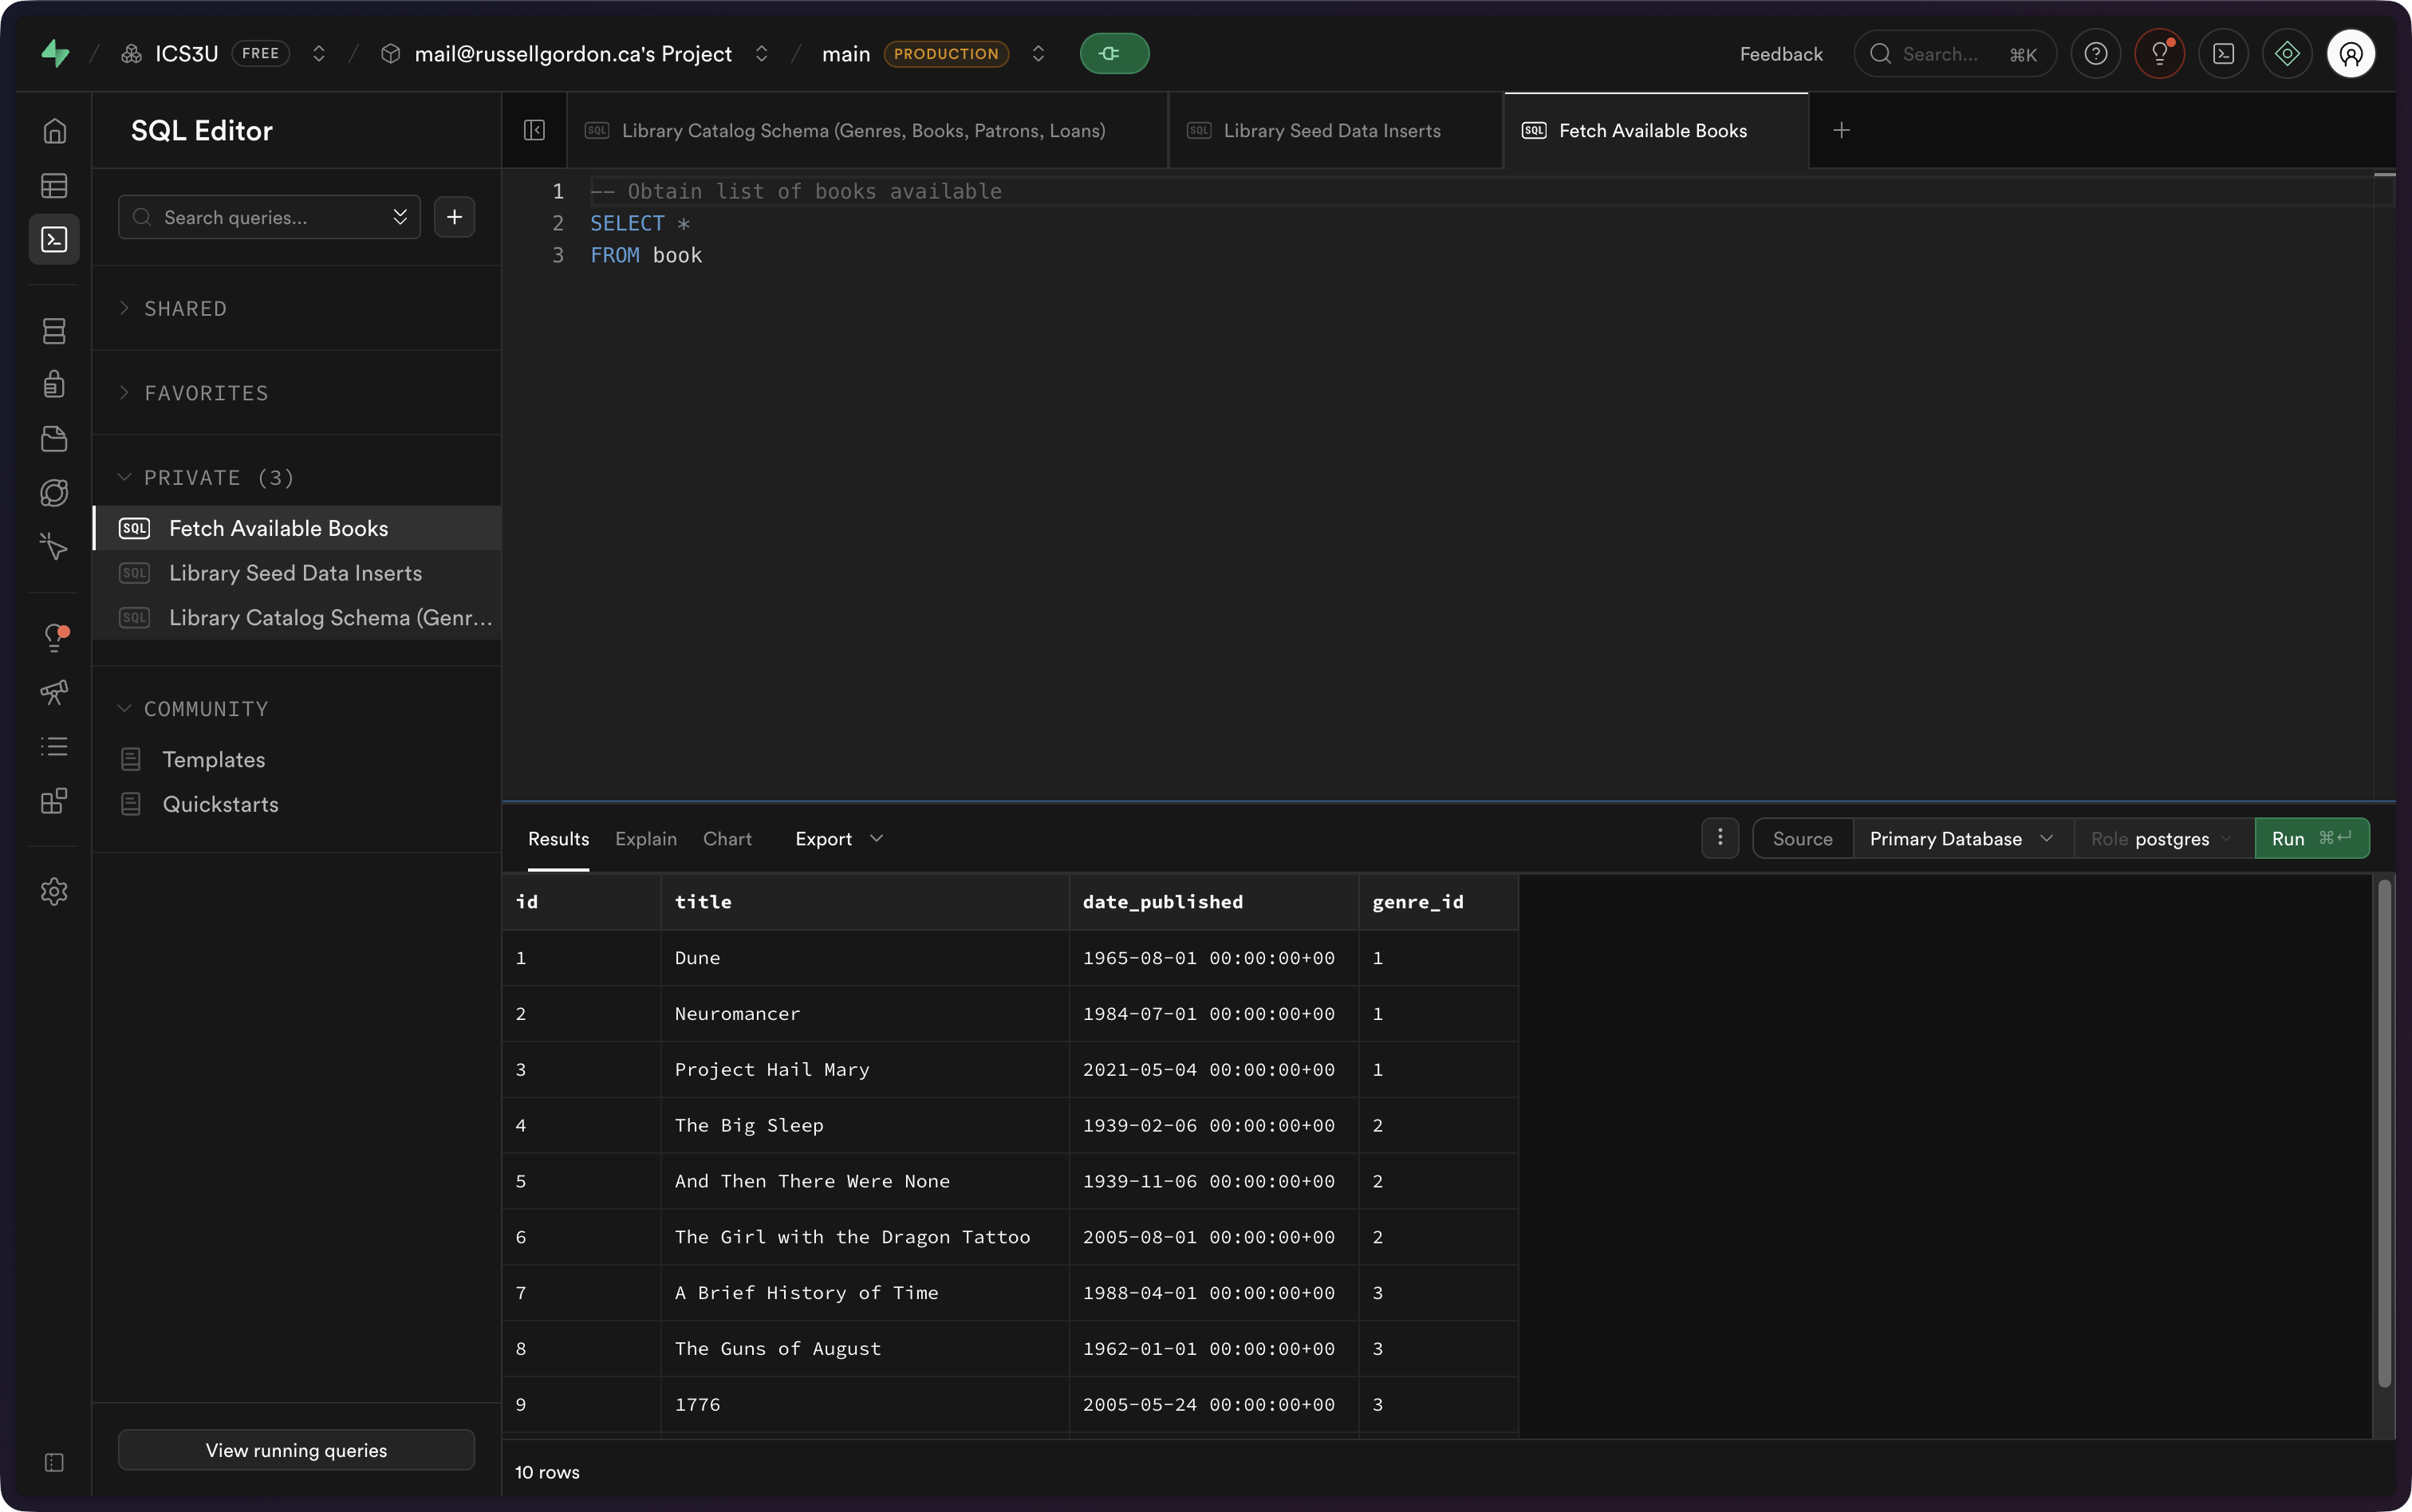
To see that information in our example app, we need to:
- Add a model file to match the columns in the
booktable. - Add a view model file to read from the database.
- Add a view to display the results.
To do this, we’ll use the existing code in the project as a guide.
Create the model
Let’s first create a new model file, and set that file up in a split-screen next to the existing model file. Follow along:
Now we write a model file to match our database table’s columns:
Notice that the database column names are in snake_case and the stored property names in our structure in Swift are in camelCase.
We must add an enumeration to tell Swift to which database columns map to which properties in the structure:
NOTE
Making the
Bookstructure conform to theCodableprotocol allows Supabase to send our app information encoded as a JSON file. More on what a JSON file is in an upcoming lesson.
Commit and push at this point, with the following message:
Added a model file to match the Book table in the database.
Add logging
It is really helpful to know what is happening and when within a view model.
To do this, we can add log messages. These are tiny messages that appear in the bottom-right corner of Xcode – the console – while our app runs.
Add a Logging group and then create a new empty file named Logger.swift:
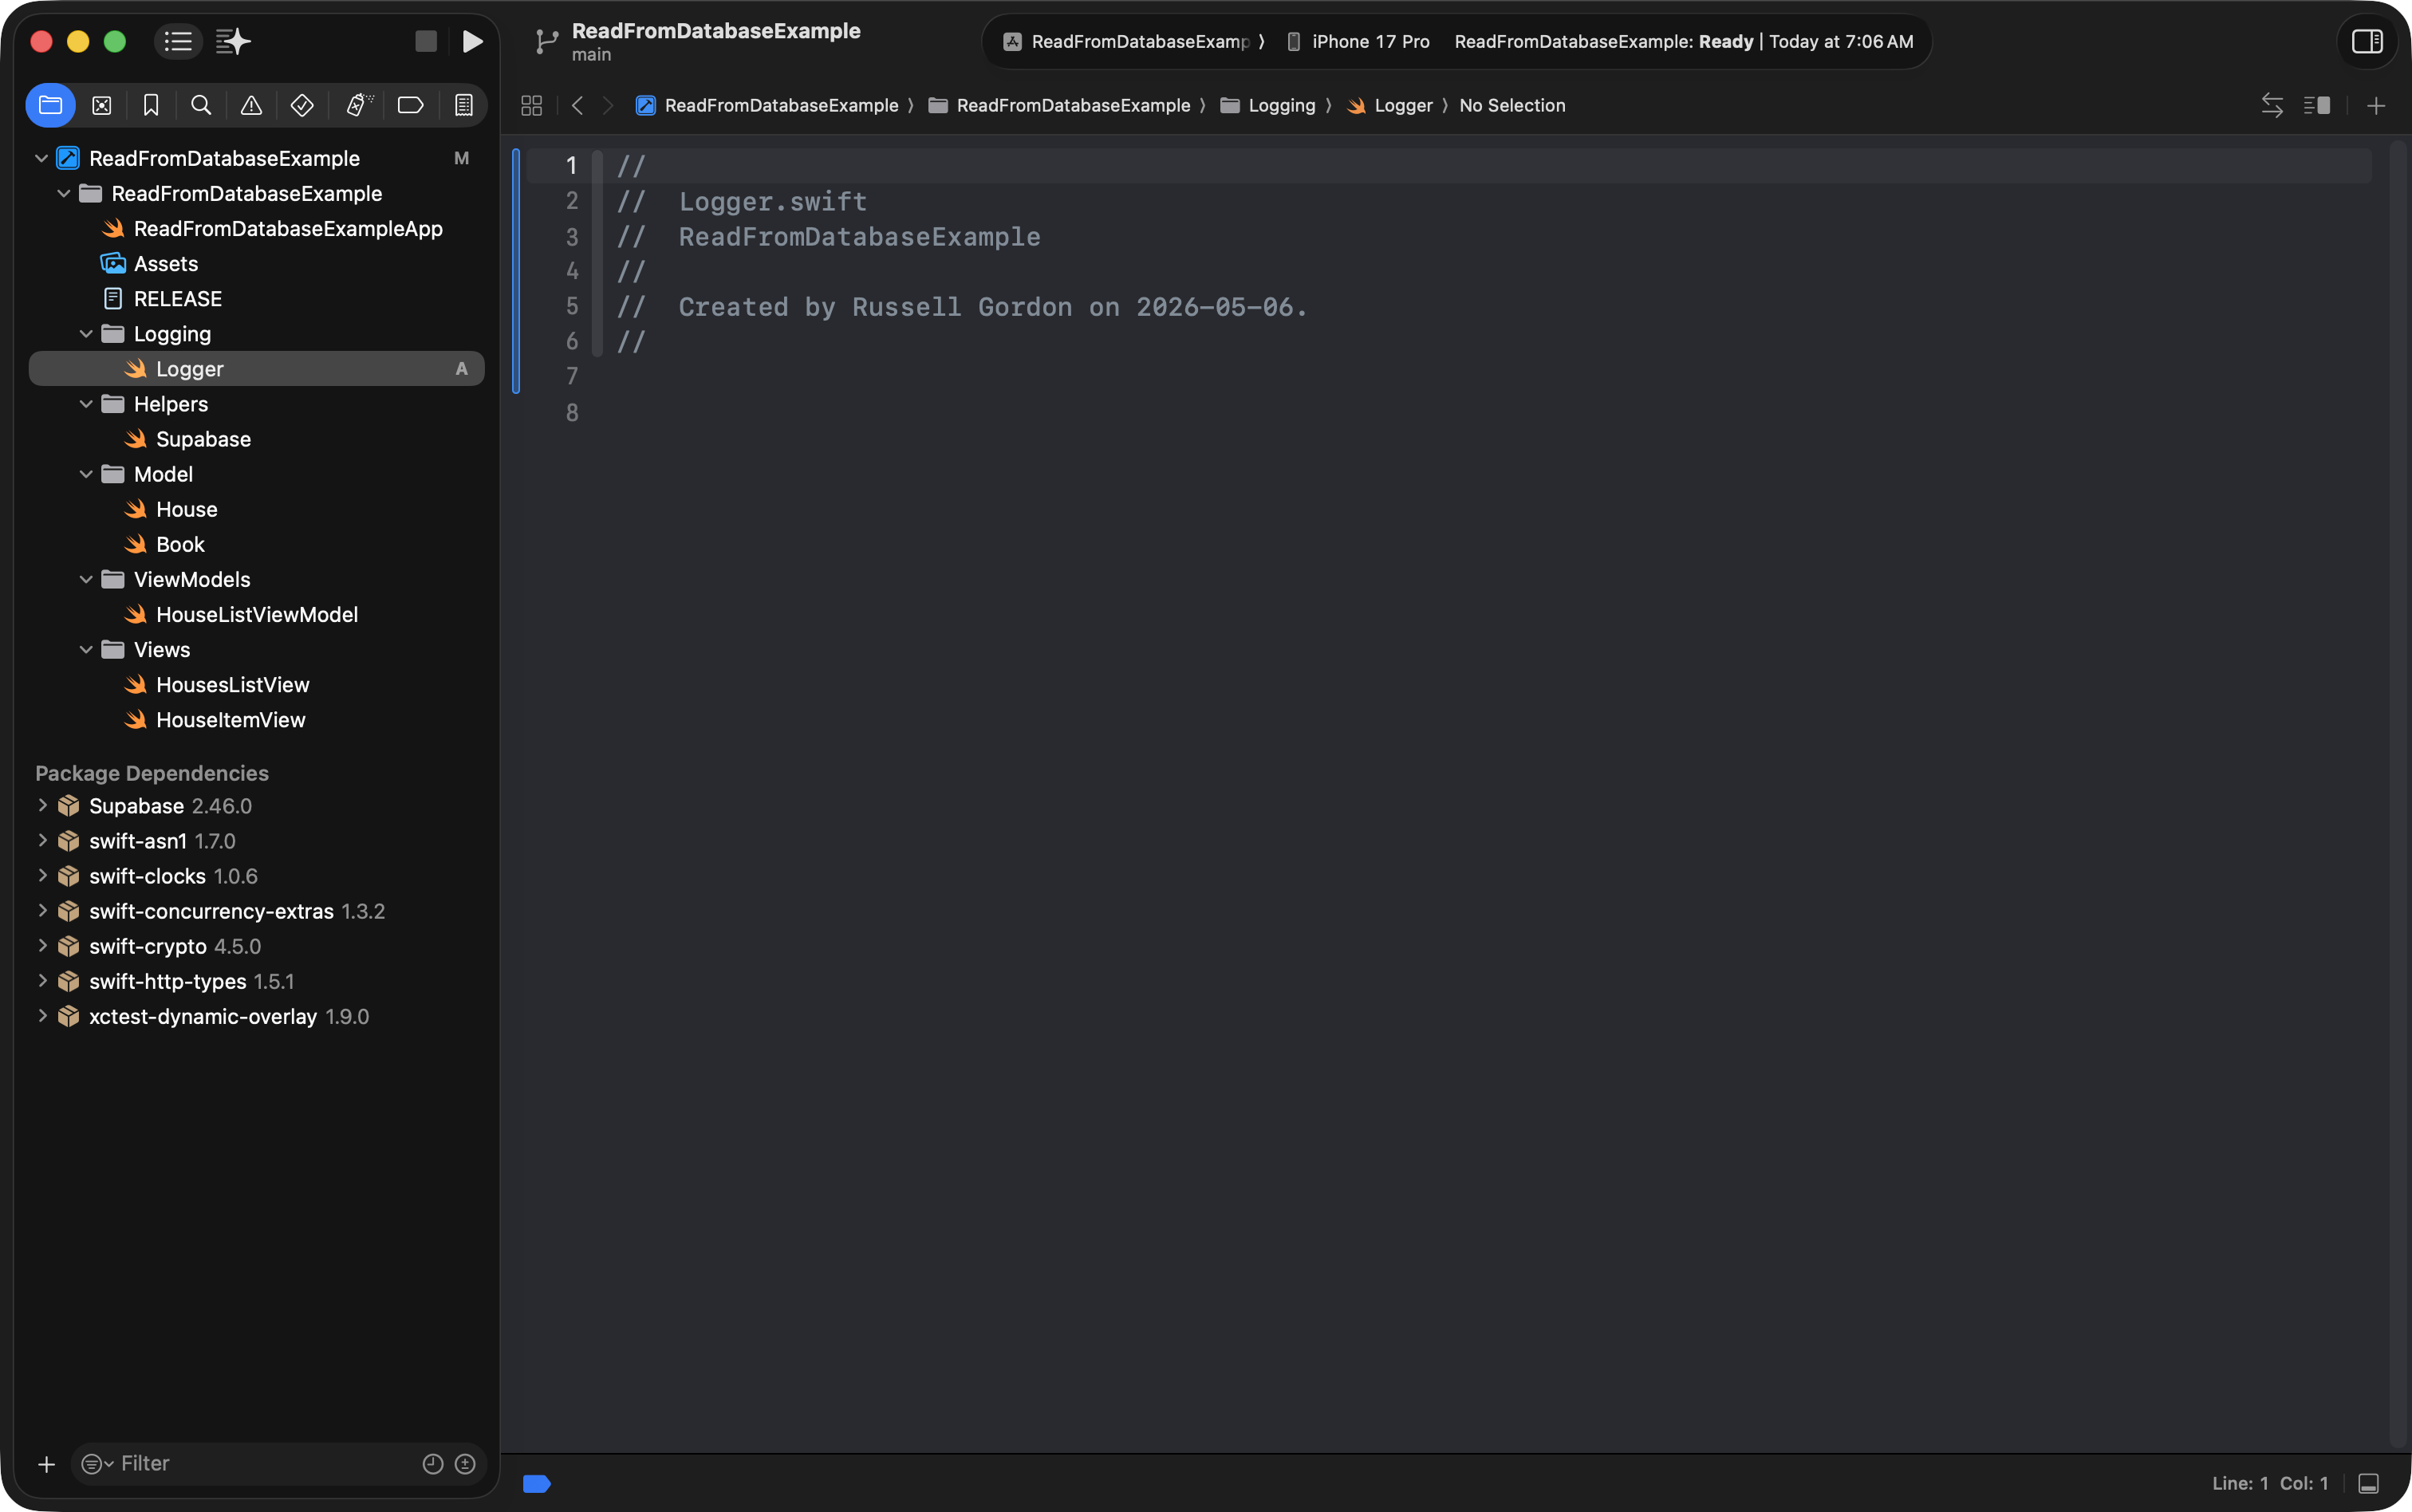
Then copy-paste this code in:
import OSLog

extension Logger {

    // Using your bundle identifier is a great way to ensure a unique identifier.
    private static var subsystem = Bundle.main.bundleIdentifier!

    // Logs the view cycles like a view that appeared
    static let viewCycle = Logger(subsystem: subsystem, category: "viewcycle")

    // All logs related to tracking and analytics
    static let statistics = Logger(subsystem: subsystem, category: "statistics")

    // All logs related to database operations
    static let database = Logger(subsystem: subsystem, category: "database")

    // All logs related to user authentication
    static let authentication = Logger(subsystem: subsystem, category: "authentication")

}
… like this:

Commit your work using Option-Command-C with this message:
Added support for log messages.
Create the view model
Now we will make a new view model file.
It will use the Book model we just created, and read from the book table in the remote database hosted at Supabase.
Set up a new view model file named BookListViewModel in a split screen next to the existing HouseListViewModel:
Then, to save some typing, please copy this code in to BookListViewModel – we will examine it carefully in a moment:
import OSLog
import Supabase
import Foundation

// MARK: View state enumeration
//
//       What is happening with data for the related view right now?
//
enum ViewState {
    case loading
    case loaded
    case error
}

// VIEW MODEL
@Observable
class BookListViewModel {

    // MARK: Stored properties
    // Stored properties must be provided with a value by providing an argument when creating an instance of this class, or, be initialized with a default value

    // Most view models are going to have an array 👇

    // Initialize an empty array of books when the view model is first created
    var books: [Book] = []

    // What is happening with this view model's data right now?
    var state: ViewState = .loading

    // MARK: Computed properties
    // Computed properties calculate or derive a value using stored properties

    // MARK: Initializers
    // Initializers get an instance of a class ready to be used
    init() {

        // Gets books from database
        Task {
            try await getBooks()
        }
    }

    // MARK: Functions
    // Functions take action using information provided through parameters
    func getBooks() async throws {
        Logger.database.info("BookListViewModel: About to try loading list of books from database.")

        do {

            // Load information from the database into an array local to this do-catch block's scope
            let results: [Book] = try await supabase
                .from("book")
                .select()
                .execute()
                .value

            Logger.database.info("BookListViewModel: \(results.count) books retrieved; about to assign results to `books` array.")

            // Copy the contents of the locally-scoped array to the array that is a stored property of this view model
            self.books = results
            state = .loaded

        } catch {
            Logger.database.error("BookListViewModel: Could not load list of books.")
            Logger.database.error("\(String(describing: error))")
            state = .error
        }
    }

}
Your file should look like this within the project:

Let’s examine what’s happening here:
DISCUSSION
- The
OSLogandSupabaselibraries are loaded – so we can add log messages to the console to report on progress, and so that we can talk to the database hosted at Supabase.- A small enumeration was added so we can keep track of what’s happening as data is loaded from the database.
- An empty array of books is initialized when the view model is created – note that the view state is set to loading to start.
- The initializer runs and immediately invokes the
getBooksfunction.- The
getBooksfunction talks to the database. The code from lines 58 to 62 is equivalent to writing this SQL:SELECT * FROM books- If anything goes wrong in the
doblock while books are trying to be fetched from the database, thecatchblock activates and logs an error message.
Commit your work with this message:
Added a view model to retrieve a list of books.
Exercises
You now have a project that is connected to a remote database.
Try the following exercises:
-
Add a new file named
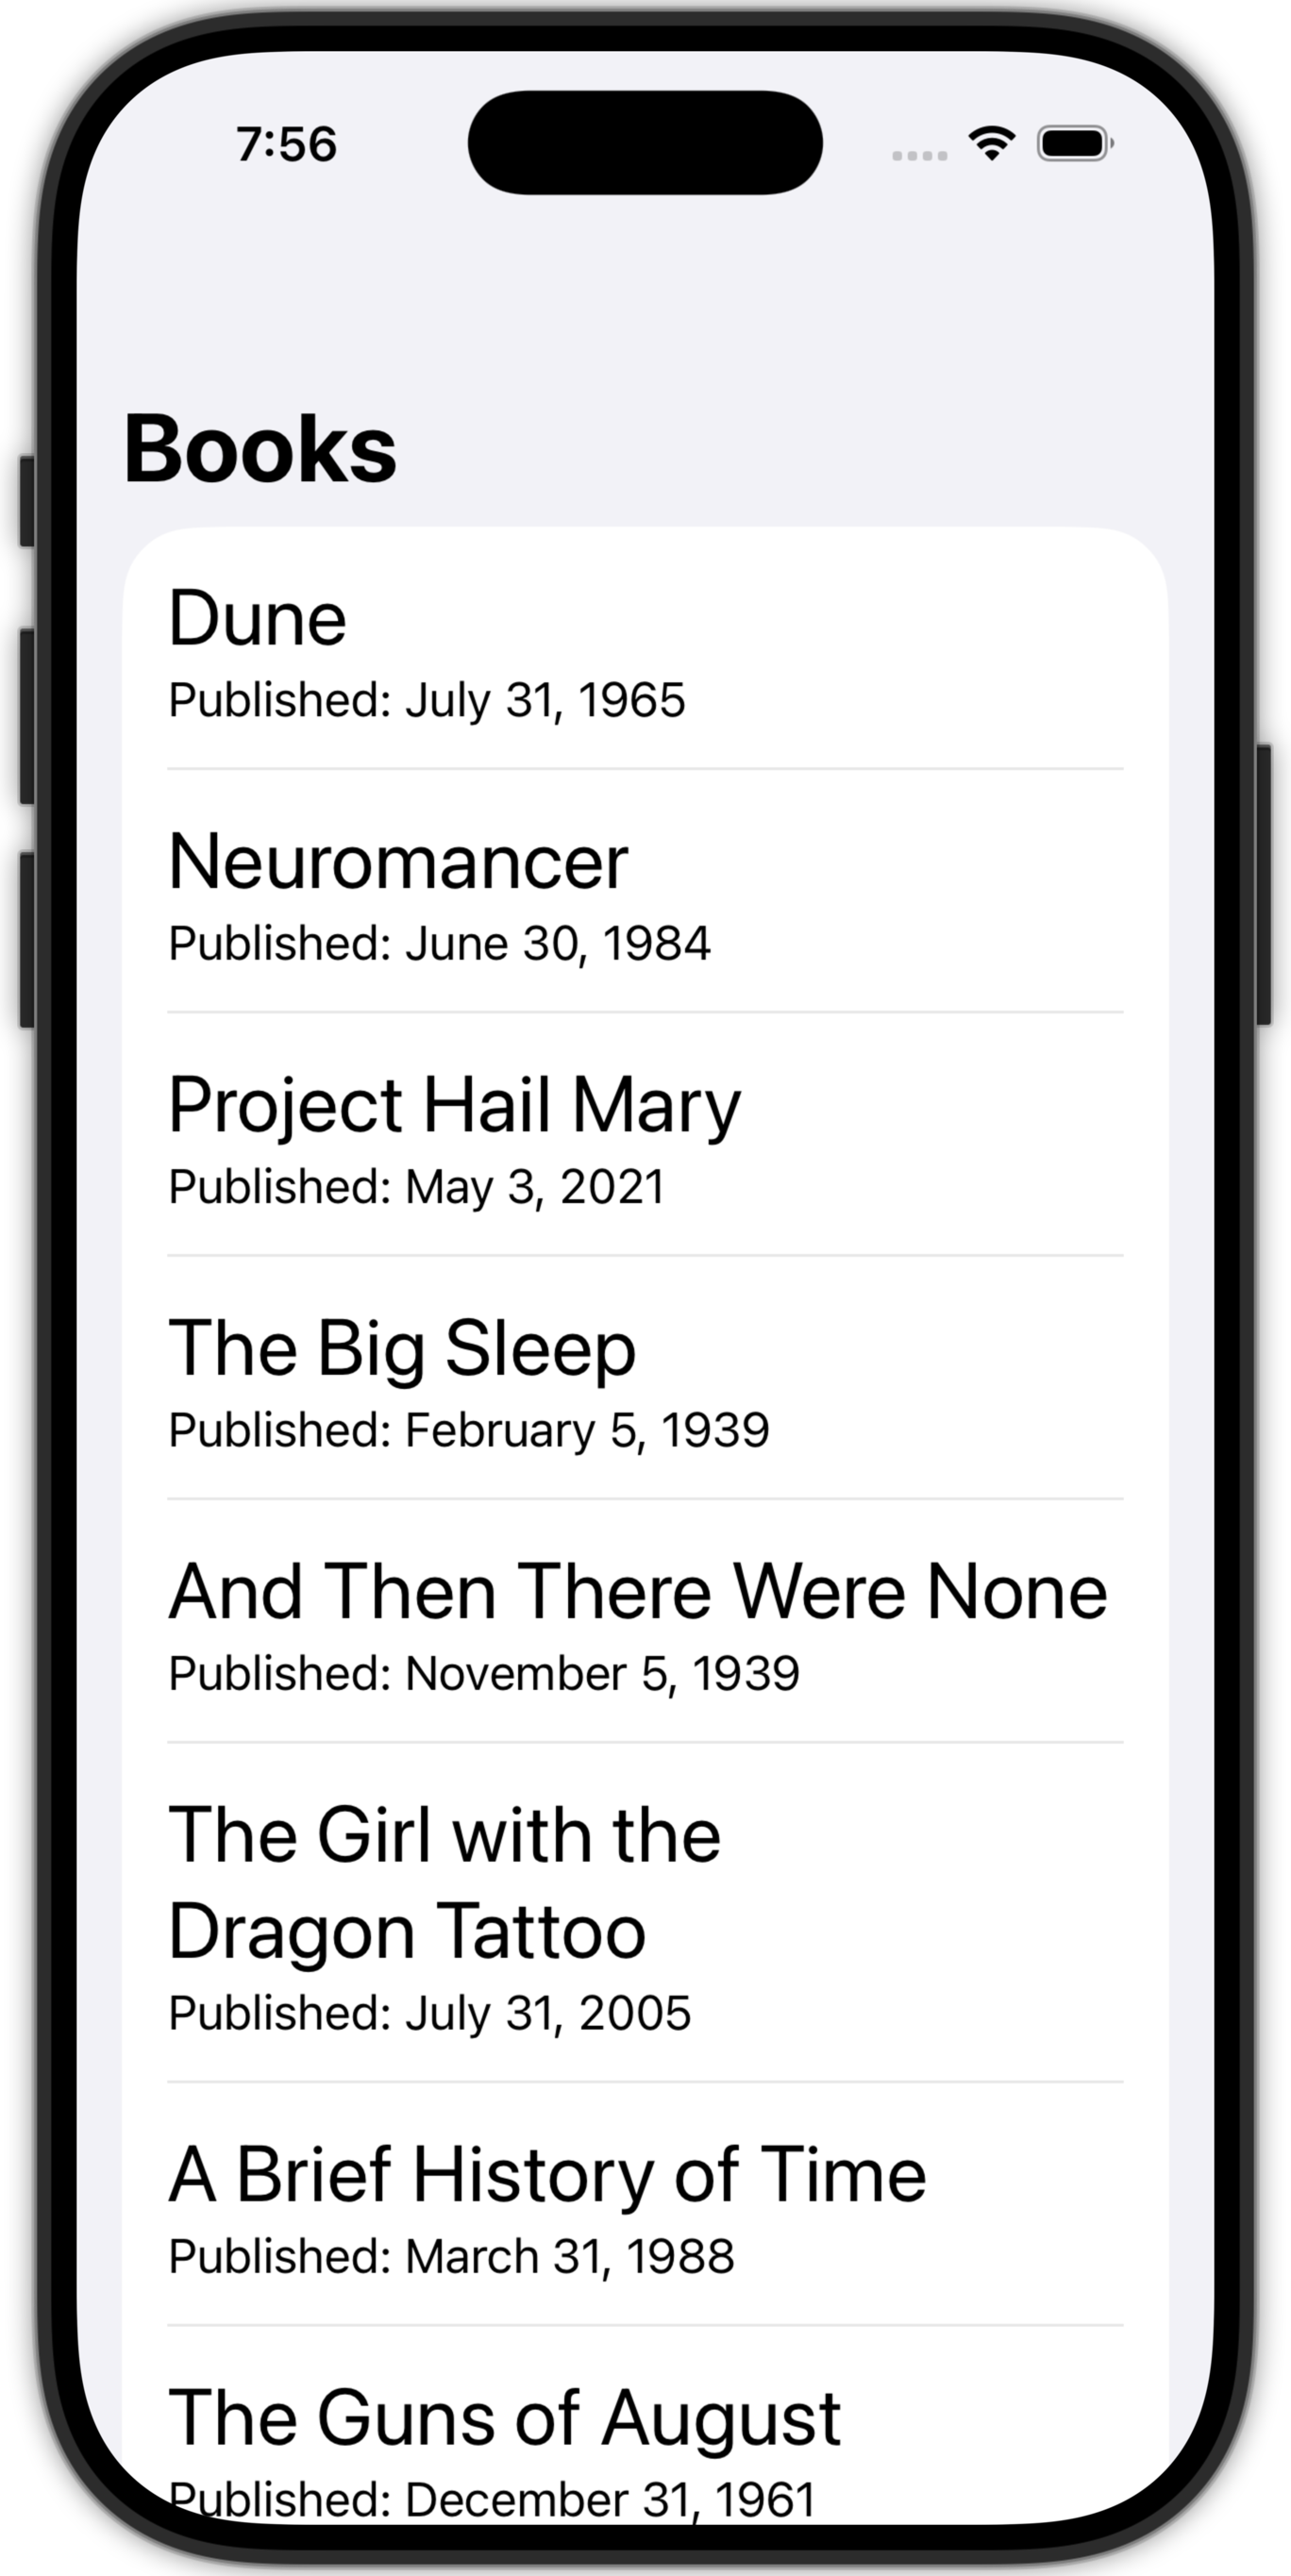
BooksListViewand refer toHousesListView. Copy code as needed to the new view, then modify the new view to useBookListViewModelinstead ofHouseListViewModel. Adjust the view so that it shows a simple list of book titles, like this: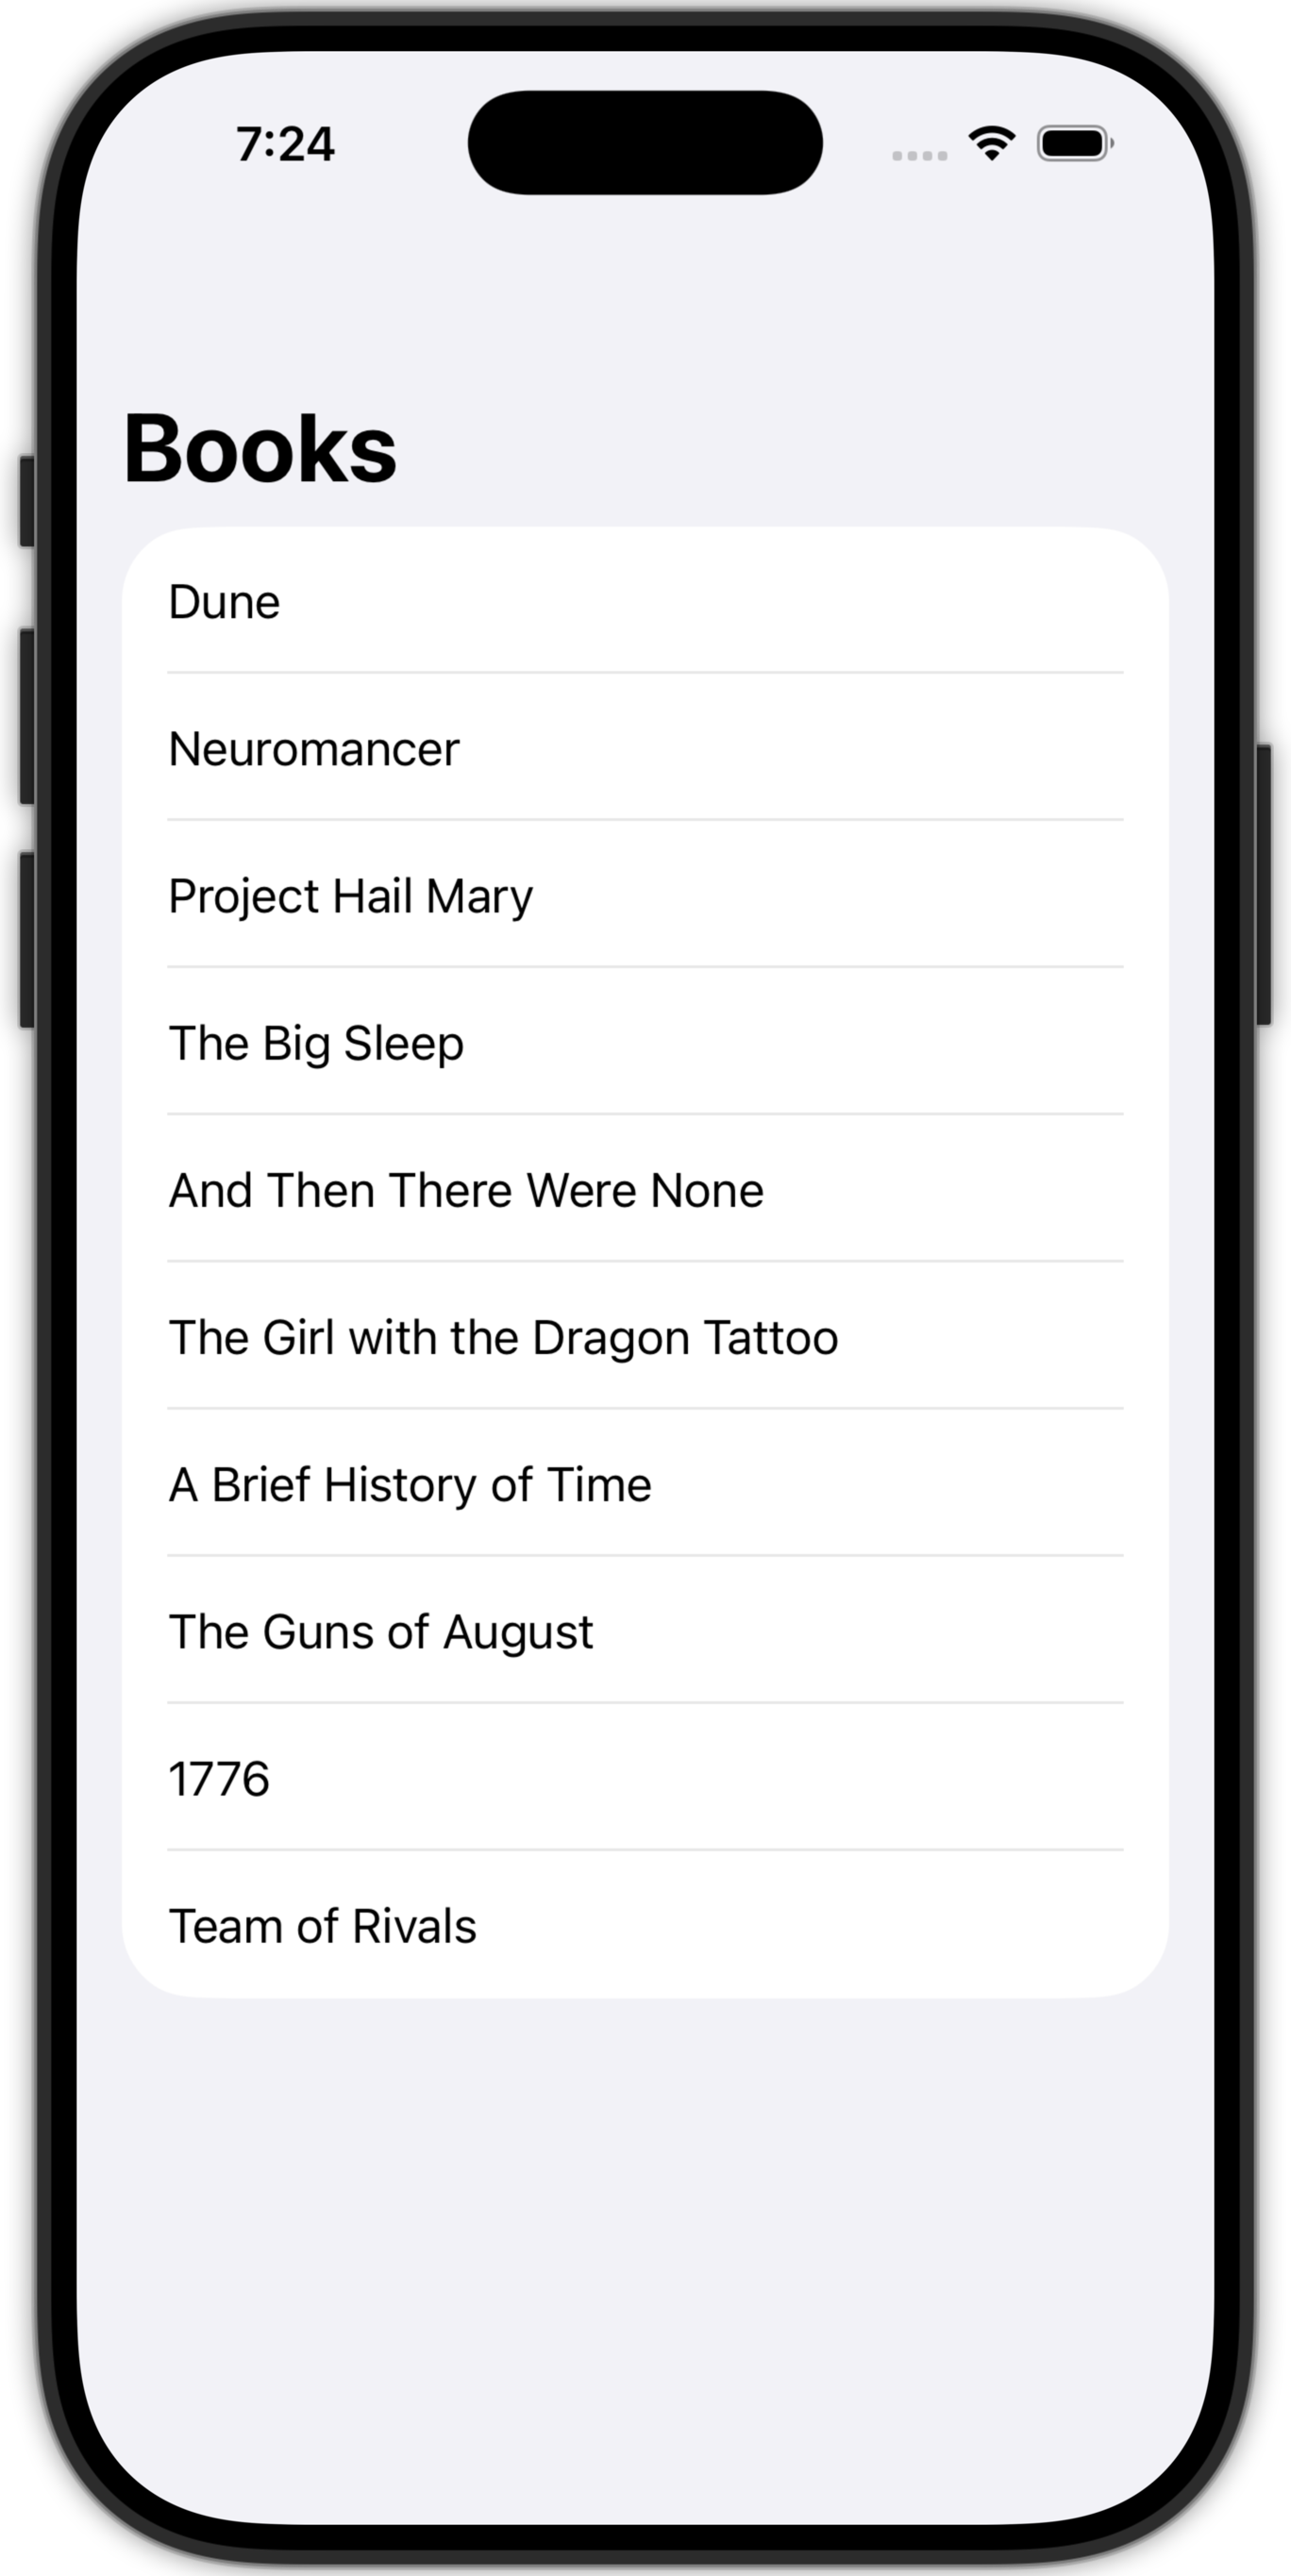
-
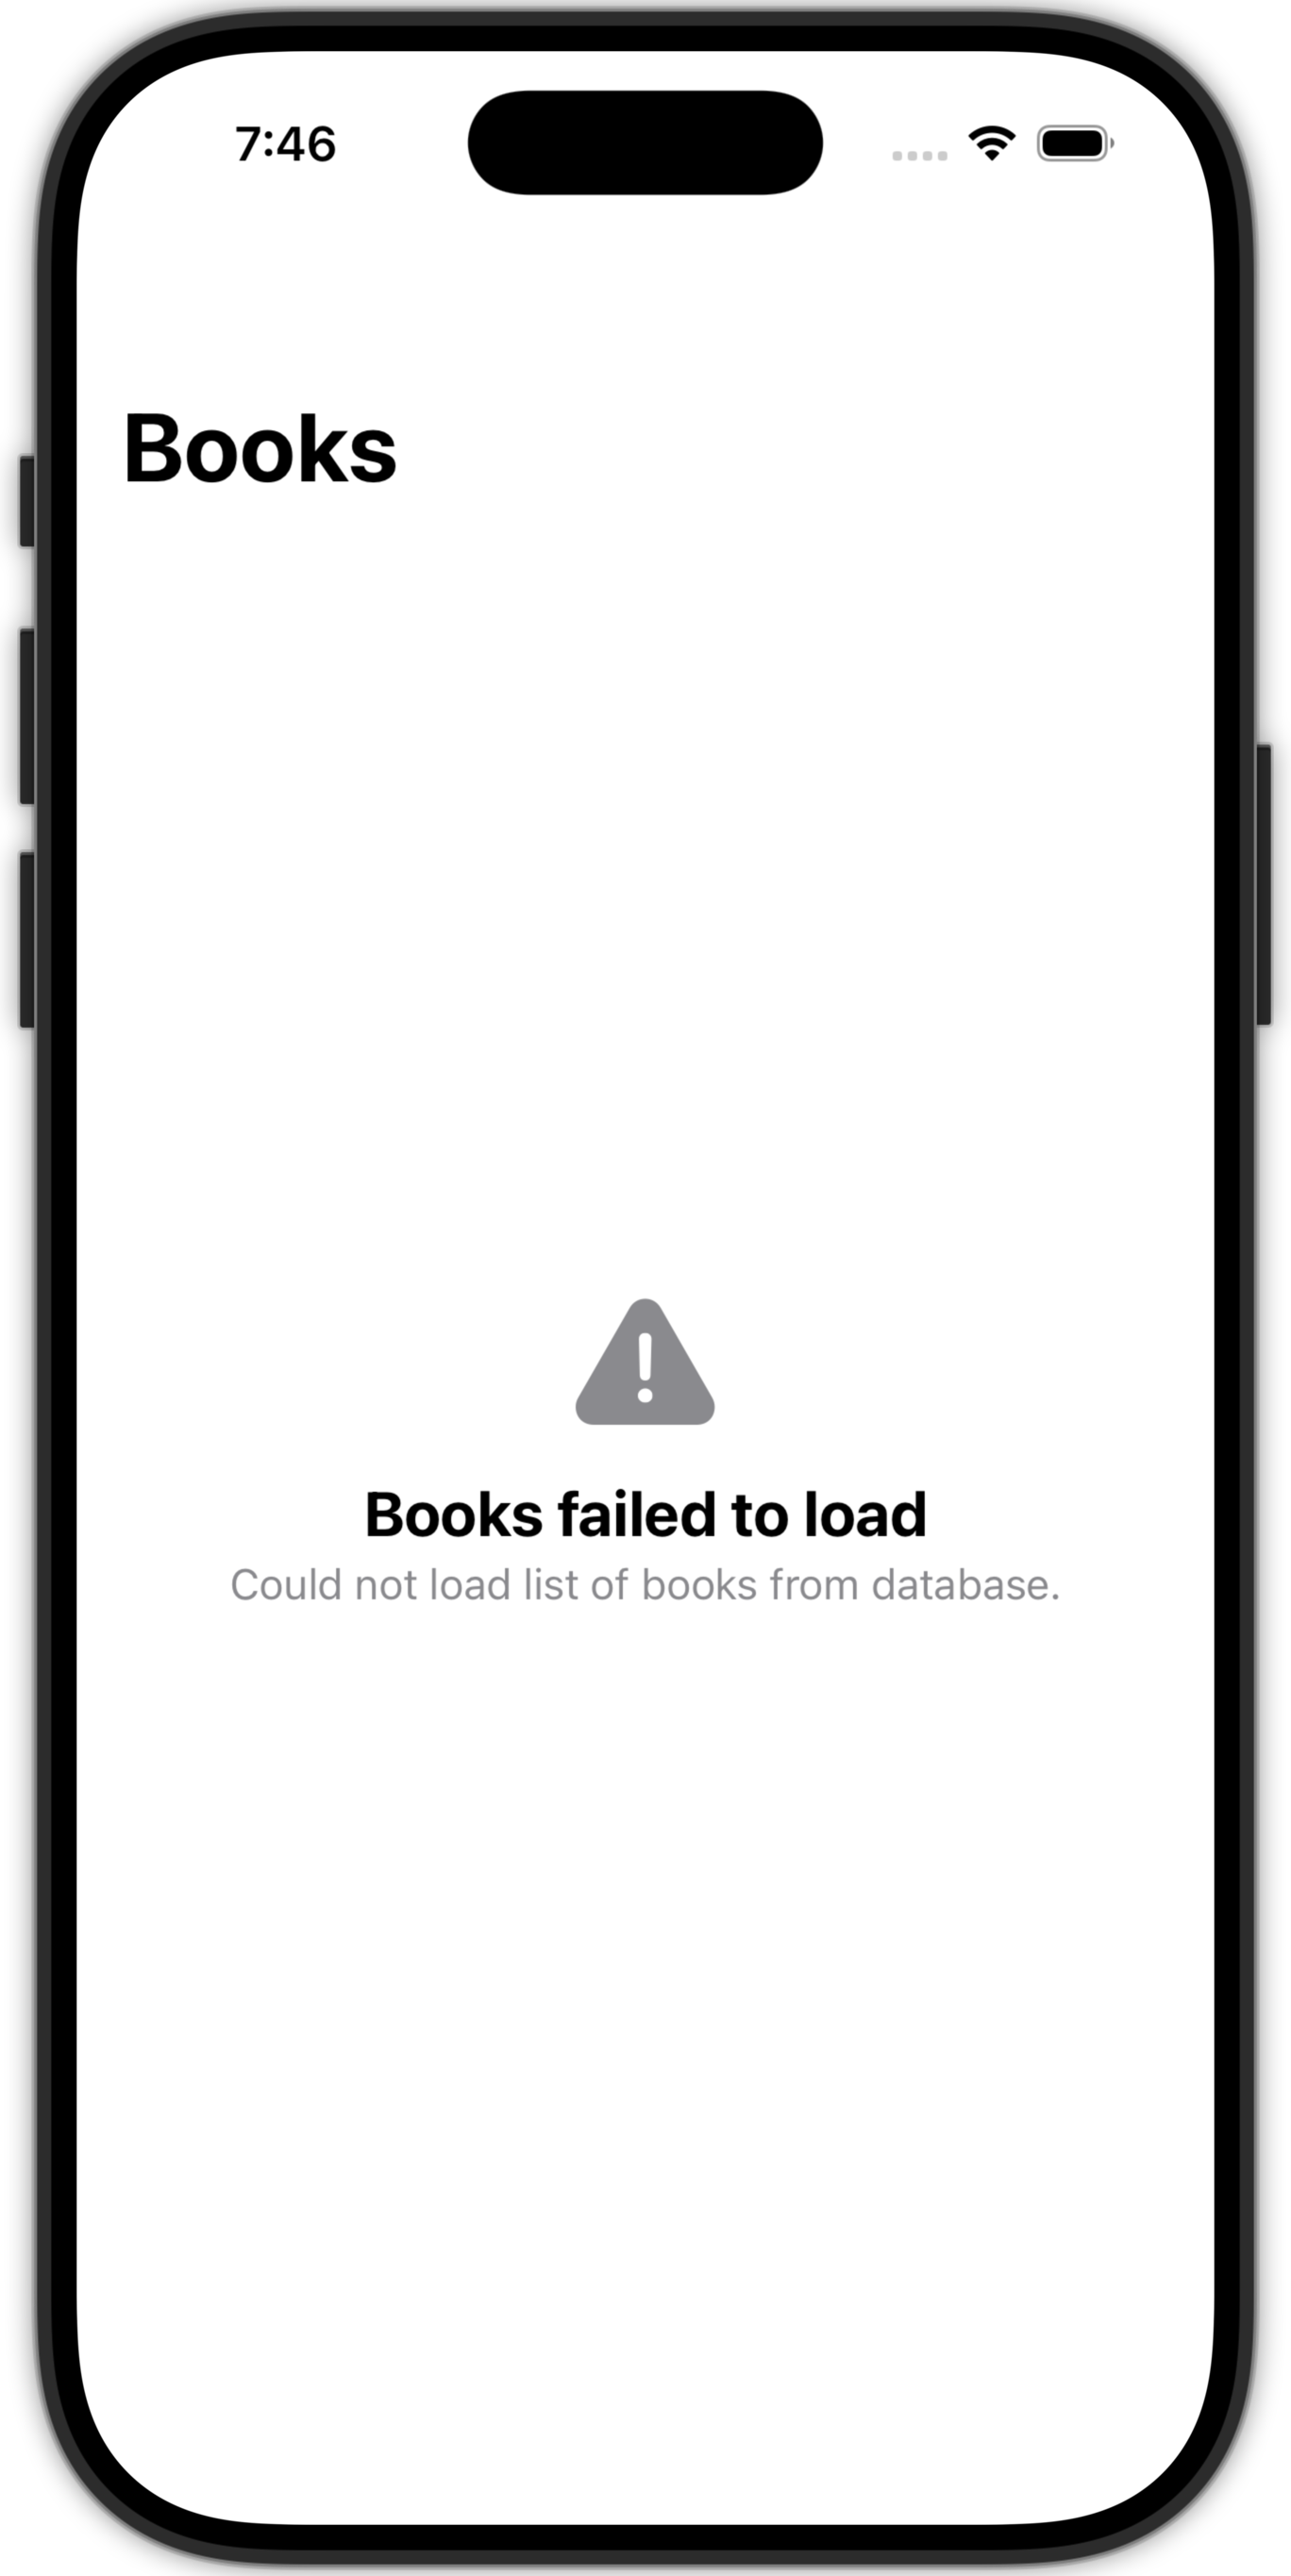
Use a selection statement to show
ContentUnavailableViewin the view when data is currently loading, or when it could not be loaded correctly :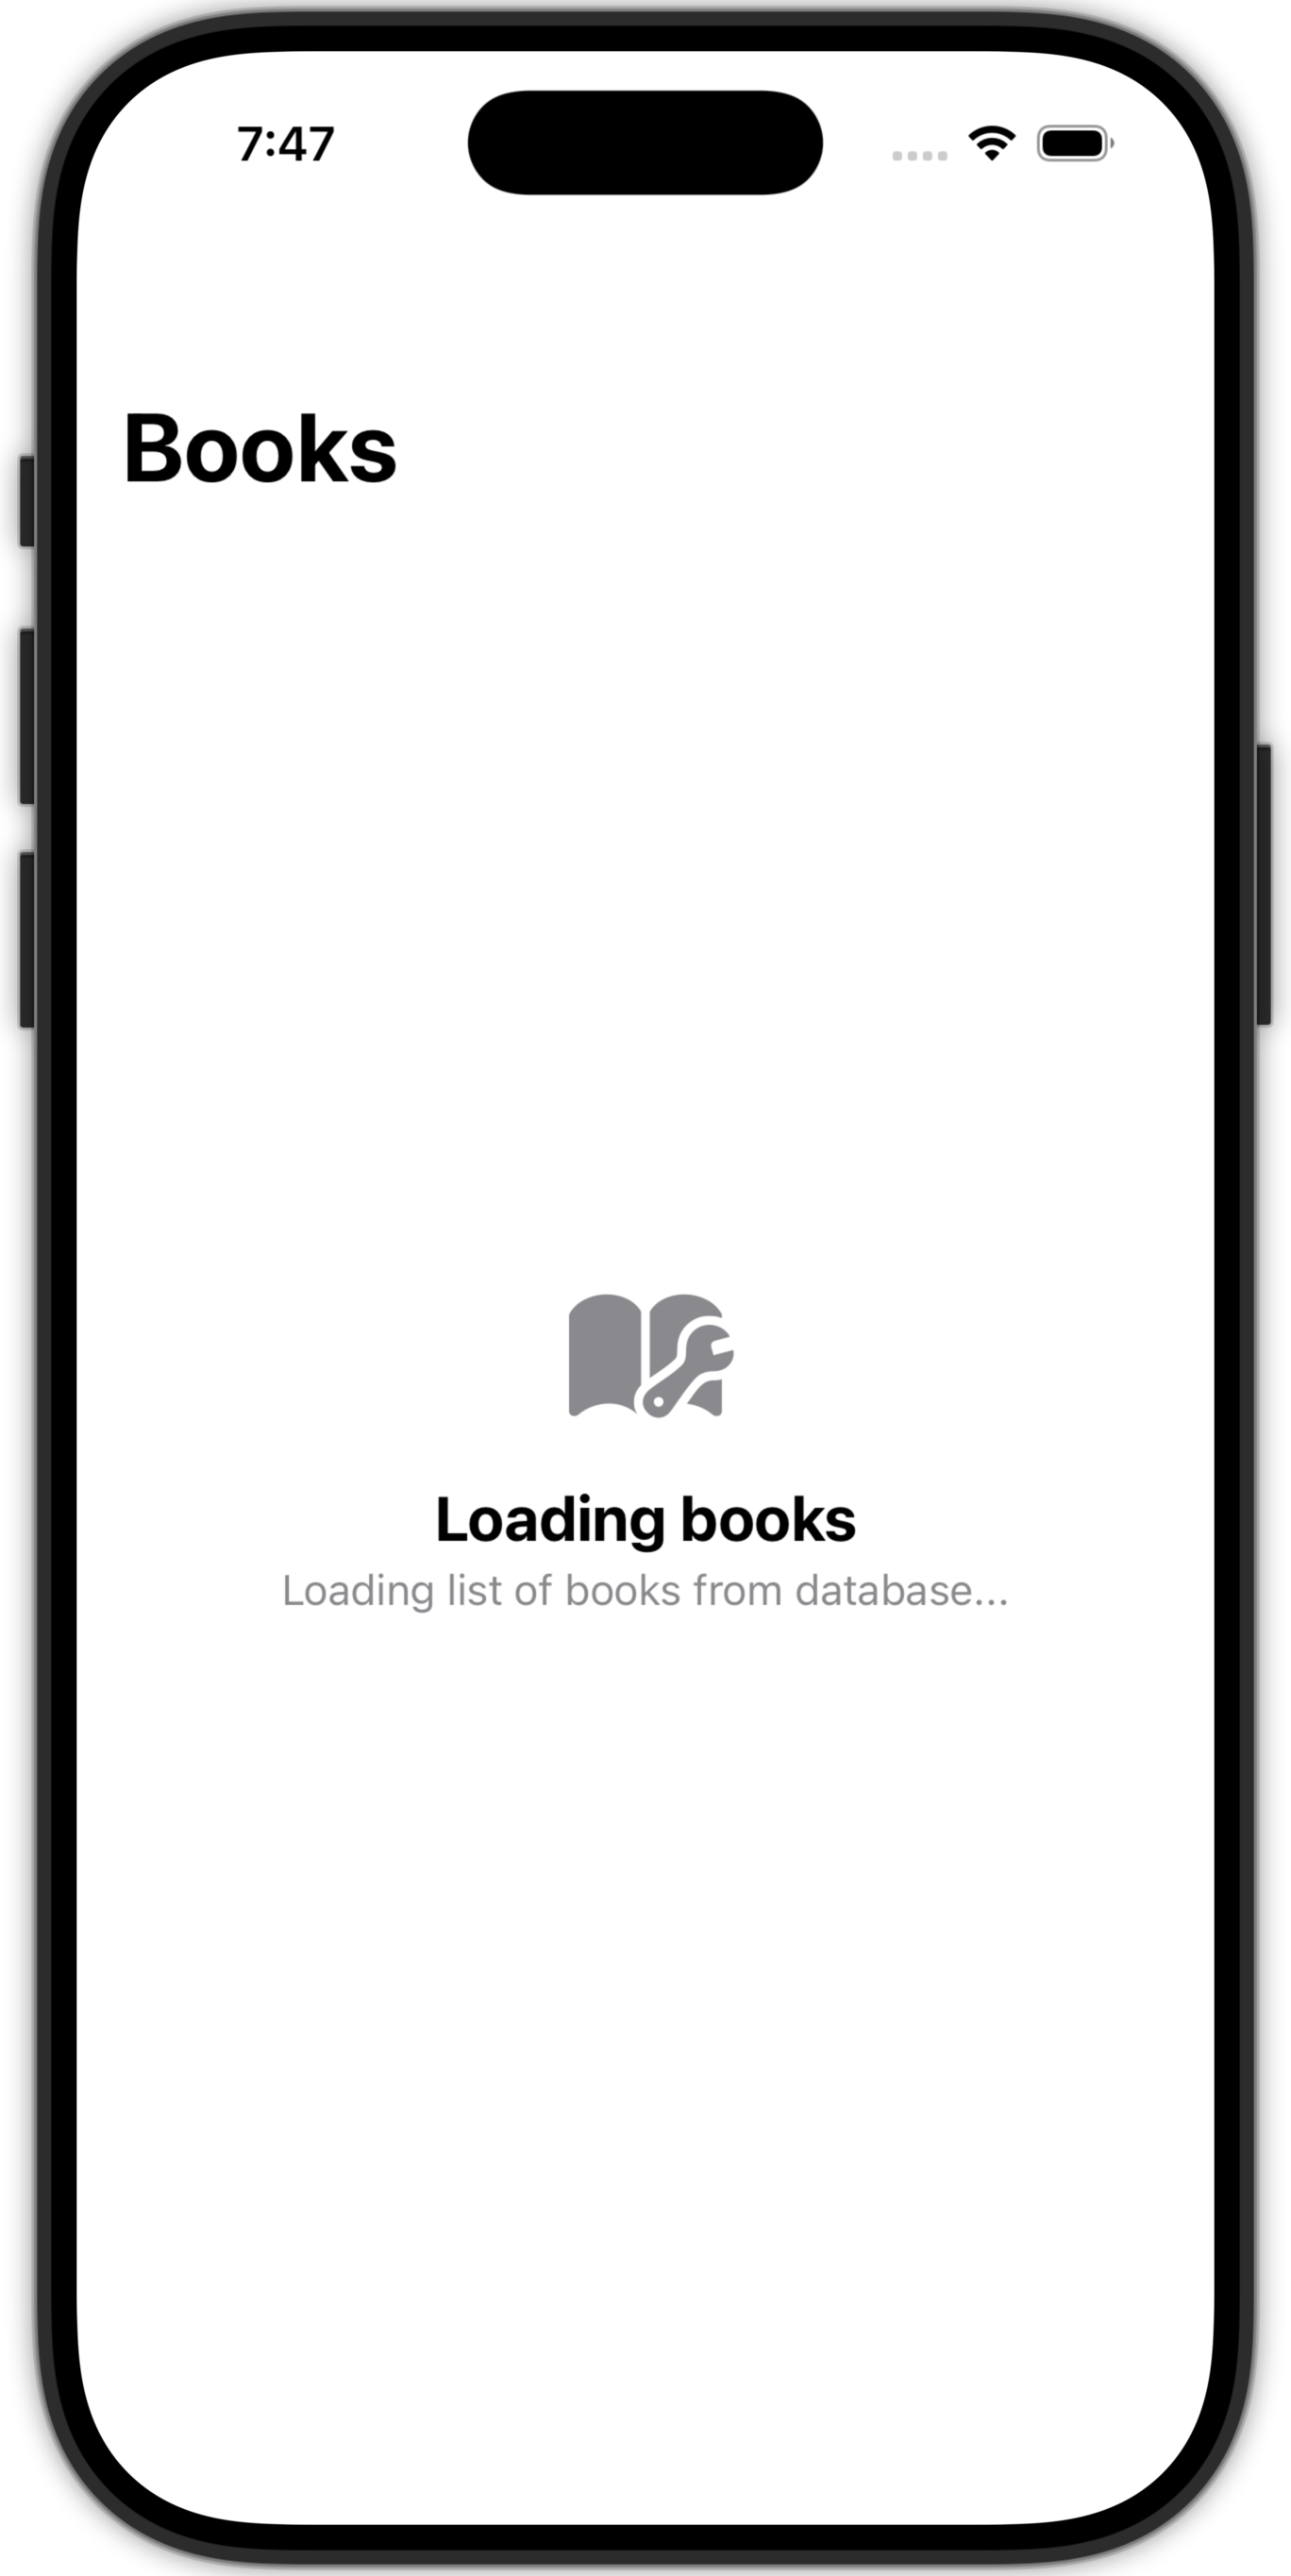
-
Improve the view so that it uses a custom subview, or helper view, to display the date a book was published as well.
The custom subview might look like this:
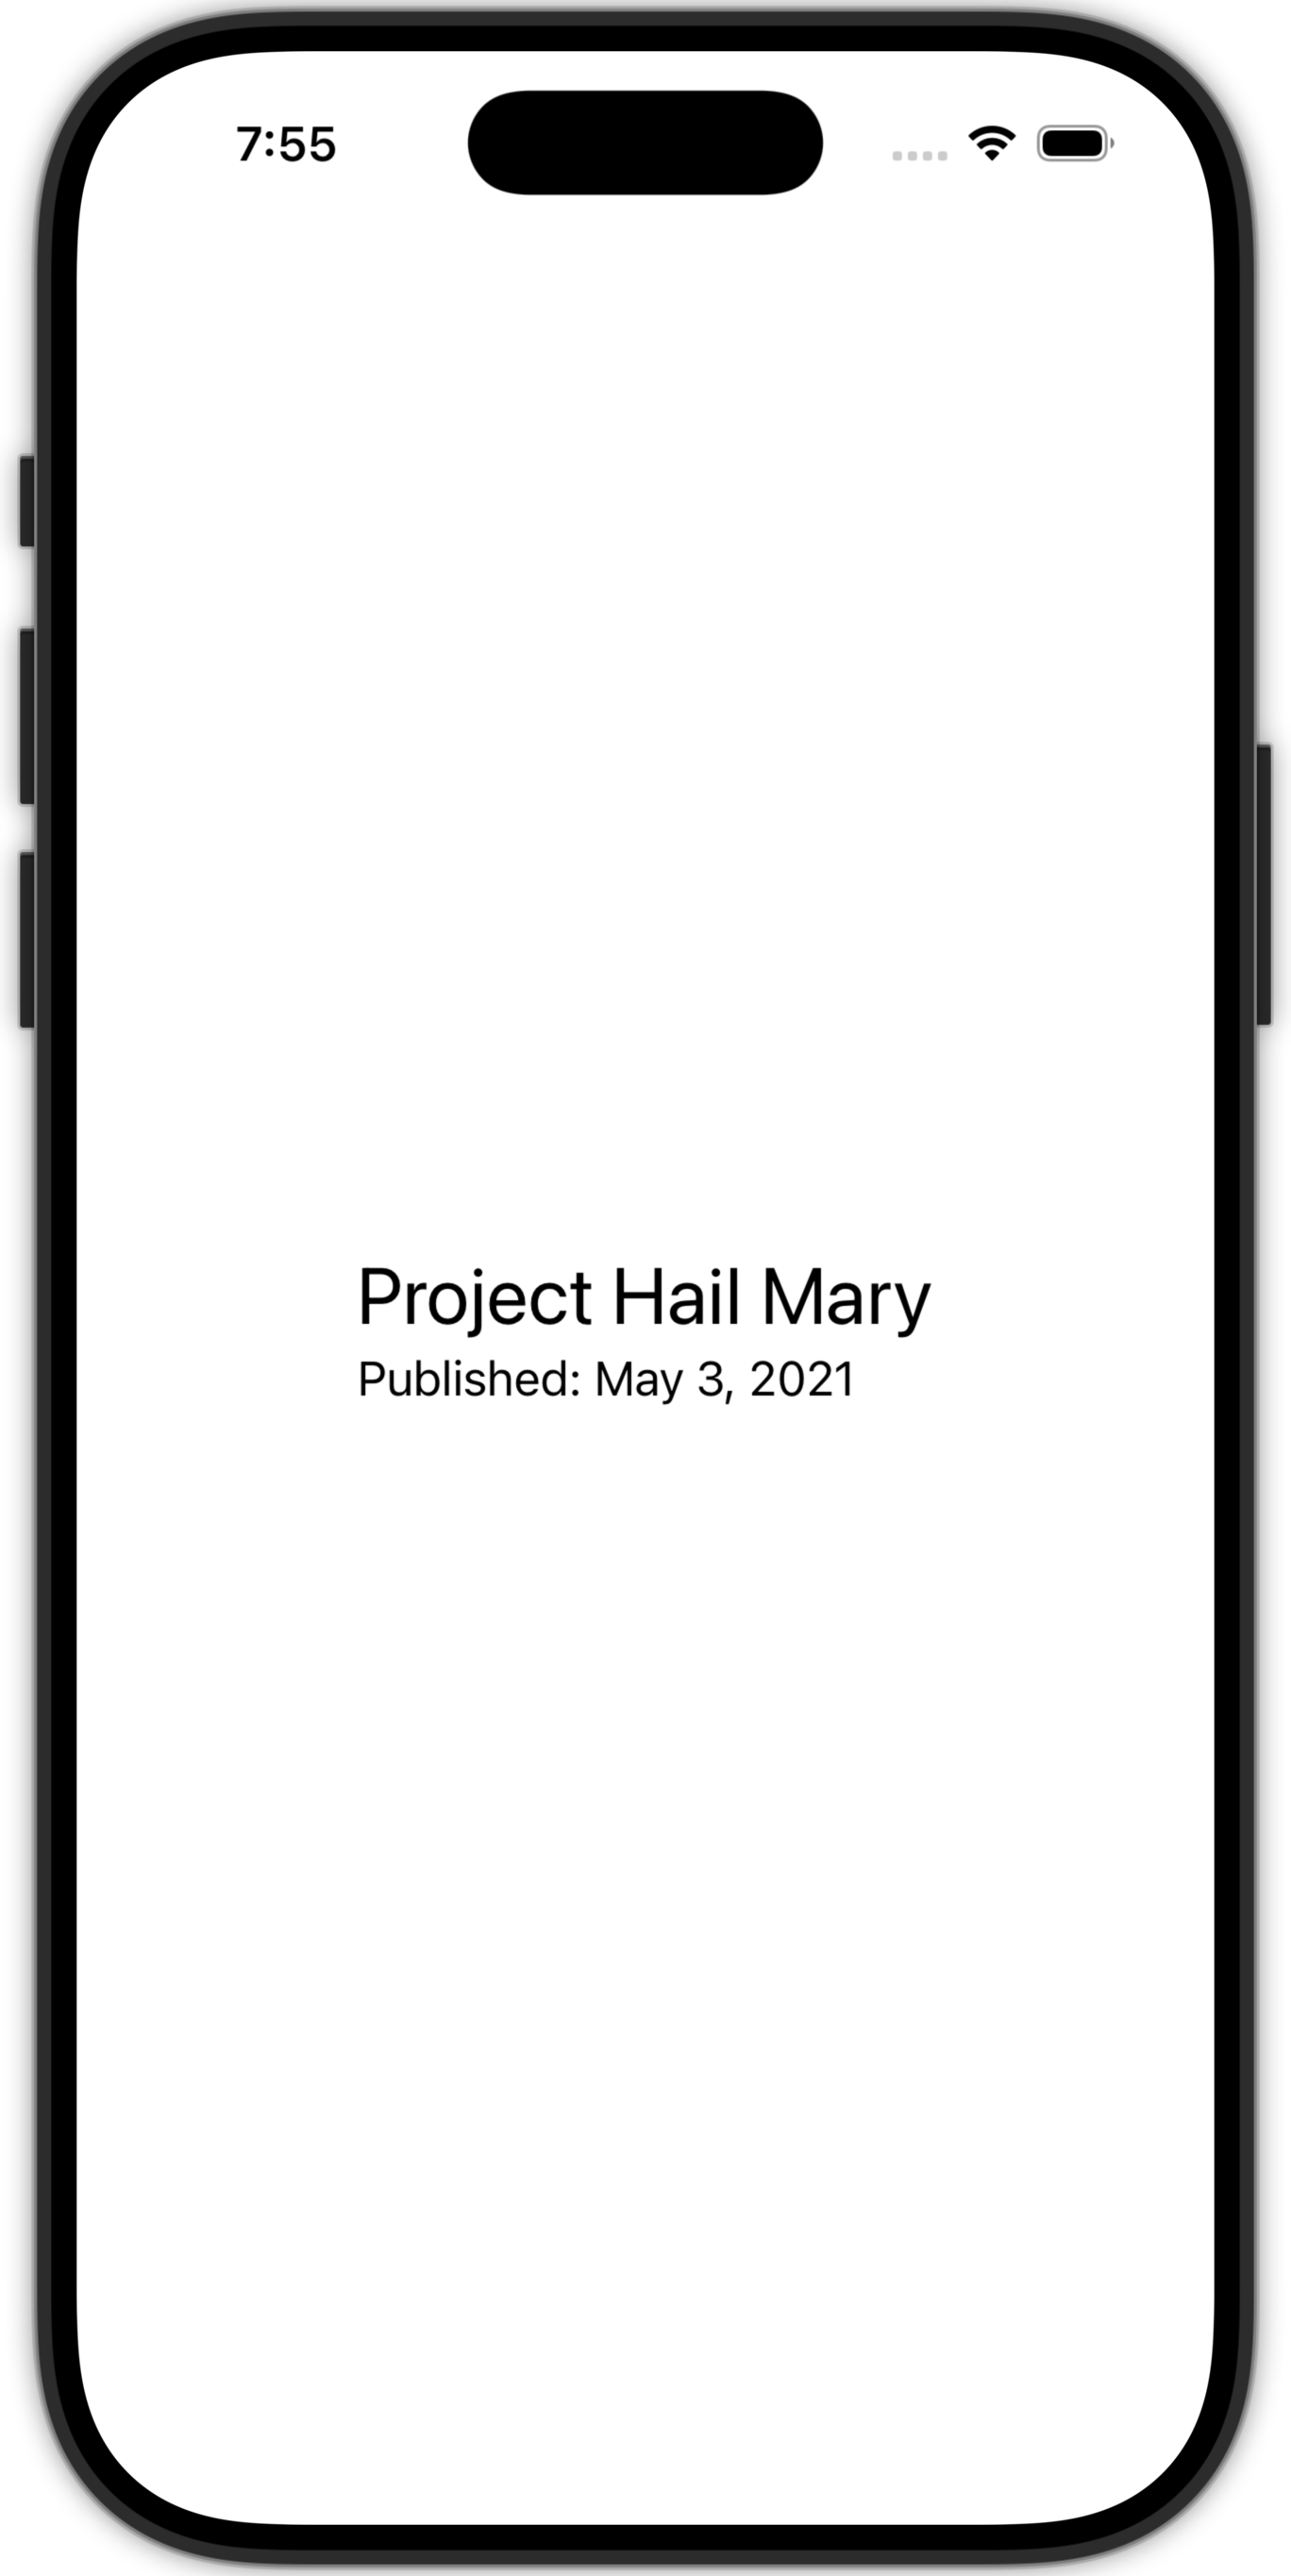
The list of books would then render like this:
HINT
Dates can be tricky.
Here’s how you can get the date published to show up:
Text("Published: \(providedBook.datePublished.formatted(date: .long, time: .omitted))")Here is example code that would allow a custom subview to be previewed without using the database:
#Preview {
    BookItemView(providedBook: Book(
        id: 1,
        title: "Project Hail Mary",
        datePublished: Calendar(identifier: .gregorian).date(from: DateComponents(
            timeZone: TimeZone(identifier: "UTC"),
            year: 2021, month: 5, day: 4
        ))!,
        genreId: 1)
    )
}